Showing posts with label diy. Show all posts

Monday, March 1, 2021

Color Kitz Collection: March 2021 Edition with Samantha Robles

 Happy March everyone! My favorite month of the year! Really, today is like the first day of Spring. It's time to break out those pastels and vibrant hues. The March 2021 Collection is simply "golden". All things gold and shimmery is available in this kit. 
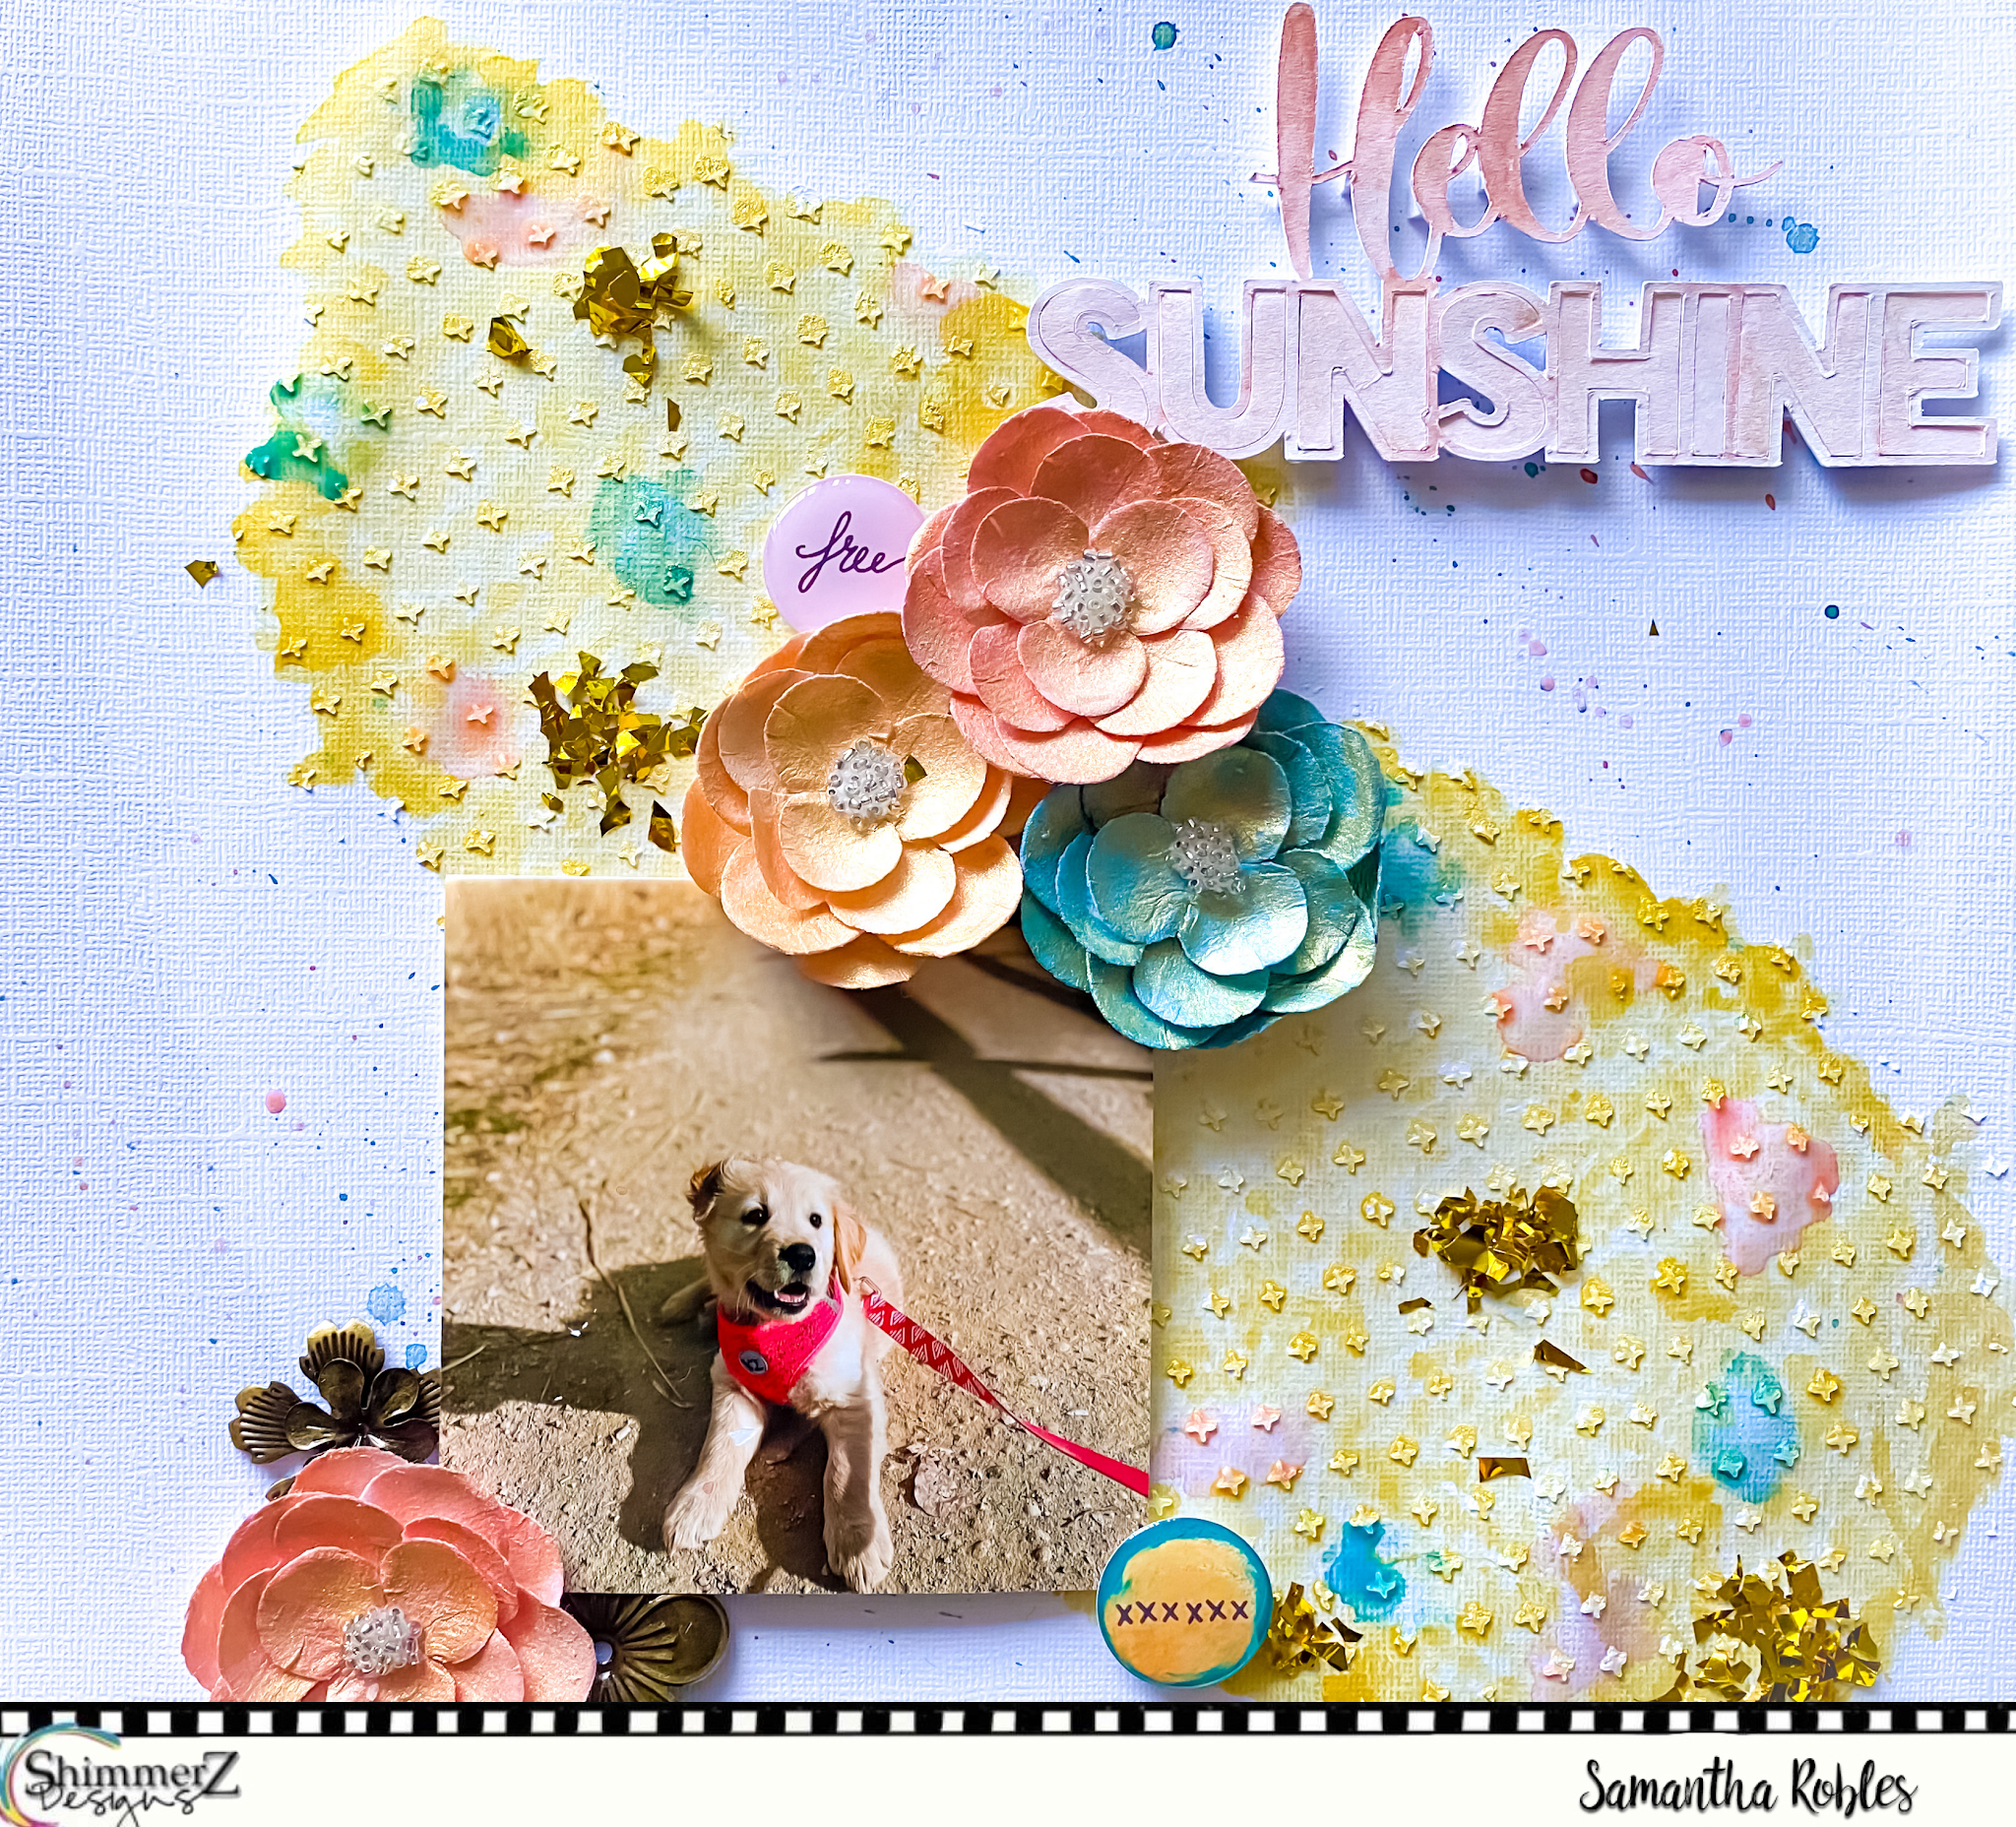
Let me start off by letting you guys know, you NEED the new exclusive color in this kit. It's called "Pink Lemonade Vibez" and it's one of a kind. To begin this layout, I gesso'ed my sheet of textured cardstock and then used my Carta Bella Hello Autumn Stencil with some modeling paste. Once my paste sets, then I  watercolor in some "Good As Gold" Inklingz and layered it with the "Goldie Lox" Shimmeringz that comes available with the paste. (Please note that Good As Gold is NOT available in the March Kit. You gotta pick that one up separately but it's so worth it!)


After my gold mixed media mess dried, I then painted my sweet paper flowers I found at my local Michaels. Behind those flowers, I then tucked some Prima Vintage Trinkets Mechanicals behind. My "Hello Sunshine" cut file was then ombre'd using both "Gosh Garnet" Inklingz and fading into the new Pink Lemonade Vibez. After my puddles dry, I then add some of the fun gold foil onto my geode background.
Thank you so much for stopping by today! I hope you have the best week. Don't forget to stop on by the Shimmerz Shop to pick up your March 2021 Kit. While you're dropping in your order, leave my name in the comments of your order to snag a freebie on Shimmerz Paints.

Happy March!
-Samantha Robles


Thursday, October 1, 2020

The October Color Kitz Collection | Samantha Robles

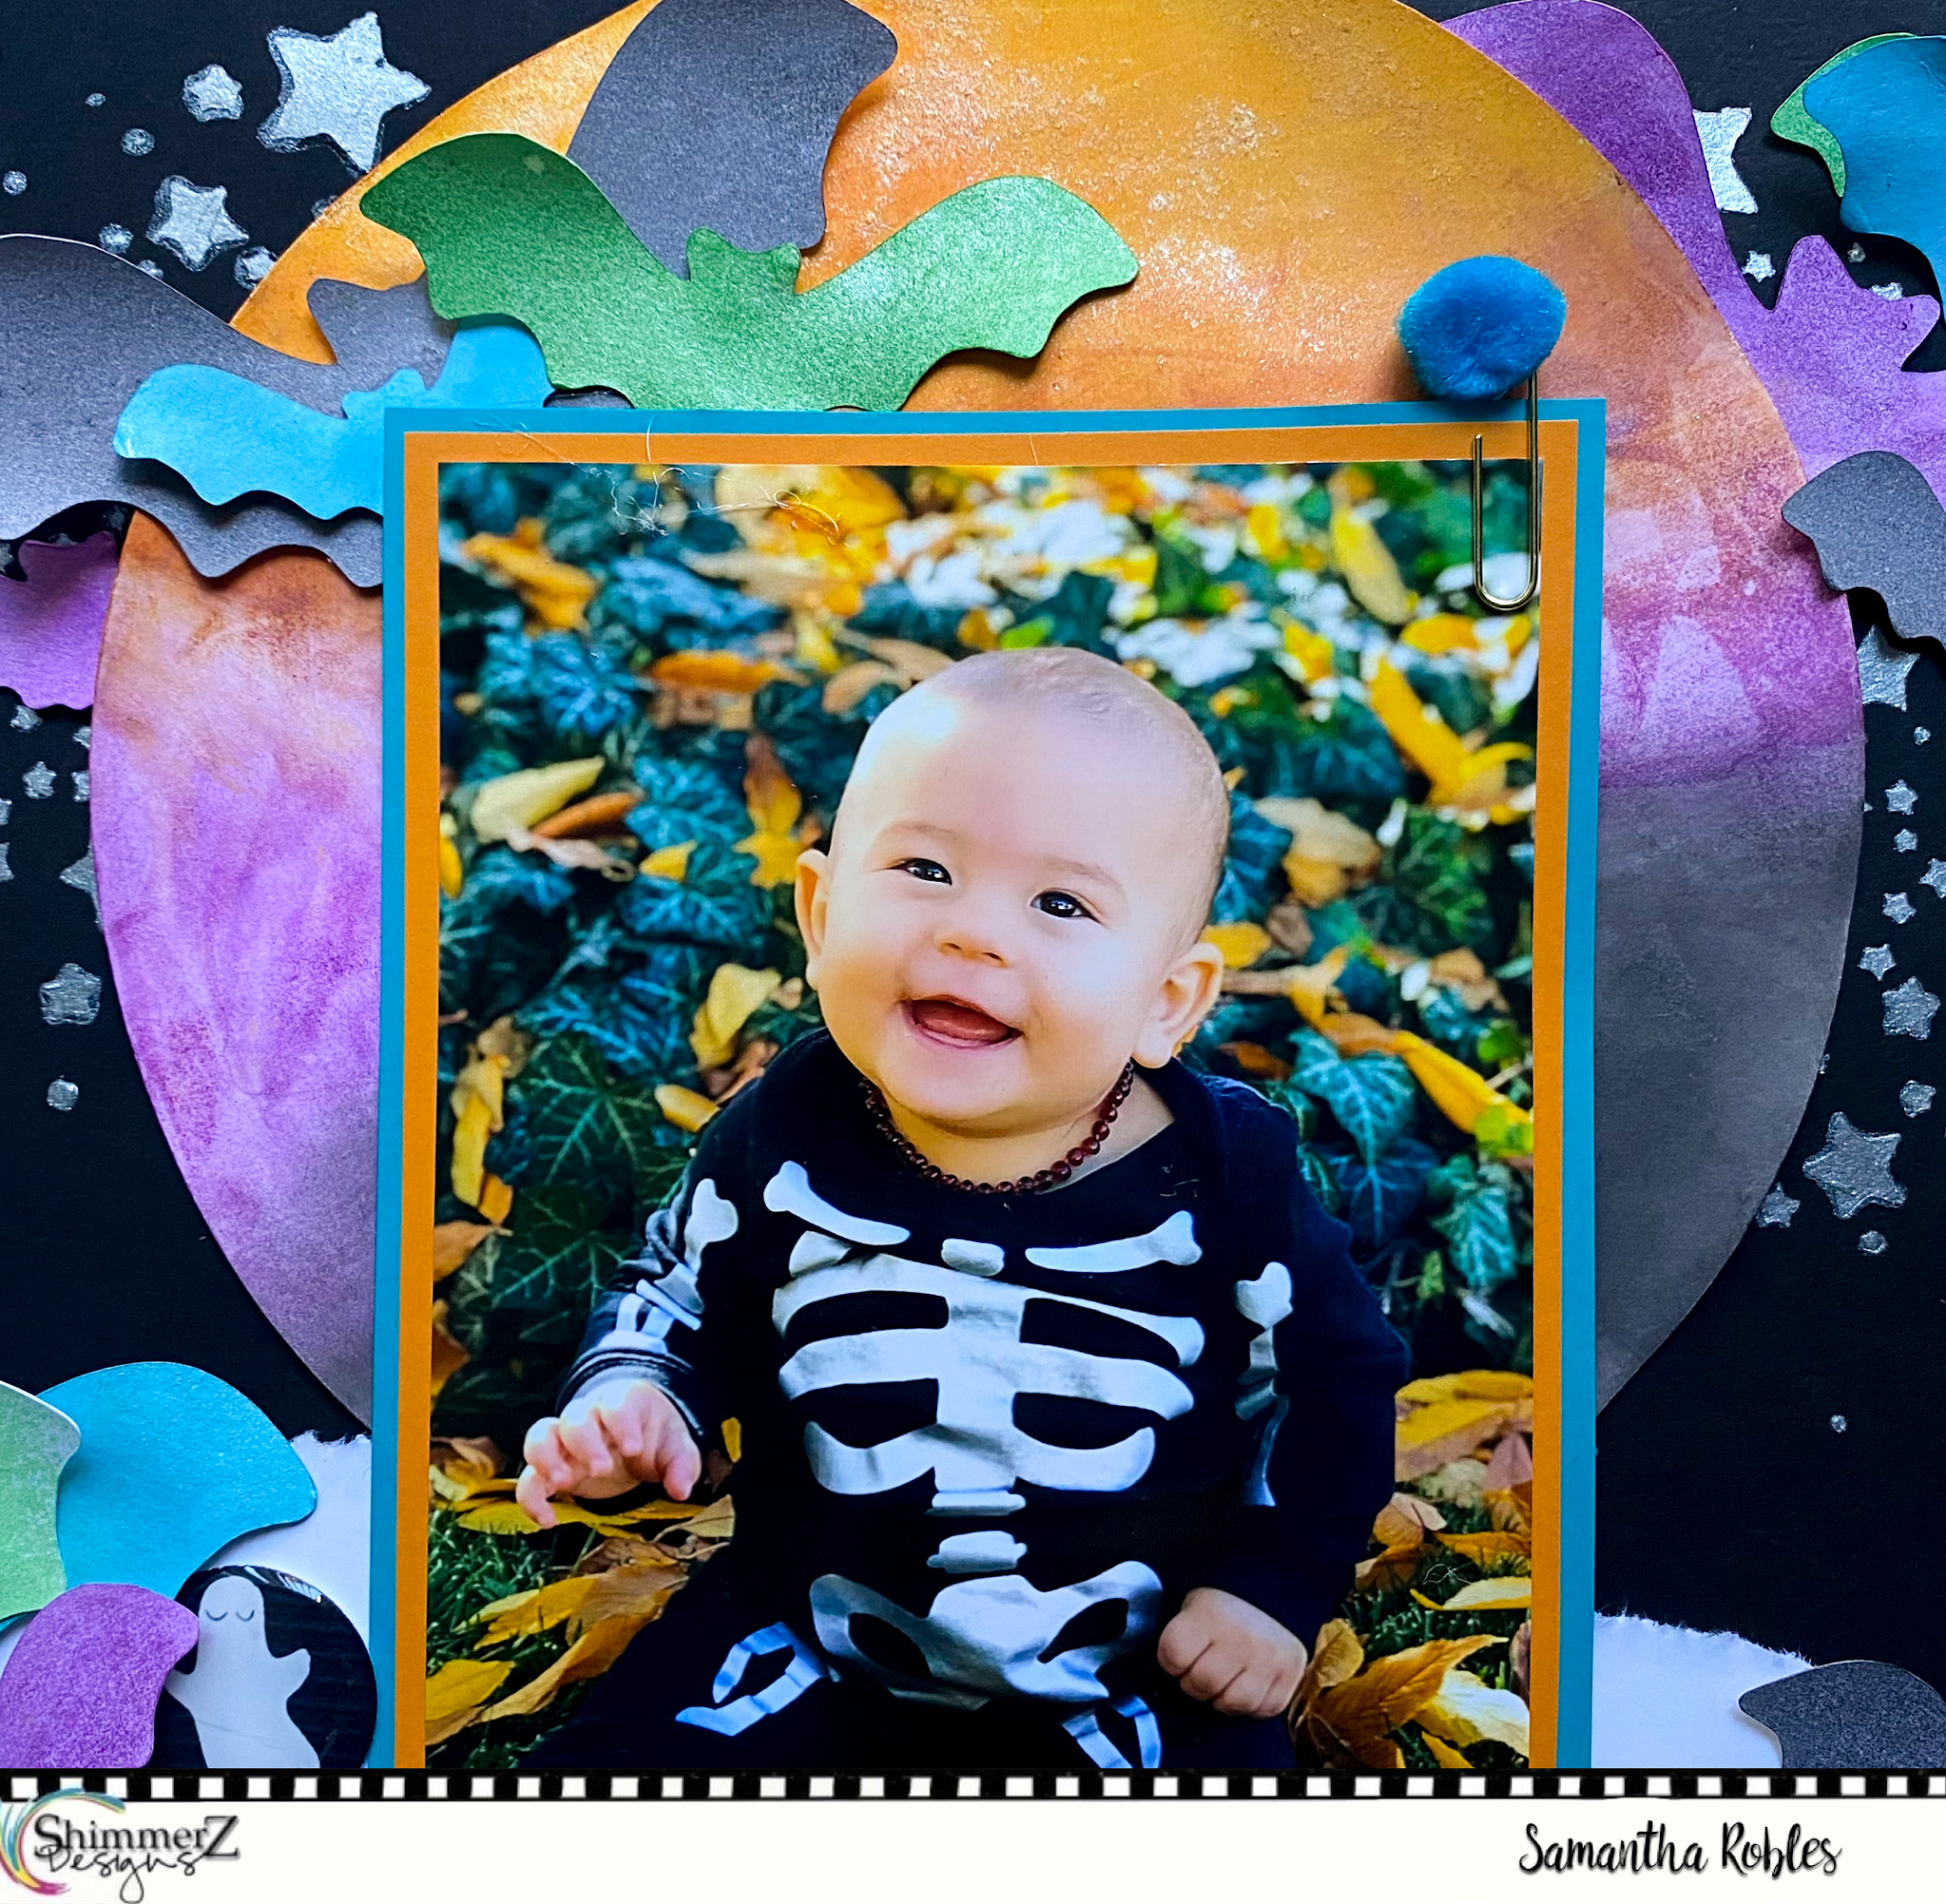
 Hi everyone! It's finally October, which I think is the best month of the year. The changing colors, cooler weather, Halloween! I'm all about the skulls and spooky things. Which is why The Shimmerz Paints October Color Kitz Collection is by far my FAVE of this year. I've had this photo of my son saved for years now. He's dressed up on his first Halloween as a tiny skeleton. The cutest one I've ever seen. The perfect brew for this month's kit!

I started my process by cutting the exclusive cut file available in the kit. I'd like to think it's Justin Timberlake approved (wink wink). I then back my cut file with a sheet of "Night Sky" by Carta Bella. After that, I then stencil on some Shimmerz Paints Foilz in "Silver Dollar" with my Paige Evans Stars Stencil. I wanted a spooky night's sky to go with my moon.

I started my moon soon after by cutting a circle out and using clear gesso all over. Once my gesso is dried, I take some cheap makeup sponges (such as THESE) and smudge in my:
  • Taupe of the Mornin' Spritz
  • Marigold Shimmerz + a small touch of Bumbly Bee Shimmerz
  • Plum Pudding Spritz


Let that sit for about 20 minutes or so. While my moon is rising (Haha, get it ;) ) I then cut out four of the new Layered Bats Cut File and begin to spray them with all the sprays in the kit. Including the new exclusive Vibez shade: Love Potion #9.
Once all my pieces are dry, it's time to glue and add the adorable exclusive Dotz to add the finishing touch. So boo-tiful and spook-tacular for the season!

Thanks so much for stopping by. Don't forget, we only have limited supplies of each Kit. Make sure you grab them while you can. While you're at it, treat yourself to some other Halloween faves in the Shimmerz Shop. We have tons of new cut files, embellishments and our new product, Foilz.

Have a wonderful weekend!


Thursday, June 20, 2019

Summer is Here!

Hi Friendz! I’m so excited to be here sharing the new fun things Shimmerz has in store for Summer. Cue the pina colada’s and sun tan lotion! If you haven’t heard, this week, Shimmerz Paints is teaming up with Paige Taylor Evans for an adorable exclusive cut file for our Shimmerz Sharez Facebook Group. What better way to ring in the first day of Summer on Friday than with this oh-so-cute cut file?! Yes,  yes, yes.
With the cut file, I wanted a beach bum sort of look to it. You’ll notice it isn’t laid down perfectly. F
unny enough, I wanted it to have a little unfussy and laid back. I started with cutting the file. This file does take a little bit of time to cut so to kill time, I started prepping my background. Just using some good ole white card stock, I prepped my page with some Vicki Boutin Gesso. GUYS, this gesso is AMAZING with Shimmerz Paints. There’s no grit to it. It’s smooth but heavy. It’s the perfect match with Shimmerz Paints products.

 After that dries, I took some plastic wrap and sprayed
Then I took my gesso’d paper and laid it down on the plastic. Then you get a smooshed, messy look but your colors don’t get all muddy and gnarly looking.
By the time the file was all done in my Cricut, my page was dry as well! I started snipping my paper pieces from the new “Chasing Adventures” Line from Pebbles and Jennifer Hadfield. These designs on the paper are PERFECT for Summer. Snag some at your local JoAnn’s.
The final finishing touches include some messy string, Shimmerz Paints Dotz and some stickers from American Crafts and Hobby Lobby.
Thanks for stopping by! Make sure when you join the group to let our team know who sent you there. We would love to know <3

Happy Summer Solstice everyone!

-Samantha

Saturday, March 31, 2018

Pencil case tutorial using Stampz | Rocío López

Hi!!

Rocío here with a new project and process video for Shimmerz Paints as part of their YouTube Education Team. For today I made a pencil case using the super beautiful Stampz with some of my favorites paints. You can preorder your Stampz in the Shimmerz Paints store right now!


As base of my pencil case I chose a canvas fabric and I used the Stampz sets Fresh Start and Hello happiness to create the design. I created the cluster of flowers with the masking technique.

Don't forget to use a permanent ink for stamping to resist the waterbase paints.


To add the color I used some of my favorite Shimmerz and Inkling with the Stampz and the masking technique again. 


I wanted a clean impression for the sentiment so I used the Stamp Platform from Tim Holtz. But you can use whatever stamping tool you have or do it with your acrylic block. 


To assemble the case I used a zipper and a hot glue gun instead of a sewing machine but you can use it if you prefer it. I made it that way to keep the process easier. 


And now I leave you with the process video on how to create a pencil case


I hope you like it and see you soon!

PRODUCTS USED:

STAMPZ: Fresh start and Hello happiness. 
SHIMMERZMagenta, Sunny, Evergreen, Peacock's Plume and Christmas Cheer.
INKLINGZPlum Crazy.

Saturday, July 8, 2017

DIY Absorbent Ground & Shimmerz Watercolors | Zinia Amoiridou

Hello artsy friends! It's Zinia here and welcome back to the Shimmerz blog!
Today I'm going to share with you an art journaling spread I created with my Shimmerz watercolors.


To start with my page I decided to prime my journal with a layer of absorbent ground. That is pretty much like a gesso for watercolors. It creates a nice absorbent base for your watercolors to sit on.

There are a few companies that make such primer but if you don't want to invest in it, you can create it on your own by mixing gesso with light modeling paste. The general ration is around 1:1 but I usually add a little bit of extra paste to make it extra absorbent. 


I decided to tint my primer with a tiny dot of AcriTonez in Roses are Red. 

Before you start adding watercolors on your page you need to make sure your ground is completely dry. I usually let mine sit overnight cause I like adding a relatively thick layer.


Then I picked some of my favorite colors of Creameez and Inklingz and randomly added them on my page to create a watercolor splash look. The products I used were: Creameez in Just Peachie, 1 Hot Mama and Inklingz in Gosh Garnet, Coral Reef, She Packs a Punch and I'm not Limon.


When that layer dried as well, I decided to add some doodles as focal points. I used one of my Coloringz in Pink Stilettos and instead of adding color in a palette and picking it with my brush, I used a droplet tool and I filled a waterbrush with the color. This way I had my own DIY Shimmerz pen to doodle with.


When my doodles dried too, I went over them with a white paint pen to add more details and finished the page by adding some opaque white splatters all over.


Thank you so much for joining me today. I really hope you enjoyed the process of this page. If you got inspired and you want to grab some gorgeous Shimmerz goodies make sure to mention my name "Zinia" at the comment section of your order to receive a FREE Shimmerz product! 


Friday, March 17, 2017

Crazy about elegant florals

Hi everyone, It's Beck BT back with a card share featuring divine Shimmerz Inklingz to make the sweetest card!  I adore creating cards full of interest, texture and dimension and this card is all that and more!  I teamed up the new Richard Garay 'Silver and Gold' collection with some Shimmerz Inklingz paints to make the most stunning flowers ever!  Have you thought of taking your plain die cuts and making them into something special?  Well Shimmerz Inklingz make that a breeze!  It seemed like this is seriously a match made in heaven.

Here is my sweet card.


Products Used:

Shimmerz Paints

Inklingz - The Holly & The Ivy
Inklingz - Giddy About Green
Inklingz - Naughty or Nice
Inklingz - Brass Knuckles

Other products:
Tinby Designs Heavy Weight Cardstock - White
RG Richard Garay - Silver and Gold Collection prints
RG Richard Garay - Silver and Gold Flower Fold Die set
Fun Stampers Journey Sentimental Prints Stamp set
Fun Stampers Journey Natural Twine
American Crafts Gold Cardstock
Gold Glitter Enamel Dots

I have also created a video for you to enjoy watching the project come together:


Here are some more pictures of my sweet card.


I hope you enjoyed my share today!
Till next time


Wednesday, October 26, 2016

Can Spring inspired projects produce Spring weather?

Hi Everyone, it is Beck BT here again this week.  I'm still trying to encourage Spring weather to hit us down in Melbourne with a love of sharing spring inspired projects.  I'm hoping it might work something like a rain dance because gee the weather has been so cold windy and wet so far this season. This week I am sharing with you a card with a cool wood veneer altering technique using Shimmerz products of course!!


I've created a video so you can see how I altered the wood veneer as well as how my card came together.


Shimmerz Products used:

Texturez paste in Patina
Vibes Sprays in 'Taupe of the mornin'

Here are some step pictures getting you nice and up close to that wood veneer altering process.

The process:
Add Texturez paste to the wood veneer piece liberally.


Apply a heat gun to the area allowing the paste to bubble up and then shrink back down


Apply a spray of the Shimmerz Vibes spray in a contrasting color


Wipe over very gently with a wet wipe to remove some of the vibes spray and allow the paste color to show through


Add as a beautiful embellishment to your project as seen on this card


It was so much fun creating this card, so I can't help but share more pictures.  I adore how the wood veneer pieces came.  They made the perfect accent to the sweet florals on the card.


What do you get inspired by?  Maybe you can find some inspiration from your local weather!

 Thanks so much for heading over to the blog today to check out my project!  

Don't forget to mention my name when you order for some free product!  WOOT!  

Till next time


Like what I have used and would like to get your hands on some?  See below:  


Friday, February 26, 2016

Water colouring with Shimmerz Auqa Hues

I am SO excited to be sharing with you my card today that I got to play with the new Aqua Hues!  OH MY GOODNESS are these divine!  I think what I adore most is that you can 'Choose your hues' yes you can purchase them in a pack which comes with a complimentary water brush and you get to choose the colours that go in there!

I am excitingly waiting more of my Aqua Hues to arrive as we split my package, but I did get to play with one of the colours to make this card.  I teamed it up with some Inklingz and also the new Color stakz.  
Shimmerz Products used:
Aqua Huez Blue Moon
Inklingz Blue Lagoon
Inklingz Miner Miner 49er
Inklingz Can't Elope
Inklingz A Rose by any other name
Color Stakz Pick Pocket Stakz


I deliberately wanted to leave some white spots to give a fun hand water coloured look.   I created an ombre effect with the background to the center panel using the Blue Moon Aqua Huez.  I first masked the words with some masking fluid, painted the background and then removed the masking ready to be coloured with the Miner Miner 49er Inklingz
 I set about coloring the flowers and other elements in the paper stakz piece

Finished off with a die cut base, some bling and twine makes this card really pop in the end

 Thanks so much for heading over to the blog today to check out my project!  I hope I've inspired you and shown you how lovely a little Shimmerz Paints can easily create amazing cards!


Till next time
xxxBeck BT


Like what I have used and would like to get your hands on some?  See below: