Showing posts with label Hottie Pink. Show all posts

Wednesday, May 17, 2017

Floral background with Anna Komenda

Hello Shimmerz fans. It's Anna here with my newest project. I want to show You today how to make colorful page without pattern papers. All You need is Shimmerz paints or mists and time. 


I like floral backgrounds but they are usually very busy or the flowers are too big. Creating Your own background in perfect color combo is a great solution for that. You can use it right away or scan it and print it later as many times as You need. I love watercolors and the messy effects they create. I wanted to paint this kind of washy flowers in blue and pink shades.


When You work with a lot of water - You have to use thick watercolor paper. It can handle all the moisture without tearing.


I had some leftover frames from one of Crate Paper collections so I decided to use them all on one page. So pattern papers - only stickers. To be honest - I fussy cut the roses and butterflies from papers, but it doesn't count, right? :)


As always, I have a process video for You. Enjoy watching.


Don't forget to mention my name while placing an order at Shimmerz Store. You will get free mini product :)


Shimmerz products:
Spritz: Bamboo leaf

XO Anna


Wednesday, April 12, 2017

Mini album "10 years" | Anna Komenda

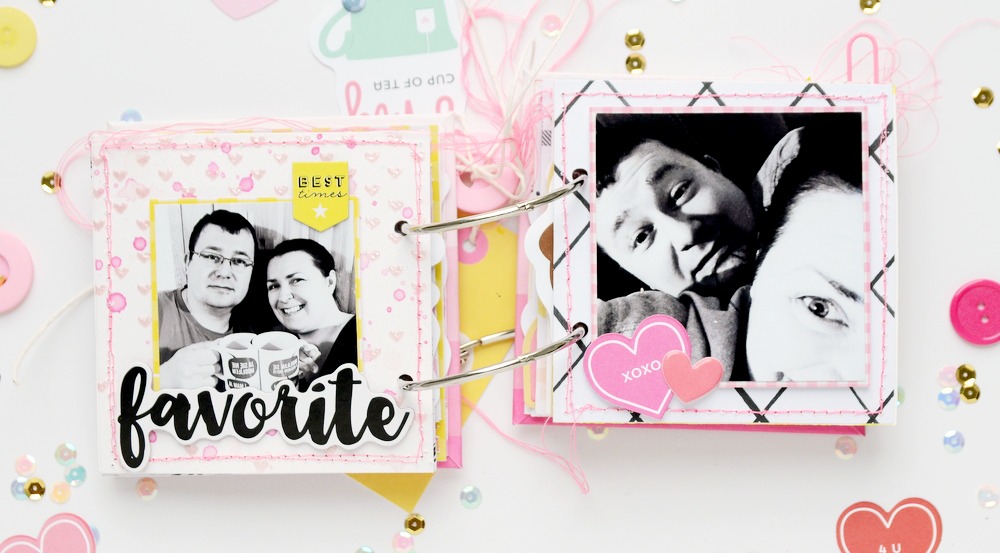
Hello Shimmerz fans. It's Anna here with a new project. I hope You like mini albums, because I have one for You. I made it as a gift for my hubby for our 10'th wedding anniversary. We will be celebrating next week and I really don't feel like a wife for 10 years. Time flies so fast. I chose few of our pictures and I must say to You - it was hard, because we almost don't have photos together. All I found was some silly selfies mostly. But it's also a part of our history together. 
I mixed pattern paper with mixed media pages. You can watch all the process on the video below.


Video is quite long and I decided I don't need to include the embellishing process. You will just watch my usual steps during creating a mini album, along with making mixed media pages and connecting it all into the album.


My album is small. Pages are 4*4 inches. I decided to use pink and yellow color combo - one of my favorites. I wanted it to look a little bit messy so I didn't cut off the thread after sewing. I also added black splashes on the cover. I have a lot of big pictures there so I really didn't need much embellishments.
Now I must warn You - there will be a lot of pictures in this post :) Check for Shimmerz supplies at the end of the post.


I hope You made it through. Don't forget to mention my name while placing and order at Shimmerz shop. You will get one free mini product :)


Simmerz products:
Aqua Huez - Hottie pink, Crazy daisy
Creameez - Cheeky pink 
Inklingz - Miner, miner 49er
Coloringz - No Yoking
Spritz - Chick-a-Dee 

That's it for today. Thank You for stopping by. Don't hesitate to ask questions in the comment section if You have any.

XO
Anna

Sunday, February 12, 2017

Layout "Fantastic" | Anna Komenda

Hello Shimmerz fans. It's Anna here with my next project created with gorgeous Shimmerz products. 
Today I want to share with You a layout full of hand painted flowers. I've gone wild with drawing, painting and fussy cutting many florals. I had so much of them, that I didn't need to add a lot more embellishments to my page :)


There is also a process video for You.


I am not a watercolor artist, I didn't take any classes, I am no expert at all. I just love flowers and decided to give them a try. I watched few YT videos about painting flowers. I also checked some flower sketches to get some ideas about shapes and forms. I sketched my own flowers. They are not the copy of real flowers - just a variation.


I used a lot of Aqua Huez and Creameez to color my sketches but I also used mists as a liquid watercolors. I mixed colors to get new shades. I chose two small pictures of me and my little girls because, after all that work, I didn't want to cover the background.


I used a hot glue to attach the flowers. It helps to add dimension to the page without using 3D foam squares. Just be careful with You fingers. I lost my thumb prints long time ago :D


I like using multiply colors so I painted flowers using blue, pink, red and purple. Leaves and twigs combine all the flowers together creating this "wildflower bouquet" effect.
I really love how this page turned out. It's quite thick - perfect for framing and hanging on the wall.

I used a lot of products:
Creameez - Refresh mint
Spritz - Bamboo leaf 

Remember - if You want to get a free product while shopping at Simmerz store, don't forget to mention my name.


XO
Anna


Wednesday, January 18, 2017

"Let it snow" layout with Anna

Hello Shimmerz fans. I am so excited because today is my first post for Shimmerz along with the process video.
We are in the middle of the winter on the northern hemisphere. It's cold, dark and depressing. The only bright thing during the winter is snow. World looks much better under the snowy blanket. I had few fun pictures from one of our winter walks and I wanted to scrap it.


As You can see I didn't use any patterned paper on this page. I created my own background using variety of Shimmerz products.


I also used a foiled snowflakes that I made by my own using Minc and Silhouette Cameo. I got my Minc for Christmas and I just love the effects You can achieve.


I was trying to kill my "Snow and cocoa" kit leftovers but in the end I didn't want to cover too much of my background.


You can create Your own background in different colors and use it for many other, not winter related projects.
Watch my process video:


Don't forget to mention my name while placing Your order in Shimmerz Store to get free product.


Shimmerz products:

XO
Anna


Friday, December 14, 2012

On a canvas

Hello. It's Naomi here. I hope you are all having a lovely weekend.

Today I'd like to share a little bit of painting I've done, of course using Shimmerz.
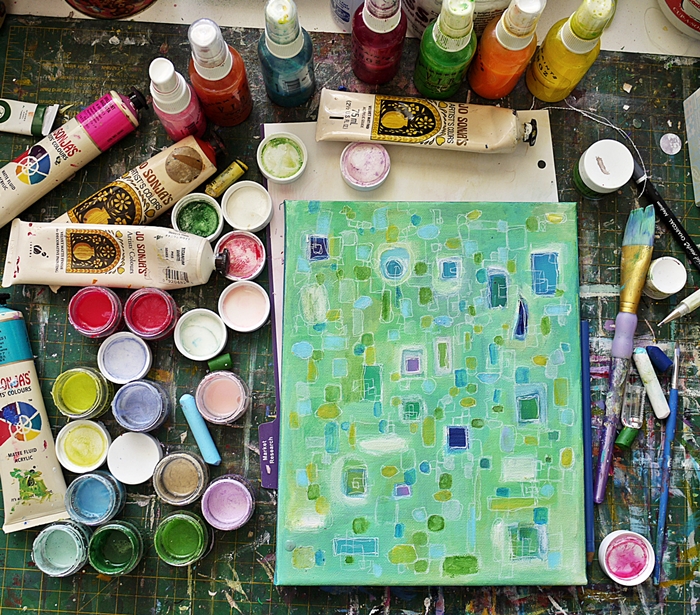
This is the canvas that I had already painted and added some details.
And here comes the fun part!
Adding more tiny little details with lots of different colours.


It is a time consuming process which I LOOOVE.
I just love watching how the whole painting grows. yes very slowly..
Using shimmerz was an awesome way to give it a shiny touch, too.

Here is the finished painting. I could've gone on forever...but it will do now:))


Products used:
Shimmerz Magenta
Blingz Hottie Pink
Pearlz Peas B Mine
Pearlz Blue Into Town
Shimmerz Jilted Jade
Shimmerz Celery
Shimmerz Key Lime
SHimmerz Sky Blue
Pearlz Powder Puff
Pearlz Mint Julip

Thank you for popping by.
wish you all a wonderful week ahead.
And a very merry Christmas and a happy new year!

lots of love,
Naomi

xx Naomi

Monday, June 14, 2010

Shimmerz helps out with a little HUG...

Hi everyone! This is Lolly (Shimmerz guest designer for the next couple-o-months)! I am super excited to share my first Shimmerz project with you!!!!

I was torn between sharing something with flowers (which are one of my absolute favorite things)... or a little tree... I decided to go with the flowers for now and we'll do the tree next time (that little tree is gonna steal your shimmery lovin' little hearts... I swears)!
Craft Goodies Used for this Project:
The Paper Studio
-
Chip Decor Letters
Petaloo - Color Me Crazy Flowers (awesome mega pack with enough flowers for multiple projects)

Cuttlebug - Quilling Flower Folders (Daisy & Chrysanthemum)
Assorted Gems
Shimm
erz - Vibez - Sunset Strip & Jeni-B-Bleu
Shimmerz - Spritz - Bed of Roses
Shimmerz Paints - A
qua Marine & Celery
Shimmerz -
Pearlz - Carrot Top, Sunny Side Up & Green with EnvyShimmerz Blingz - Hottie Pink (this color totally rocks!!!!)
(shop for Shimmerz HERE)
...I also used an assortment of craft acrylic paints to paint the chipboard letters 3 different colors of green!

Now let's get started for real!

I tend to test and play around with things when starting a project... just to make sure that the
way I see it in my head has a fighting chance to become reality.


My initial plan was to cover all of the chipboard letters with quilled flowers, but they looked too packed together and plain... plus they needed way more POP!

So I busted out this awesome pack of Petaloo flowers and laid about them as the foundation for the quilled flowers...


Then once I added a few of those quilled flowers on top of the Petaloo flowers... things really started to take shape!


My Mom dropped by for a visit (she's also known as MomChops over on my blog)... so I put her to work painting all of the Petaloo Flowers with a nice assortment of Shimmerz Paints...

When you come to my house you have to be ready to dig in and do some crafts... especially on Saturdays!

(any man, women or child who enters the craft room on a Saturday is in danger of being handed a pair of scissors or a paint brush)
(even my husband has fallen prey to this phenomenon)


I decided that the color for my quilled flower petals would come entirely from Shimmerz sprays..
I really wanted them to have a nice shimmery shine to them and the best way to do that was to start with plain white paper and spritz the heck out of them!


Once they were nice and dry...
I cut them into one inch strips so they could be run through my Cuttlebug quilling folders!

(if you have never seen the quilling folders in action and want to see a video demonstration... leave a comment here and let me know!)
(I'll put a little video together of how I made the flowers for this project and post it right here on the Shimmerz blog!!!)


MomChops painted the chipboard letters and ALL of the Petaloo flowers for me...
(I took her to lunch to thank her after we were done... she was plum tuckered out!!!)

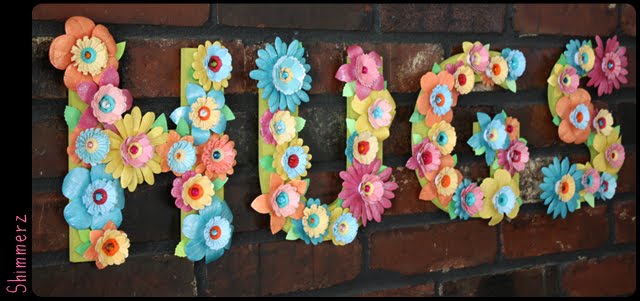
41 fabulous shimmery quilled flowers and 42 fabulous painted and shimmery Petaloo flowers later...


I started assembling the whole thing!

I filled the centers of those flowers with bright sparkly gems and used some of the quilling leaves under each flower pair.

To get everything to stick together nice and tidy...
I used an assortment of liquid glue, ZipDry and a hot glue gun!


Here is the finished sign of HUGS!
(this little sign is going to be given as a birthday present to the daughter of a very dear friend of mine who likes lots of sparkle and nice bright colors)!!!!

...and here are a coupla more pics so you can check out the details a little better!


Thanks so much for dropping by and big thanks to Stacey and the whole DT for having me over for a visit! I had a blast! I'll be back in about a week with another project!

Have a great day!