Showing posts with label cutfile. Show all posts

Saturday, October 5, 2024

Cute & Creepy Halloween | Melissa Minor | October 2024 Color Kitz


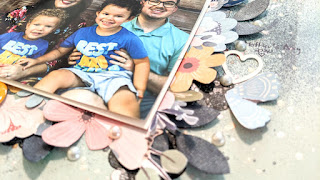
Hi crafty friends! Melissa Minor here on the blog for the Shimmer Paints design team. I have a cute & creepy Halloween scrapbook layout for you today. I’ve used the October 2024 Color Kitz. It’s full of Halloween themed paper and ephemera. The photos I’m documenting are of me and my boyfriend Dale from last Halloween. We went to the pumpkin patch to pick out the perfect pumpkin. Of course we had to snap a few photos in front of the amazing pumpkin wall display they had.


The cut file “Halloween Bunting” I used is from PearTree Cutfiles. You can find it here: https://www.peartreecutfiles.co.uk/product/halloween-bunting/ 


My layout came together rather quickly. I used several of the patterned papers from the kit and lots of the ephemera. I was really excited to add a layer of cheesecloth behind my photos. I think that’s a must have for Halloween layouts. I finished the layout by adding some paint splatter using Dandy Lion-Creameez. You can also see the paint I added to the eyes to make them look like they were glowing.


I have a process video over on YouTube. It is linked down below. If you haven't seen the kit, check out my unboxing video too!

You can shop the Shimmerz Paints website here: https://www.shimmerzpaints.com/collections

*Leave my name (Melissa Minor) in the comments section of your order to receive a free jar of paint.


Thursday, May 19, 2022

Hello Summer | Shimmerz Paints Color Kitz May 2022 | Lorimar Ortega

Hello Shimmerz Paints Fans!

Today's layout features the oh-so-stunning May Color Kitz (click on the name to grab it before it sells out). I decided to focus on the colors, vellum flowers, and dots for my layout, but know that there are 2 cut files included with your purchase. Also, remember to type my name (Lorimar) in the comments section of your next order to be able to receive a freebie!


Let's get started with the process. I began with a non-gessoed sheet of white cardstock and sprayed No Yolking and Palm Reader in a grid-like format; then, I splattered For Shore and Meet Me At Sunset on top. While this dried, I dove into my stash and picked out embellishments which were green, yellow, or neutral in color AND/OR had a summer-y feel to them. For an extra pop of color, I colored the vellum flowers with Palm Reader and Here I Yam.
 
The arrangement of my layout is basically a grid format with the larger photo on the upper right-hand quadrant and the smaller ones in the center and lower left hand side. The bigger embellishments were nestled into the open spaces and the rest were arranged around those. The vellum flowers were layered beneath some of the embellishments in places that needed a pop of orange and green. I was inspired by the cut files from the color kit to use up some lemons and I was so thankful that I had stashed them. Then I popped some Dots around the layout. To finish off my layout, I wrote the journaling with a green marker and added some doodles here and there as well, and splattered Here I Yam and For Shore to tie everything together.

That's it! I had loads of fun with this layout and hope that I've inspired you!
Take care,
- Lorimar 


Wednesday, August 18, 2021

Sunny Days | August Color Kit | Simple Stories | American Crafts | Pebbles by Lorimar Ortega

 Hello Shimmerz Family,

Lorimar here with a Summer-y layout to share with you today. I would consider this layout a mixed media heavy layout, but trust me, the process is simple and so fun to make. I used the August Color Kitz and one extra Shimmerz Paints mist to make this. You can grab the August 2021 Color Kitz here, and the Don't Citron Me here. If, after reading this blog post, you need a more visual exclamation, you can catch my process video here. Remember you can get a freebie on your next Shimmerz Paints order if you write my name "Lorimar" in the comments section.

Alright, so let's get into it.

I started out with a scrap piece of gessoed white cardstock. This is where I'm going to making my affectionately called "mixed media blob" from which I'm going to cut the cutfile (from the Kitz). For this "mixed media blob", I sprayed the Fire and Spice Spitz as my first layer and then splattered Daffodil (Creameez) and Antique Lace (Shimmerz). Set this aside to dry before cutting out the cutfile at roughly 6x6. I cut it up right down the middle to use as two layering pieces beneath two of my embellishment clusters.

Next mayor step was working on my background. Using a gessoed sheet of white textured cardstock, I sprayed Velveteen Green basically all over the page. For some added variation, I sprayed and splashed some Don't Citron Me. Once that was dry, it was on to the embellishments.

For each of the embellishment cluster I used a mixture of stickers, ephemera pieces, foam stickers, and chipboard stickers from Simple Stories Sunkissed, Paige Evans Bloom Street, and Pebbles Sun & Fun collections. I love playing with dimension and layers whenever I make my clusters so the close-ups that follow will show the details of each of them. I tangled up some thread in each of the clusters for a pop of color and texture. To finish up the layout, I splashed a bit of Daffodil and Velveteen Green around the clusters.

That's it! Thank you so much for joining me today.


Wednesday, March 17, 2021

Catch the right moment by Veronika Senova

 Hello scrappy friends, Veronika here with new layout.  I was scrapping picture of my younger who just discovered beauty of photographing. I wanted to use camera cut file so I was looking for it on Etsy and found this beautiful camera with flowers. It gave me idea for whole layout immediately.


Firstly I cut my cutfile with my Silhouette cameo and peel main part from sticky matt, I keep flower laeves there as I wanted to color them. Then I took out my pinks and blues by Shimmerz paints :) For backround I used Dont rain on my parade and Ahoy Matey which are must haves for every Navy lover (as Im :) and bit of Rip von Periwinkle. I just sprayed them on my glass mat and with brush spread everywhere I needed. Together with water was colors  perfectly mixed  and created background exactly as I wanted. At the end I added few splatters.


I kept it drying and in meanwhile I chose Shimmerz for flowers. For blue one I went for Rip von Periwinkle with touch of Pink A Boo and for the rest I used mix of  Bahama Mamma, Crimson Tide, Pink A Boo and She Packs a Punch. After everything completely dried, i adhered cutfile to my background and then adhered leaves  with foam squares to add dimension into the cutfile.


I added my photo backed with two patterned papers, combination of three puffy alphas to create my title and few embellishments - golden gems, enamel dots , cute camera , bee and flowers.
At the end I added very few splatters with Miner,  Miner 49er to add little something for final touch and I really like the result.


Hope you like my layout and see you  next time

Veronika


Wednesday, February 10, 2021

Love this girl by Veronika Senova

 Hello everyone, Veronika here. 

This is my first layout as Creative Design Team member. As I don't have my kit yet , I was creating with my Shimmerz stash. I wanted to scrap photo of me and my younger daughter Marina, so I wanted something sweet and girlish :)

     I knew I will use cutfile and I was looking for something with hearts or flowers, but when I found this "LOVE THIS GIRL" cutfile by Paige Evans, I exactly knew this is IT! I cut it out with my Silhouette Cameo and then put on clear gesso for better paper resistance and colour mixing. 

When it dried I took four of my VIBEZ ( "Egg noggin'" , "Mustard Seed" , "Mango Tango" and "Pop Art Pink"...which is discontinued, I think) and simply began to spray them on my cut file.

I wanted to have some pink and some yellow areas with smooth shift so I took a brush and with a bit of water to mix areas between colours. I repeated this until I was satisfied and let it dry. 

I went through my paper stash and looked for flowers matching used colors. I found them in "Little by little" collection by Shimelle and fussycut some of them. When my coloured cutfile was completely dry I added a foam from the backside and adhered it to white cardstock. This created a dimension which I really like. Then I aranged my fussycuted flowers and adhered it with foam squares also for dimension effect. I couldnt resist to use two little rabits and one racoon from the same collection:)

 At the end I added few enamel dots and my journaling. And thats it! I hope you enjoyed this reading and see you soon. Veronika

Wednesday, November 18, 2020

Thankful for Every Little Moment | November Color Kitz | Cocoa Vanilla Studios Daydream

 Hello everyone!

We are just a week shy of Thanksgiving, and although the year has been on the crazy side, I'm sure there are still moments that are worth being thankful for.

Today's layout features all the goodness found in the November Color Kitz, and I've added in an extra challenge: make my own embellishments. Apart from the Color Kitz, I used mainly items from Cocoa Vanilla Studios Daydream collection. If you are interested in watching the process video, click here!


Let's begin! I selected a minty-green cardstock as my base and cut out the cutfile on beige cardstock. I went for muted and delicate colors as opposed to bold colors this time around to make my photo pop. After adding clear gesso to the base and letting it dry, I began adding my colors; I sprayed Don't Rain on My Parade lightly first and then began adding each of the other colors (from the Color Kitz) by splattering them unto the base. In my mind, I was going for a sort speckled egg look for my base.


While my base dried, I went to town fussy-cutting out florals and butterflies from a Cocoa Vanilla Studios patterned paper. I also punched out some leaflets which were colored with Don't Rain on My Parade in order to add a pop of that gorgeous dark blue. As soon as my base was dried, I stamped some flowers around where I'd be adding the rest of my florals in order to make it look fuller. I then glued the cutfile at the top of the layout right unto the base and added in my photo (a true 4x6) on craft foam right below it. Afterwards, I took my time fiddling with the placement of the fussy-cut florals and butterflies; the butterflies' wings were popped up on craft foam, as were some of the florals in order to add dimension. Popped the Dotz near my photo and, finally, I sprinkled some of the stickable pearls from the Color Kitz to add a pop of delicateness to the layout, and that's it!


The layout took awhile to assemble from start to finish, but I love the result! Remember to use my name (LORIMAR) in your next Shimmerz order so you can receive a freebie. Thank you so much for sticking around this far.

Stay safe and be grateful,
Lorimar


Wednesday, April 8, 2020

Homegrown Rainbows | Colorful Spring layout w/ process video

Hello everyone!

Lori here, sharing a colorful spring-filled layout. I'm certainly ready for bursts of colors any time, especially in these uncertain times.

I began my layout with selecting a bright blue cardstock as my base. I then cut out the Rainbow Heart Cutfile (part of the April Color Kitz) on white textured cardstock and backed it with patterned paper in primary colors. For added texture, I hand-stitched a simple back stitch on the cut file with red, blue, yellow and green thread.

For an extra pop of color, I added some white acrylic paint (by way of the packaging technique and splatters) as a layer beneath where the cutfile was going to be. I then did the same with Hermit the Frog (Vibez), Bed of Roses (Spritz), Jenni B Bleu (Vibez) and Heidi Ho Blue (Coloringz).
Popped the cutfile on 3D craft foam, matted my pictures on white cardstock and placed them like you see in the pictures. I made my title using three different packs of Thickers. For the word "Rainbows", I colored the letters with the same aforementioned colors in addition to Pumpkin (Shimmerz) and Lil' Yellow School Bus (Coloringz).

Finished off the layout with some embellishments from a home-made stash-bursting kit I made for my April layouts, and added a few red sequins from SpiegelMom Scraps around each heart.


Splashed a bit of Mustard Seed (Vibez) and Freshly Squeezed (Coloringz) all around the layout to tie each thing together and finished off my layout. Added my journaling in black ink right beneath one fo my photos, and done!


I love how this turned out! Hope I've inspired you to embrace the sunshine and rainbows in your life, and to get your stories documented.

Need a bit of sunshine in your day? Check out the April Color Kitz, and remember, type "Lorimar" in the comments section to receive a freebie.

Process video here: https://youtu.be/IyQe5_FiQRc

Have a great everyone, and stay safe!
- Lorimar

Tuesday, February 4, 2020

Sweet | Color Kit Cut File Layout with Process Video

Hello Everyone!

Thank you so much for joining me today and viewing how to make this "envelop explosion" layout. Ever since I first saw this gorgeous cutfile (designed by Samantha Robles for the February Color Kitz), I fell in love with it! I instantly knew that I wanted to create a layout which would convey the idea of a dropped envelope full of mementos with its contents spilling out, and after finding out memory I wanted to document, I got to work. So, let's get to it! (Process video is linked at the end of this post).

Since Valentine's Day is right around the corner, I wanted to use more pinks and reds in this layout, and in order to tie in the photos with my color scheme, I added a bit of blue into the mix. I began by cutting out the cutfile; Altered it a bit to have some extra hearts in various sizes and made sure that that envelope within the cutfile measured at least 4x5. This is so my pictures could really seem like that really did spill out of the envelope.


Then came the process of coloring all of the elements in my layout. Listed below are the colors and where I used them:
Background
- Peacock's Plume (Shimmerz)
- Coral Reef  (Inklingz)
- Cheeky Pink (Creameez)
- Pink Caviar (Shimmerz)
- Pink (Shimmerz)
- 1 Hot Mama (Creameez)
- Pip Pip Cherry-O (Shimmerz)
- Dear John Letter (Inklingz)
- Bubble Gum Blast (Shimmerz)
Hearts and Envelops Over Lay
- Razzle Dazzle Berry (Vibez)
- Cotton Candy (Spritz)
- Bed of Roses (Spritz)
- Jeni B Bleu (Vibez)
- Goldie Lox - (Shimmeringz)


Once all my items were dry and my pictures were matted on craft foam, I placed the envelope with the envelope cut file laid over it at the bottom left-hand corner followed by the pictures placed at an angle as if spilling from the envelope. Then I spent some time rearranging the hearts all around the pictures; some of the hearts are placed on craft foam, others laid on top of each others, and still others are glued directly unto the background.

After this, I added some pink, yellow and white sequins from Spiegel Mom Scraps that I had in my stash (Freezin' for a Reason). I then splattered some Miner, Miner 49er all around the layout to tie things together and add a pop of gold. Wrote my journaling on some scrap pieces of yellow cardstock and added a border around my layout using Jenni B Bleu and a brush.


I loved how this turned out! It had many processes, but I loved playing around with the colors and cutfile. Hope I've inspired you to get your story documented. Remember, you can get some free paint by writing my name in the comments section of your next Shimmerz order. 

Process video: https://youtu.be/0wryaEJ3RMg 

See you soon!