Showing posts with label Bed of Roses. Show all posts

Tuesday, February 4, 2020

Sweet | Color Kit Cut File Layout with Process Video

Hello Everyone!

Thank you so much for joining me today and viewing how to make this "envelop explosion" layout. Ever since I first saw this gorgeous cutfile (designed by Samantha Robles for the February Color Kitz), I fell in love with it! I instantly knew that I wanted to create a layout which would convey the idea of a dropped envelope full of mementos with its contents spilling out, and after finding out memory I wanted to document, I got to work. So, let's get to it! (Process video is linked at the end of this post).

Since Valentine's Day is right around the corner, I wanted to use more pinks and reds in this layout, and in order to tie in the photos with my color scheme, I added a bit of blue into the mix. I began by cutting out the cutfile; Altered it a bit to have some extra hearts in various sizes and made sure that that envelope within the cutfile measured at least 4x5. This is so my pictures could really seem like that really did spill out of the envelope.
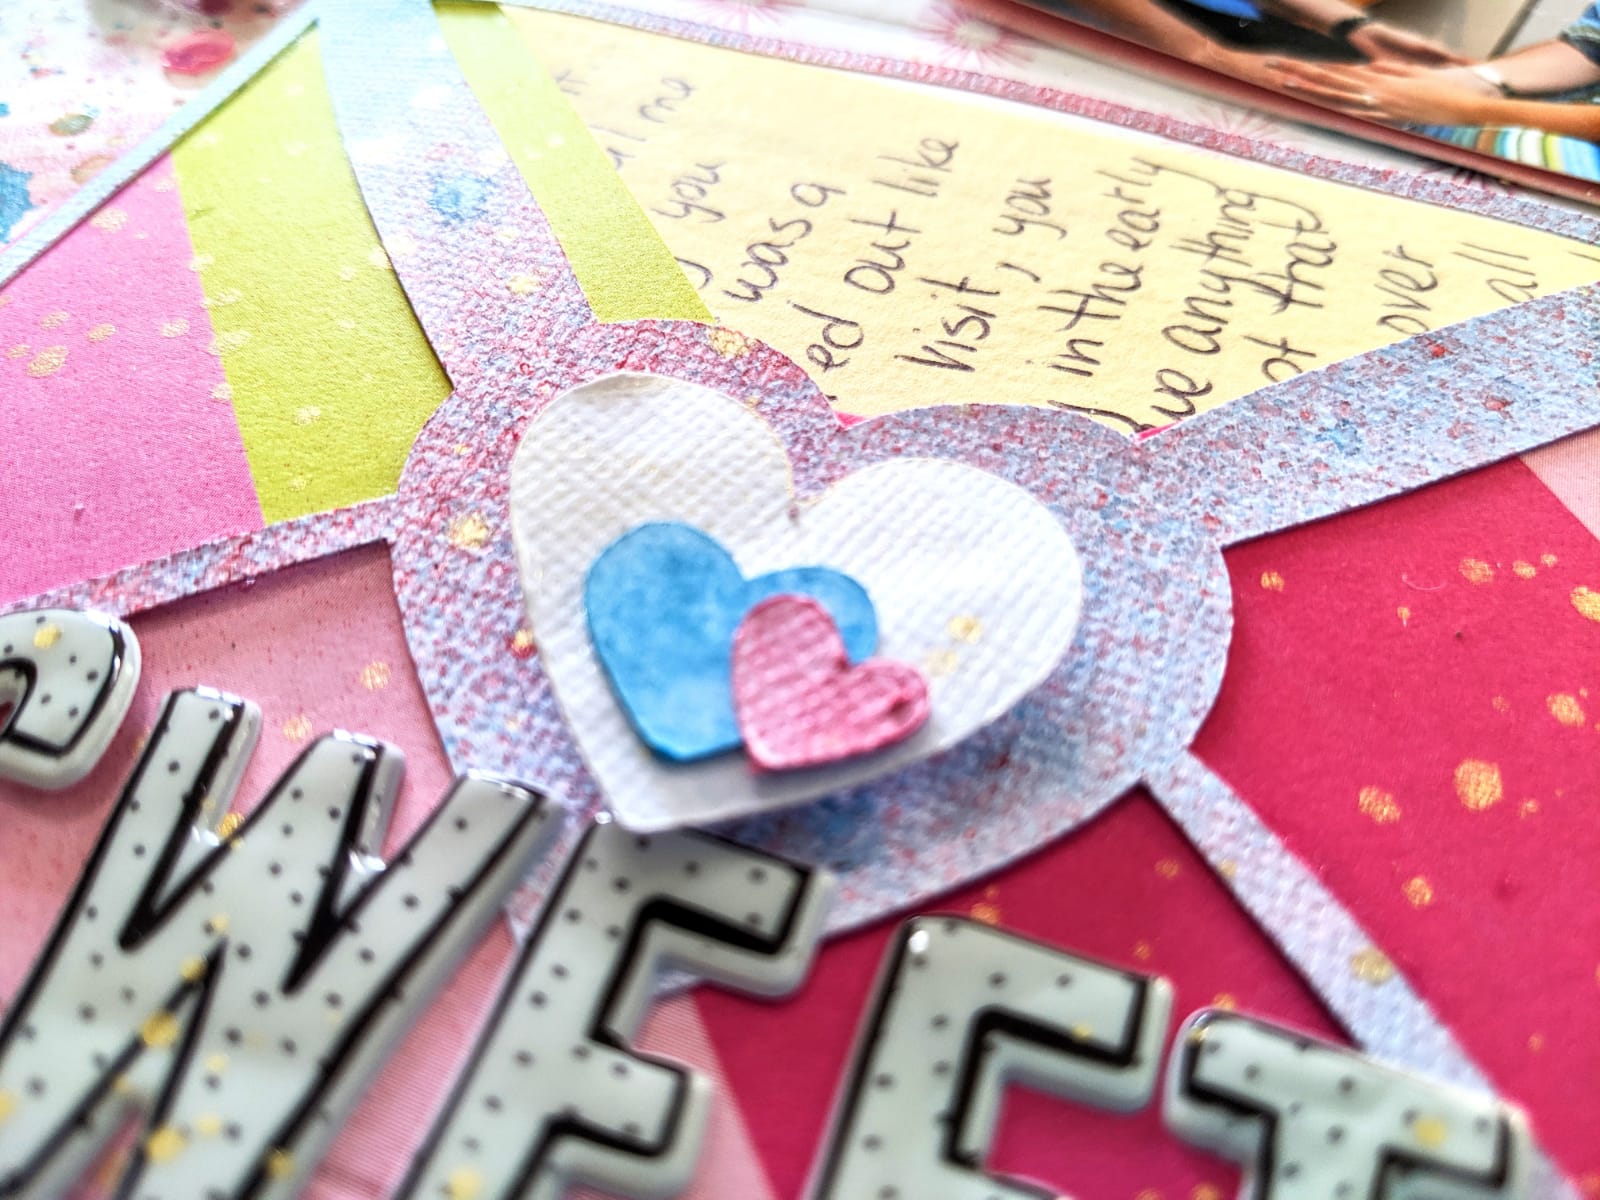

Then came the process of coloring all of the elements in my layout. Listed below are the colors and where I used them:
Background
- Peacock's Plume (Shimmerz)
- Coral Reef  (Inklingz)
- Cheeky Pink (Creameez)
- Pink Caviar (Shimmerz)
- Pink (Shimmerz)
- 1 Hot Mama (Creameez)
- Pip Pip Cherry-O (Shimmerz)
- Dear John Letter (Inklingz)
- Bubble Gum Blast (Shimmerz)
Hearts and Envelops Over Lay
- Razzle Dazzle Berry (Vibez)
- Cotton Candy (Spritz)
- Bed of Roses (Spritz)
- Jeni B Bleu (Vibez)
- Goldie Lox - (Shimmeringz)


Once all my items were dry and my pictures were matted on craft foam, I placed the envelope with the envelope cut file laid over it at the bottom left-hand corner followed by the pictures placed at an angle as if spilling from the envelope. Then I spent some time rearranging the hearts all around the pictures; some of the hearts are placed on craft foam, others laid on top of each others, and still others are glued directly unto the background.

After this, I added some pink, yellow and white sequins from Spiegel Mom Scraps that I had in my stash (Freezin' for a Reason). I then splattered some Miner, Miner 49er all around the layout to tie things together and add a pop of gold. Wrote my journaling on some scrap pieces of yellow cardstock and added a border around my layout using Jenni B Bleu and a brush.


I loved how this turned out! It had many processes, but I loved playing around with the colors and cutfile. Hope I've inspired you to get your story documented. Remember, you can get some free paint by writing my name in the comments section of your next Shimmerz order. 

Process video: https://youtu.be/0wryaEJ3RMg 

See you soon!


Saturday, October 20, 2018

Color Challenge Floral Wreath Balloon Card | Melinda Beltran

Happy Saturday crafty friends,
My name is Melinda and I am so super excited to  be on the Shimmerz Creative Card Design Team!  I can't wait to share some projects with you. Here is a look at my first one.


Our challenge this month is to use one of their products as the focus. The product I chose was Pip Pip Cherry – O Shimmerz Paint.  For my project, I started by creating the cut files that I used. I then cut all of the pieces out in white cardstock.  I used some of the Pip Pip Cherry – O Shimmerz  paint to paint my flower petals. For the larger flower, I did also use some Bubble Gum – Shimmerz paint.


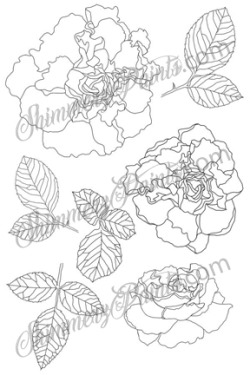
For the wreath, I layered 3 of the die cuts together to give them a sturdy, chipboard type feel. I then used some of the Puttin On The Glitz – Pasteez to add some glimmer and texture to my die cut. It is hard to capture that sparkly shine, but it is on there and looks so pretty. In this view you can also see that I used the Bed of Roses Stamp Set to stamp both my gray and pink cardstock to create a background.


Next, I turned to my flowers, I used some of the Pip Pip Cherry – O Shimmerz to paint my flowers the beautiful Hot Pink. For the larger flower I did add some Bubble Gum – Shimmerz for a gradient look. I staggered, layered and curled the flower petals to give them some dimension.I added a pear to their centers and a soft bow from some seam binding ribbon.


For the balloon, I used the Lovely Balloons Stamp Set. I stamped it with some light gray ink and then used a fine point paint brush to brush some Pip Pip Cherry – O Shimmerz, Bubble Gum – Shimmerz and some Puttin' On The Glitz – Pasteez. I fussy cut it and then used some foam tape to give it a little lift.


I added a sentiment from the Lovely Balloons Stamp Set by stamping the banner and one of the words with my gray ink. I fussy cut it out and added it to my card. I finished off my card by adding some pearls to my frame.


Feel Free To Pin This Image For Some Inspiration!


Supplies Used
pip pip cherry o

bubble gum - shimmerz

bed of roses-sm

lovely balloons-sm

puttin on the glitz - pasteez
Puttin On The Glitz – Pasteez


Be sure to head over to the Shop and pick up some of these beautiful products. They really add such a beautiful finish to your projects. Don't forget to add my name: Melinda Beltran to the comments when you place your order and you will get a freebie! How's that for awesome!!!


If Interested, You Can Check Out My Process Video!


FREE SVG FILE SET
For a limited time, I am sharing the SVG file set I created to make this project.
Now all that's left is to pick up a little Shimmerz Paint and you can make your own!

Thank you so much for allowing me to share with you. Please leave me a comment and let us know you were here. Don't forget to check back to see what the rest of these amazing designers are working on! Until the next time, you have a wonderfully crafty day!

Saturday, April 21, 2012

believe in yourself.

Hello. It’s Naomi and I would like to share an LO, a very bright one with you today. I am hoping it brightens up your day.


I used the products below and gesso.

Products used:

Caribbean Sunset Spritz
Bed of roses Spritz
Mango Madness Spritz
Coloringz Pink Stilette
Colouringz Mon Shan
Coloringz No Yoking

I just love these bright colours together and they work so well amongst each other.
Wishing you all a very happy day!

Naomi xx

Tuesday, November 30, 2010

Frame It .. with Shimmerz!

by Carrie Ferrier
Lately I've really been into using my scrapbook supplies to make simple framed art. Shimmerz is a major part of both of my framed pieces I'm sharing today.

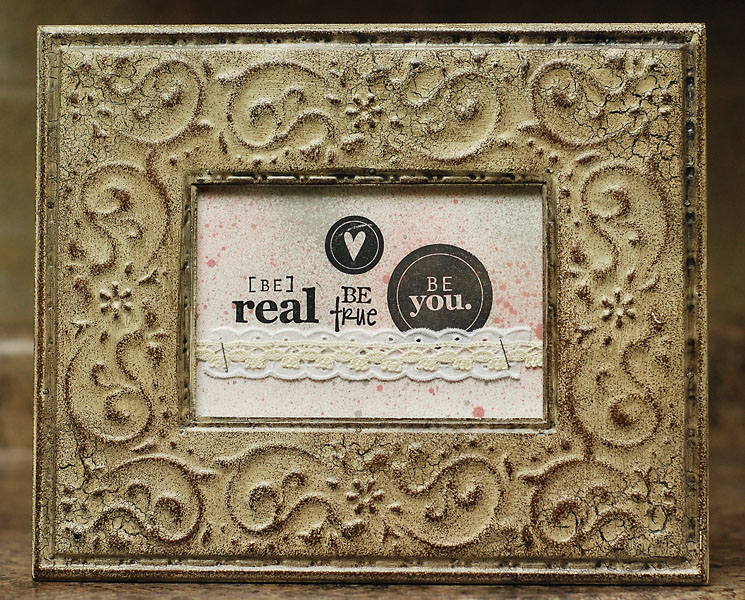
On this framed piece, I simply spritzed Shimmerz Vertigre and Barn Door on the background cardstock before I added my word stamps and ribbon. I've been wanting to make this simple framed piece using these word stamps for a long time .. pretty powerful to me. This is in my scrapbook room, and I'm also making several more for Christmas gifts.


 On this framed piece, I wanted to decorate the frame in a simple way that would aid in showcasing the photo of my beautiful niece on her wedding day. I took a plain white prima flower and spritzed it with a combo of Shimmerz Bed or Roses, Baby Breath, a fine spritz of Vertigre, and finished it off with some Barn Door.


I absolutely adore how, with just a little bit of Shimmerz, a project gets that final "oomph" of goodness.

Monday, June 14, 2010

Shimmerz helps out with a little HUG...

Hi everyone! This is Lolly (Shimmerz guest designer for the next couple-o-months)! I am super excited to share my first Shimmerz project with you!!!!

I was torn between sharing something with flowers (which are one of my absolute favorite things)... or a little tree... I decided to go with the flowers for now and we'll do the tree next time (that little tree is gonna steal your shimmery lovin' little hearts... I swears)!
Craft Goodies Used for this Project:
The Paper Studio
-
Chip Decor Letters
Petaloo - Color Me Crazy Flowers (awesome mega pack with enough flowers for multiple projects)

Cuttlebug - Quilling Flower Folders (Daisy & Chrysanthemum)
Assorted Gems
Shimm
erz - Vibez - Sunset Strip & Jeni-B-Bleu
Shimmerz - Spritz - Bed of Roses
Shimmerz Paints - A
qua Marine & Celery
Shimmerz -
Pearlz - Carrot Top, Sunny Side Up & Green with EnvyShimmerz Blingz - Hottie Pink (this color totally rocks!!!!)
(shop for Shimmerz HERE)
...I also used an assortment of craft acrylic paints to paint the chipboard letters 3 different colors of green!

Now let's get started for real!

I tend to test and play around with things when starting a project... just to make sure that the
way I see it in my head has a fighting chance to become reality.


My initial plan was to cover all of the chipboard letters with quilled flowers, but they looked too packed together and plain... plus they needed way more POP!

So I busted out this awesome pack of Petaloo flowers and laid about them as the foundation for the quilled flowers...


Then once I added a few of those quilled flowers on top of the Petaloo flowers... things really started to take shape!


My Mom dropped by for a visit (she's also known as MomChops over on my blog)... so I put her to work painting all of the Petaloo Flowers with a nice assortment of Shimmerz Paints...

When you come to my house you have to be ready to dig in and do some crafts... especially on Saturdays!

(any man, women or child who enters the craft room on a Saturday is in danger of being handed a pair of scissors or a paint brush)
(even my husband has fallen prey to this phenomenon)


I decided that the color for my quilled flower petals would come entirely from Shimmerz sprays..
I really wanted them to have a nice shimmery shine to them and the best way to do that was to start with plain white paper and spritz the heck out of them!


Once they were nice and dry...
I cut them into one inch strips so they could be run through my Cuttlebug quilling folders!

(if you have never seen the quilling folders in action and want to see a video demonstration... leave a comment here and let me know!)
(I'll put a little video together of how I made the flowers for this project and post it right here on the Shimmerz blog!!!)


MomChops painted the chipboard letters and ALL of the Petaloo flowers for me...
(I took her to lunch to thank her after we were done... she was plum tuckered out!!!)

41 fabulous shimmery quilled flowers and 42 fabulous painted and shimmery Petaloo flowers later...


I started assembling the whole thing!

I filled the centers of those flowers with bright sparkly gems and used some of the quilling leaves under each flower pair.

To get everything to stick together nice and tidy...
I used an assortment of liquid glue, ZipDry and a hot glue gun!


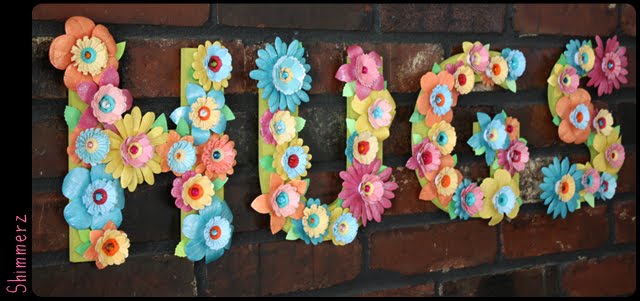
Here is the finished sign of HUGS!
(this little sign is going to be given as a birthday present to the daughter of a very dear friend of mine who likes lots of sparkle and nice bright colors)!!!!

...and here are a coupla more pics so you can check out the details a little better!


Thanks so much for dropping by and big thanks to Stacey and the whole DT for having me over for a visit! I had a blast! I'll be back in about a week with another project!

Have a great day!

Sunday, January 31, 2010

Life Lessons Project with Shimmerz Spritz

Today I'd like to share a project that I created using some fabulous Shimmerz Spritz colors: Bed of Roses (my favorite) and Eucalyptus.

I confess that I've been coveting one of those great 7 Gypsies artist painter's tray for a while now, but my local scrapbooking stores didn't have them in stock. So I resorted to finding something similar at the craft store. Well, I found a long wooden display frame which I painted black and then created the dividers with black cardstock. Here's how the completed frame turned out:


Each section has either a pocket or envelope where I've placed my journaling - the "hope" section has a stitched pocket made from glitter paper, the "love" section has a mini envelope made from vellum, and the "peace" section has a handmade cardstock envelope.

I sprayed a combination of both Bed of Roses and Eucalyptus Spritz colors onto the piece of doily in the first section titled "Life Lessons" as well as the cardstock envelope in the "peace" section. I also sprayed the chipboard letters with Shimmerz Spritz to get the neat speckled effect on the chipboard letters that spell "life", "hope" and "peace". You can get the same effect by quickly drying it with a heat embossing tool.


The next time you'd like to try something different with your chipboard alphas, give them a little spritz! You'll probably love the result just as much as I did!

Thanks for visiting today! Hope you have a wonderful week!


Wednesday, January 27, 2010

Christmas Memories


I created this for a challenge to create a layout with journaling that sums up our holiday season. The background paper is sprayed with Bed of Roses Shimmerz Spritz. My journaling is tucked inside this little kraft envelope. The envelope is sprayed with Bed Of Roses and Baby's Breath Shimmerz Spritz.

The chipboard house is painted with ivory white paint and Mossy Stone Shimmerz paint. I used a mini comb for the house texture while the paint was still wet. I found the comb at our local craft store. It is made out of rubber and has four different ends/textures. You can use a regular old comb or old toothbrush. Play around and see what you get.


It doesn't take much to add a little sparkle and interest to your layout.

Wednesday, January 20, 2010

Frost Your Layouts!

Are you getting ready for Valentine's Day? I love seeing all the reds, pinks, and whites hit the store shelves and I'm getting the urge to make some pink frosted sugar cookies with my kids.

In the meantime, I will "frost" my pages with some pink-hued Shimmerz products. :)


On this page, I used the Cuttlebug Heart Blocks embossing folder to create a subtle background piece to balance out my single photograph. I used Bed Of Roses Spritz by Shimmerz Paints to spray my embossing folder (NOT the paper) before embossing. I love the way the Spritz pooled into the deeper areas of the image creating a variety of interesting shades of pink.


Thanks so much for coming by!

Sunday, December 20, 2009

Love tags and Shimmerz Spritz

I know that Christmas is this week, but I wanted to make some love tags. Red is a good color and it can be used any time of the year.
For these tags I used Bed of Roses Shimmerz Spritz and Licorice Spritz. I had recently cleaned my space and found a ton of fun things to play with.
I stamped the tag with VersaMark ink and then embossed the image with clear embossing powder.
I stamped the background with a polka dot stamp.
This is where the magic begins. First I sprayed a light color coat with Bed of Roses Shimmerz Spritz. I used a towel to gently wipe the embossed areas, and the tag. I sprayed with Bed of Roses, again, and then added a light coat of Licorice Shimmerz Spritz. I wiped the embossed areas and this time I got that Licorice color in the grooves of the embossed image.
I added some stamped hearts, Love sentiment and a fabric bow with a button. Perfect gift tags for that someone special.