Showing posts with label Dear John Letter Inklingz. Show all posts

Wednesday, October 28, 2020

Trick Or Treat - Melissa Larson

 Hi everyone! Melissa here with a new design team post for the amazing Shimmerzpaints! I love their rich texture and colors! 


To make this card I used paper from 49 And Market, glued on top of a card made from watercolor paper. The image is from Tim Holtz paper dolls. 

I picked out Reneabouquets Beautiful Board frame, figured out where it would go on the page, and prepped it with white gesso. I painted it with Green Olive Shimmerz and Penny 4 Your Thoughts Inklingz. On the small star at the right I used Plum Crazy and Imperial Amethyst Inklingz.On each of them I poured on a thick layer of Clear Rock Candy Crackle.

I applied texture paste to the background with a bubble stencil from Prima. I painted all the raised areas of the paste with Green Olive Shimmerz and Penny 4 Your Thoughts Inklingz. I put Plum Crazy and Imperial Amethyst Inklingz on the background. 


To add visual interest I used Glossy Accents to put on micro beads, seed beads, gold leaf,swarovski crystals,glass shard glitter,glass beads,pearls,iridescent wrapping paper,tulle,pressed flowers and leaves,bark,feathers left by birds at the bird bath outside,shells,fussy cut images from Graphic 45,flowers from Reneabouquets, metal from Tim Holtz and and bling and metal from my stash.I rubbed and flicked on gold and purple mica powder.


The white area to the right of the boy is  Dear John Letter ,it's also at other areas of the card.


                                        Thank you so much for looking, and have a great week!


Tuesday, February 4, 2020

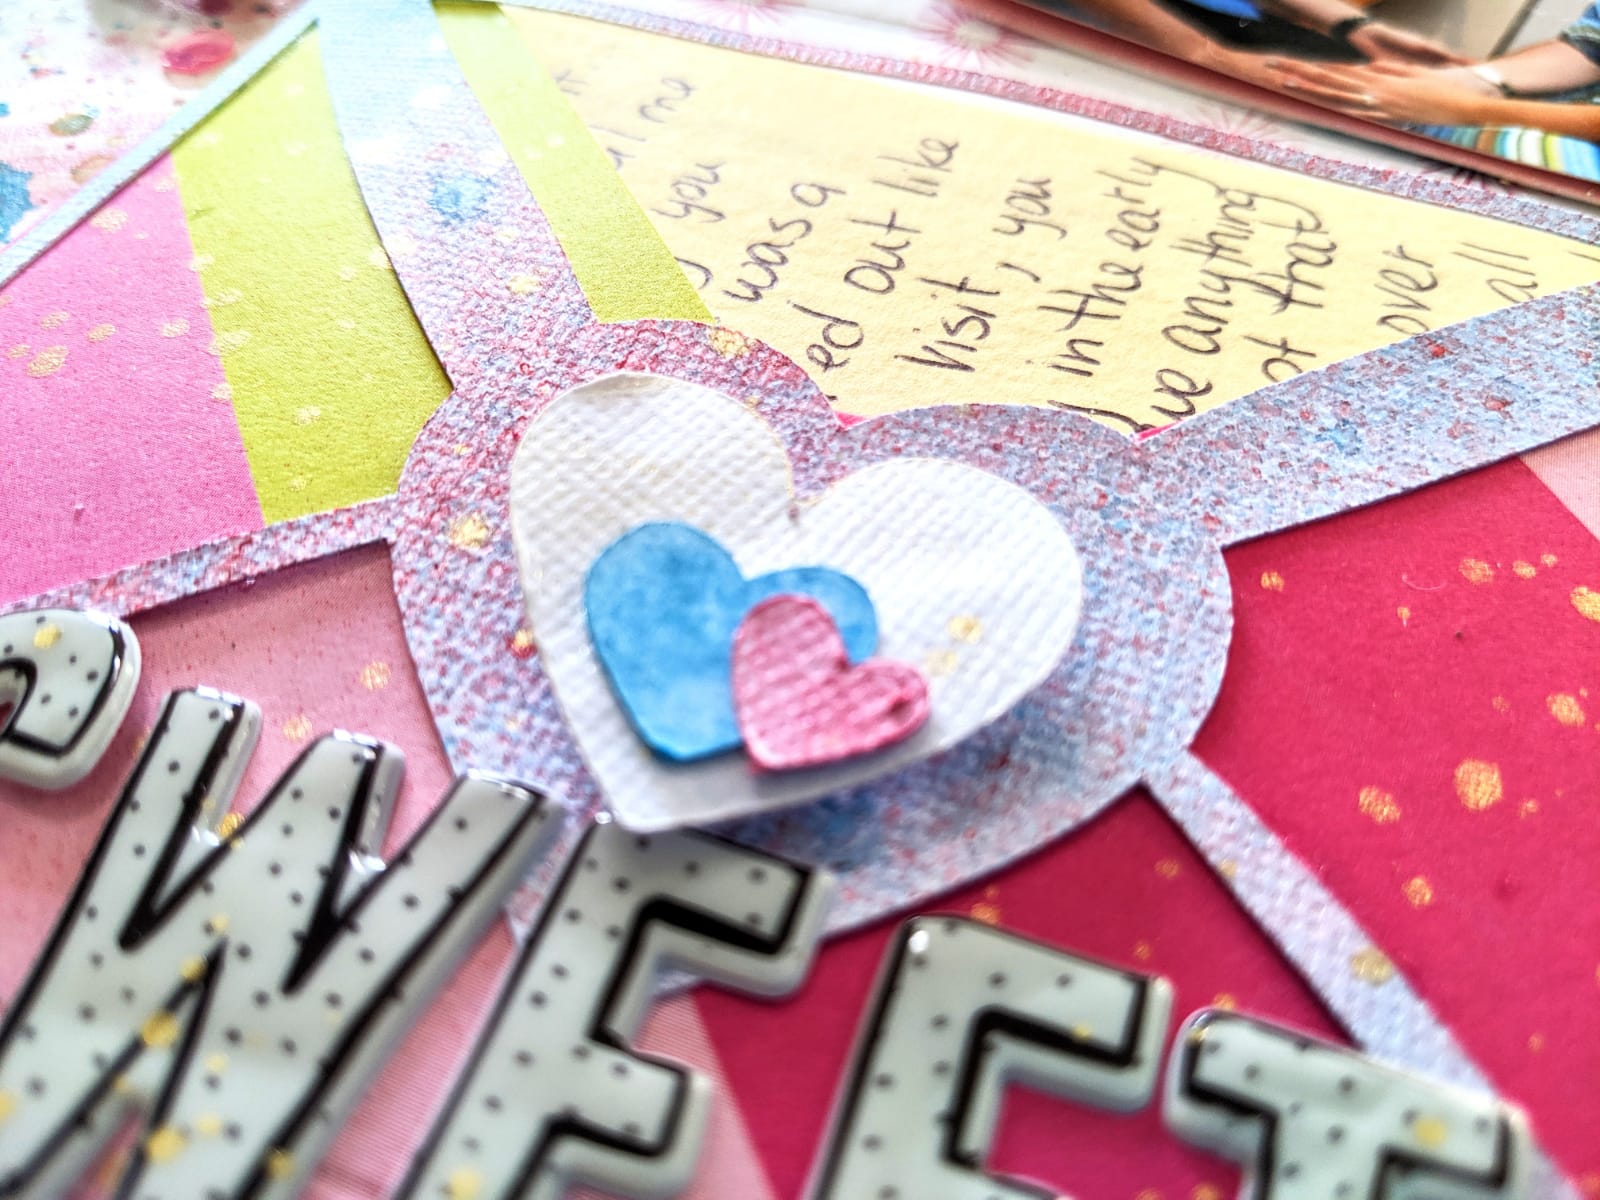
Sweet | Color Kit Cut File Layout with Process Video

Hello Everyone!

Thank you so much for joining me today and viewing how to make this "envelop explosion" layout. Ever since I first saw this gorgeous cutfile (designed by Samantha Robles for the February Color Kitz), I fell in love with it! I instantly knew that I wanted to create a layout which would convey the idea of a dropped envelope full of mementos with its contents spilling out, and after finding out memory I wanted to document, I got to work. So, let's get to it! (Process video is linked at the end of this post).

Since Valentine's Day is right around the corner, I wanted to use more pinks and reds in this layout, and in order to tie in the photos with my color scheme, I added a bit of blue into the mix. I began by cutting out the cutfile; Altered it a bit to have some extra hearts in various sizes and made sure that that envelope within the cutfile measured at least 4x5. This is so my pictures could really seem like that really did spill out of the envelope.


Then came the process of coloring all of the elements in my layout. Listed below are the colors and where I used them:
Background
- Peacock's Plume (Shimmerz)
- Coral Reef  (Inklingz)
- Cheeky Pink (Creameez)
- Pink Caviar (Shimmerz)
- Pink (Shimmerz)
- 1 Hot Mama (Creameez)
- Pip Pip Cherry-O (Shimmerz)
- Dear John Letter (Inklingz)
- Bubble Gum Blast (Shimmerz)
Hearts and Envelops Over Lay
- Razzle Dazzle Berry (Vibez)
- Cotton Candy (Spritz)
- Bed of Roses (Spritz)
- Jeni B Bleu (Vibez)
- Goldie Lox - (Shimmeringz)


Once all my items were dry and my pictures were matted on craft foam, I placed the envelope with the envelope cut file laid over it at the bottom left-hand corner followed by the pictures placed at an angle as if spilling from the envelope. Then I spent some time rearranging the hearts all around the pictures; some of the hearts are placed on craft foam, others laid on top of each others, and still others are glued directly unto the background.

After this, I added some pink, yellow and white sequins from Spiegel Mom Scraps that I had in my stash (Freezin' for a Reason). I then splattered some Miner, Miner 49er all around the layout to tie things together and add a pop of gold. Wrote my journaling on some scrap pieces of yellow cardstock and added a border around my layout using Jenni B Bleu and a brush.


I loved how this turned out! It had many processes, but I loved playing around with the colors and cutfile. Hope I've inspired you to get your story documented. Remember, you can get some free paint by writing my name in the comments section of your next Shimmerz order. 

Process video: https://youtu.be/0wryaEJ3RMg 

See you soon!


Monday, November 25, 2019

Be You, Bravely

Hi everyone! Melissa here with a design team page for the amazing Shimmerz Paints. I love these paints, they're so easy to use, and the colors are so rich! I've used a photo from free google by Stella de Libero,


To make this page I applied clear gesso to Prima's Moon Child paper.
              
 I put the layers under the photo together,including taping on card stock under the image to make it stronger. Below that is a layer of watercolor paper, and at the bottom is corrugated cardboard. I tore off most the paper from the surface of the cardboard, and painted it with gesso. While it was wet I poured on UTEE, and heated it until it was just melted. I put two layers of cardboard between the layers to add dimension. 

I painted Prima Moon Child paper with clear gesso, then applied texture paste with a stencil and a credit card. I poured on Ultra Thick Embossing Powder (UTEE) onto the paste, and heated it with a heat gun. Don't use Hobby Lobby brand texture paste, it takes way too long to dry,even with a heat gun. Liquitex works a lot better.

I picked out Reneabouquets Beautiful Board,arranged it around the page, took it off, and prepped it with gesso. I painted it with Blue My Mind, and Dear John Letter  and Imperial Amethyst Inklingz. I topped it with a thick coat of Ranger Clear Rock Candy Crackle. A lot of the textural elements are from Reneabouquets. 

I drew out the colors of the photo to the watercolor mat, and the page too.


To add visual interest I added micro beads, seed beads, glass glitter,glass beads, pearls, Swarovski crystals, rhinestones,sequins, shells, pressed flowers and leaves,tulle, metal from Tim Holtz and Reneabouquets, pieces of floral picks, and bling and metal from my stash. The gorgeous butterfly is from Reneabouquets.


I sponged and brushed on a lot of gesso around the page, because it was getting too busy. I used   gold and silver mica powder.


]

Thank you so much for looking, and have a great week!


Sunday, November 10, 2019

Skiing By | Ericka Strange

Hey Shimmerz fanz I hope you had a wonderful weekend! Ericka here with a cute Christmas card using the Pinkfresh Studio stamp Skiing By.


I love these cute little critters and the sparkle of all the Shimmerz Paints products is perfect for a snowy look.


I stamped the critters with Versafine ink and clear heat embossed them. I used Coffee Shimmerz on the bear and Dear John Inklingz on the bunny.

For my background I sprayed a piece of water color paper with Deep Blue Sea Vibez and another piece of watercolor paper with Elfin' Magic Vibez. I love this set especially since it has die cuts for the mountains, hills and snow caps.


I used Neenah Metallic paper for the snow and then adhered my scene using foam tape for dimension. For more information on how I created my card, check out my blog Strangely Creative.


That's all for me today. Thanks for stopping by and don't forget if you make a purchase on our new website, type in ERICKA in the comments and you'll receive a freebie with your order!


Wednesday, August 22, 2018

Let Your Spirit Take Flight


Hi everyone!Melissa here with a page for Shimmerz Paints! I love using these paints, the quality and shimmer are amazing!


I was craving pink, so I picked this photo to work with. I also really wanted to use flowers, and everything else had to balance with them. I wanted to keep those flowers, and not have things get so busy I'd have to take them off.

I took a piece of Blue Fern Paper from Seaside Cottage, and applied texture paste with a stencil. I picked out some chipboard from Reneabouquet, and decided where it would go. 

I attached cardstock to the underside of the photo with double sided foam tape. I put two layers of foam core board under the photo. I attached the layers to the page. I wanted some room under the photo to tuck things into.

I sponged on gesso with a cosmetic sponge, to make a surface for the paint. Otherwise the paper just soaks up the paint.


What I like the effect of is painting over different items with paint. I pooled the paint over micro beads, and it gives the beads a lot of definition. Sometimes I used gesso, then painted over that.  I added a lot of glass shard pieces from Reneabouquet, and brushed Dear John Letter Inklingz over it.


To add visual interest I used the following: micro beads, seed beads, pearls, bling, Prima flowers, sequins, crystals,plastic and glass rhinestones, gold leaf,mica, glass glitter, threads of cheesecloth,lace, metal from Tim Holtz, pressed dried flowers and leaves,lichen, moss, bark, and feathers. I fussy cut a few things from Graphic 45 and other places.


The chipboard was first painted with gesso, then Shimmerz,and finally coated with Ranger Clear Rock Candy Crackle. I added more paint on top.


The title sticker is from 7 Dots. I drew around it with a Derwent Inktense watercolor pencil, and brushed on water to soften the lines. I used the pencil in several areas around the page. I was trying to give the page more definition and depth.  


I rubbed on gold mica powder in different places. I glued on all the embellishments and pieces with Glossy Accents. I used a lot of gesso over the textures, and left a lot just white. I kept adding gesso to keep things balanced, and not too busy looking. At the end I rubbed on white mica powder.


Here's a list of the Shimmerz Paints I used:

Inklingz:


Shimmerz:


Thank you so much for looking, and have a great week!