Showing posts with label olive branch. Show all posts

Thursday, September 24, 2015

Home Decor with Shimmerz & Gabrielle


Hello lovely Shimmerz Fans! I'm really excited to share with you a home decor design I made on a 12" x  24" canvas.  I often get asked how I come up with some of the ideas I make.....this one is not one I came up with myself.  I saw this wonderful canvas with a vase attached on Pinterest and thought about how nicely this would work with some new stencils I designed for The Crafter's Workshop (Moving Vines 12"x12" stencil, and Organic Matter 6"x 6" stencil).....so I contacted the lovely lady (Vicki Chrisman) that designed the one I saw and she kindly gave me permission to use her canvas as inspiration.


The Crafter's Workshop Stencils used in this project, designed by me :)


Shimmerz Paint Products used in this project:

~ Olive Branch Spritz
~ Bamboo Leaf Spritz
~ Glorious Day Vibez

Here is a very brief video tutorial I made up to show how I made this project! Enjoy! ....


I hope you enjoyed my little tutorial and that I've inspired you to get playing with your Shimmerz Paints.  Here are a couple of close-ups of my project....


I used the darker colors like Olive Branch  on the outer edges of the canvas, fading into the lighter colors like Bamboo Leaf on the inside....using Glorious Day for little hits of layered color in a few key spots.


I added extra layers of the darker spritz over the stenciled areas, allowing the to pool in the cavities and cracks.  The bottle I wired through the canvas using a piece of cardboard in the back of the canvas to make a strong backing for the vase.

Thanks so much for stopping by the Shimmerz blog today, and REMEMBER! If you are looking to order Shimmerz products, be sure to get your FREE/Bonus Shimmerz product in the color of your choice by mentioning my name 'Gabrielle' in the 'Instructions to Merchant/seller' part of your order! xo


Saturday, August 1, 2015

Textured Journal Covers with Gabrielle {Video Tutorial}


Hello friends! It's Gabrielle here with you today to share an art journal cover I recently made using beautiful Shimmerz Paints, Dusty Attic chipboard and a variety of new stencils I designed for The Crafter's Workshop.  The Stencils I used were 'Tuscan Wall', 'Moving Vines' and 'Organic Matter'.  Because I was going for the warm colors of Tuscany, I went with yellows, blues and greens with a hint of sepia.   Here are the Shimmerz Paints colors/products I used for this project...


Shimmerz Products Used:
~ Heidi Ho Blue Coloringz
~ Glorious Day Vibez
~ Chocolate Brownie Coloringz
~ Taupe of the World Vibez
~ Bamboo Leaf Spritz
~ Olive Branch Spritz
~ Emerald City Inklingz
~ Artichoked Texturez
~ Pumpkin Shimmerz

I did a video recording, a sort of step by step of the making of this journal cover (front and back) if anyone wants to recreate the look.   So take a break from the hassles of your day and let creativity flow your way! Enjoy! 


This was so much fun to make, I hope you enjoyed watching my video tutorial as much as I enjoyed creating this project!  Here are a few close-ups, that you can check out at your leisure....


Here's a view of the back and front cover.  I was going for a kind of aged, sun-warmed Tuscan doorway look.  I began by adding lots of textures using my stencils, and then just started layering on the paint colors starting with the lightest (Glorious Day Vibez) to the darkest.(Taupe of the World Vibez).


For the door, I brushed the Heidi Ho Blue on with a paint brush rather than spritzing it on, so that I would get streaks in the chipboard resembling woodgrain.  Then I lightly dry brushed some of my white Gesso over it to give the blue a more sun-bleached look. I finished the aged look by using a stamp I designed for The Scrapbook Diaries called Crackle Textures....I used the crackle paint stamp on the door and the peeled paint design on the walls.


For my vine corner, first I used my TCW 'Moving Vines' stencil with some texture paste, the  began to layer on my greens (Bamboo Leaf and Olive Branch Vibez).  For the chipboard I used the Chocolate Brownie Coloringz for the 'wood frame' and Emerald City Inklingz for the leaves.  


For the Ivy vine, I used my all-time favorite color of Texturez called Artichoked on the Ivy cut out on my Tuscan Walls stencil.  And finally I used a very light brushing of Pumpkin Shimmerz for my cracked brick design.

NOTE:  Don't forget to get your FREE/BONUS Shimmerz product in the color of your choice with your next Shimmerz Paints order....Just mention my name 'Gabrielle' in the 'Instructions to Merchant/Seller' part of your order, and presto! Stacey will bestow an extra Shimmerz product upon you!  Perfect if you're like me and have a hard time narrowing down the colors you NEED! :P

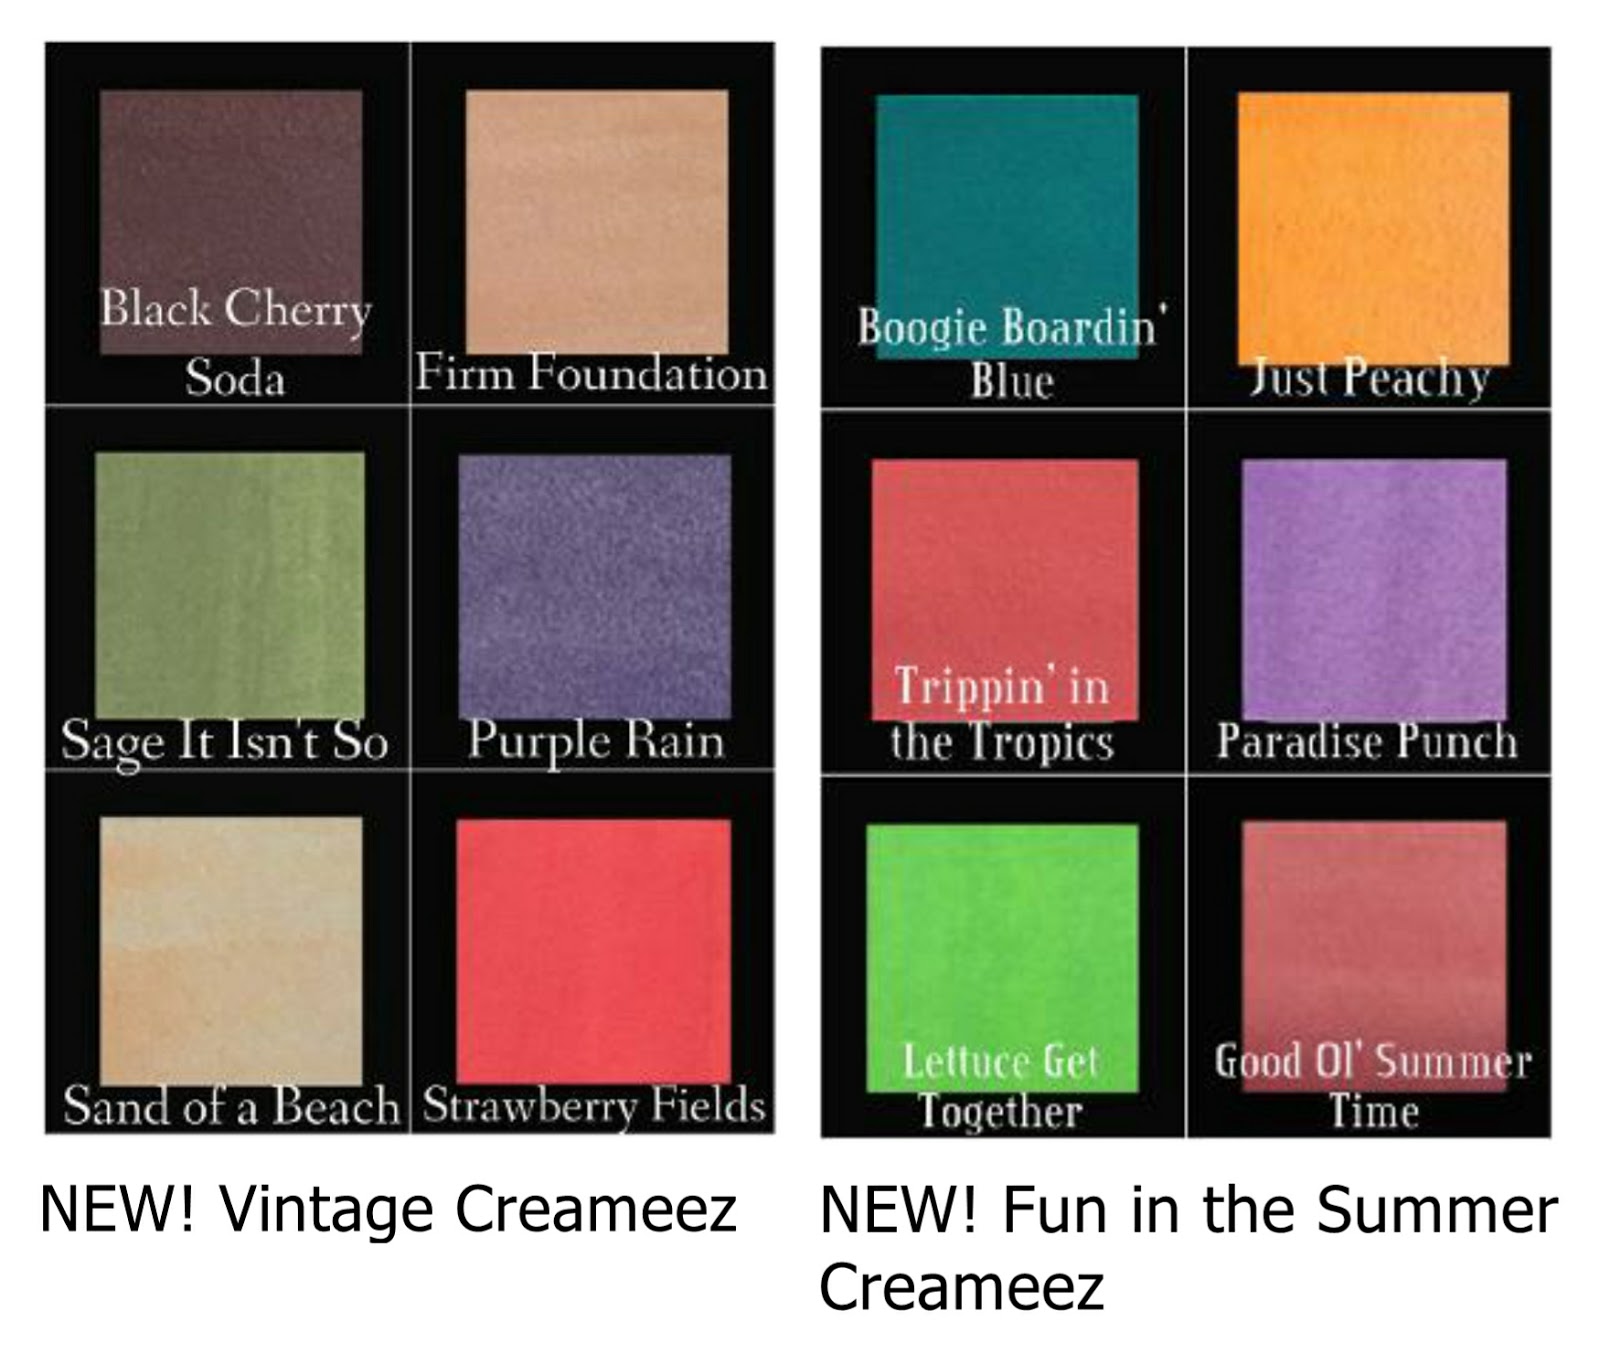
....AND....If you haven't heard the exciting news yet, Shimmerz has brought out a whole bunch of gorgeous new colors for their summer release!  I'm super excited to give these lovely colors a go!  I recently have been playing a little more with the Creameez paints and I just love the matte watercolor look they can give to a project!...I sat here trying to pick some favorite colors, but it's so hard to do, they are all so yummy! (Firm Foundation, Sage It Isn't So, Good Ol' Summer Time...seriously, how cute are those names too!). What's your favorite?


Thursday, April 9, 2015

Steampunk Canvas Video Tutorial by Gabrielle Pollacco


Hi All! Gabrielle here with you today to share a new project I made up using a unique elongated canvas and some really fun Shimmerz products! I've always wanted to try doing one of these long canvas's and I found myself one in a nice manageable size for my first try, this is a 4x12 inch Artist Loft Canvas that I found at my local craft store.


I was going for a metalic/verdigris look for this one so I chose these colors and products for this project:

~ Mandarin Mai Tai Coloringz
~ Olive Branch Spritz
~ A Shade of Grey Coloringz
~ Chocolate Brownie Coloringz
~ Before the Dawn Coloringz
~ Ride the Tide Creameez
~ Miner Miner 49er Inklingz
~ Giddy about Green Inklingz

I will take you through the whole process of creating this project, from making the heart centerpiece embellishment to layering on all these lovely paint products.  So grab yourself a cup of coffee/or tea, relax and enjoy!....


I hope you enjoyed watching my step by step on creating this canvas!  Here are a few close-ups of my page .....


Close-up of the air dry clay heart I made as centerpiece for this project as well as some of the Dusty Attic chipboard pieces I used to make up the canvas design.


I added some textures with molding paste and some stencils and used the Shimmerz NEW 'Ride the Tide' Creameez and 'Giddy About Green' Inklingz with 'Miner Miner 49er' Inklingz to get the verdigris (aged metal) look.


Thanks so much for stopping by the Shimmerz Blog today! You can order your paint products at the Shimmerz Paint Store HERE.   Remember if you would like to have a FREE/Bonus Shimmerz product in the color of your choice, just put my name 'Gabrielle' in the 'Instructions to Merchant/Seller' part of your next order!  xo


Monday, March 9, 2015

Together ~ A Mixed Media Video Tutorial with Gabrielle


Hello friends! It's Gabrielle here with you today to share with you a page which was my 'attempt' at doing a 'white space' page.  I often admire the look of the layouts that utilize only a small portion of a page but do it in such a way that the eye is drawn right in to the photo.  I, being over embellisher find that my attempts at this style does not always come out as I had envisioned!  In this case I think I came closer to what I was envsioning so I guess I should be happy with that. 


These are the Shimmerz products I used to create this page.  After making this page up, I had to tell Stacey (owner of Shimmerz) how much I'm in love with their new 'Olive Branch' Spritz, beautiful rich color! (and by now you all know how much I love their purples!) **Please NOTE: I said I used Bamboo Leaf Sprtiz in the Video...It should say 'Olive Branch'....sorry about that!  Here is a full step by step video tutorial I created on how I made up this page. Enjoy!


I hope you enjoyed watching my video tutorial!  I've got some close-ups of the page for you to view at your leisure below....


I used some of the Punked Up Purple Spritz to add a soft hint of color to my Rodanthe Blossoms from Prima.  I always love a nice white blossom that you can change up to match your page with just a few dollops of color!


Another design technique I really like to use in my work is laying down a couple of layers of color with my Shimmers mists and then stamping on top of it. In this case I used a well used stamp I have from Bo Bunny called 'It Is Written'.   The pretty Moroccan looking chipboard is a piece from Dusty Attic called Marrakesh Trellis panel.....and the circle frame is an old favorite of mine called Decorative Scroll #1.


I did a little bit of fussy cutting from a labels paper I had from the House of Roses paper from LemonCraft. The title sticker is a Heidi Swapp epoxy sticker.


To achieve a shabby chic look, I like to first paint my chipboard pieces white, then do some random stamping in black using an archival ink (so it doesn't run when you hit it with other mediums).  I used my Paris/Beauty stamp for this. Then I rub a little brown chalk ink along the edges of the chipboard to give it a well worn look. Finally I add a coat of Crackle Varnish.


And I don't want to forget to talk about the yummy tinted texture paste used here, it's the gorgeous green color of Texturez called 'Artichoked'.  I used this with a Tim Holtz Harlequin stencil, I think it adds a nice festive touch, don't you?

I hope you enjoyed today's project, I had a LOT of fun making it!  Remember! If you would like to get a FREE/Bonus Shimmerz product with your next order of Shimmerz Paints, be sure to mention my name 'Gabrielle' in the 'Instructons to Merchant/or Seller' part of your order.  You will receive a free Shimmerz product in the color of your choice!  You can shop for Shimmerz Paints HERE.

Thanks for stopping by the Shimmerz Blog today, visit us often for daily inspiration from our creative design team! xo


Sunday, July 27, 2014

Relax with friends by Amy Prior

Hi everyone! Amy Prior back again today to share another scrapbooking layout that I have created using tonnes of Shimmerz goodies. The layout is highlighting a fun group photo from a recent retreat I had the pleasure of attending and I just couldn't wait to scrap it. Having fun relaxing and scrapbooking with friends is my favorite way to spend a weekend!


My background for this layout was created using some of the fabulous new Shimmerz Inklingz plus some Shimmerz Texturez Paint. The Inklingz were painted in circles onto a non-stick craft sheet and I have then stamped my paper over the top. I repeated this step with 3 different colors of the Inklingz and just love the cool circle effect it gave. I have then added the Shimmerz Texturez paint through a stencil using a Palette Knife. 


The large circle chipboard frame was painted using lots of different shades of colors in the Shimmerz Inklingz to create the appearance of texture and shadowing. I have also added some leaf spray chipboard pieces that I have painted with Shimmerz Dimensionz Paint before adding some Shimmerz Spritz spray over the top.


The finishing touches on my chipboard was to add some yellow added in the little circles using Shimmerz Dimensionz which helped tie the yellow back in to the rest of my layout. The flower cluster was formed using various vines as a base and then a tonne of gorgeous Petaloo flowers. 


Shimmerz products used in this project include...
Shimmerz Texturez Tidy Widy
Shimmerz Dimensionz Green Thumb
Shimmerz Dimensionz Streets of Gold
Shimmerz Spritz Olive Branch
Shimmerz Inklingz Good as Gold
Shimmerz Inklingz I'm not Limon
Shimmerz Inklingz Blue My Mind
Shimmerz Inklingz Pink-a-Boo
Shimmerz Inklingz Beets Me
Shimmerz Inklingz Spotlight White
Shimmerz Inklingz Pugnacious Purple
Shimmerz Inklingz Giddy about Green
Shimmerz Inklingz Me and Blue

Thanks so much for stopping by and don't forget you can head over to the Shimmerz store here to purchase any or all of your favorite Shimmerz products. Until next time...

Amy Prior xx 


Tuesday, December 22, 2009

Last minute Christmas tags

Do you need a quick, last minute gift tag? I have a solution. I didn't have any white tags so I made these by cutting some white cardstock, punching a hole and adding a white reinforcement label. You can find it at an office supply store.

I punched several 3/4" circles and arranged them randomly on the tags. I sprayed the tags with Olive Branch Shimmerz Spritz. Once the circles were removed I had this beautiful background. Next, I used Licorice Shimmerz Spritz to lightly spray over the tags.

I embossed the bottom edge of the tags with embossing folder from Cuttlebug.

I die cut stars from red felt, or you can trace a star on any shape that you like. I painted the white flowers with Mossy Stone Shimmerz paint. I added hemp cord, a little glittery pom pom and names of the recipients stamped on the paper strips that I sprayed with Olive Branch Shimmerz Spritz.


I hope you give these tags a try.

Thursday, December 17, 2009

Shimmery Christmas Trees


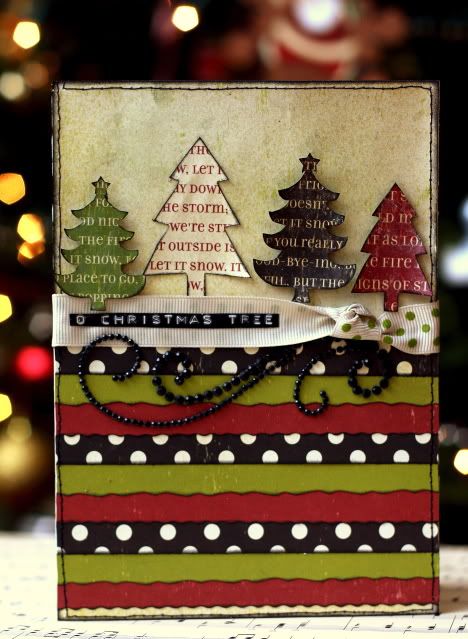
I used Purple Cows 2-in-1 Trimmer along with designer blades 2801, 2803, 2810, and 2811 and Making Memories Mistletoe line to create this Christmas card. It was very simple to make! I just cut strips of patterned paper using the different blades and layered them along the bottom of the card.

I spritzed the top portion with Olive Branch Shimmerz Spritz, cut the trees from patterned paper, painted them with Pixie Dust Blingz and adhered with foam adhesive. I added a few little embellishments and now I have a great accompaniment to any gift or cute a gift card holder!

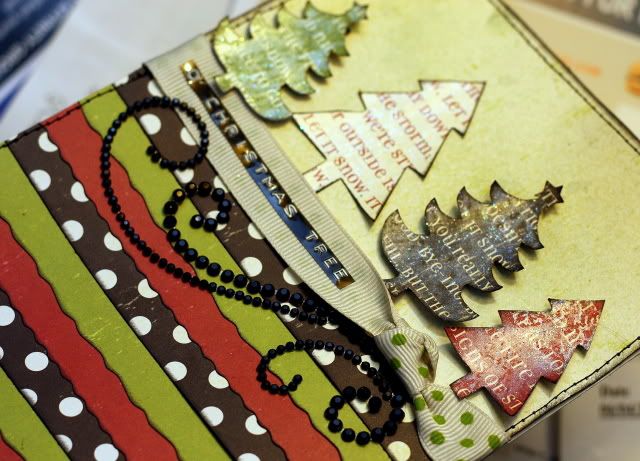
Here's a close-up of the different borders and the bling.

supplies: patterned paper- Making Memories, cardstock- Bazzill; ribbon- Junkitz; Iridescent paint and Shimmering Spritz- Shimmerz Paints; gems- Zva; label- Dymo; trimmer- Purple Cows; adhesive- glue arts, glue dots int'l; ink- -clearsnaps

Add a little sparkle to you holiday gifts!

Tanisha

Friday, December 11, 2009

Sparkly Background

I wanted to try something different on this page. I decided to use my Shimmerz to create an ultra-sparkly background cardstock for this layout of my daughter.


I began with a light tan cardstock base. Next I Spritzed the entire sheet using Olive Branch and Treasured Hymn Spritz. I loved the way it looked but I wanted to take it a step further, so I dry-brushed on streaks of Gold Glimmer Blingz and Key Lime Shimmerz. I absolutely LOVE the way it turned out . . . sort of a rustic take on glitz.


Thanks for coming by!
Jana

Tuesday, December 1, 2009

Double Masking Technique


Hello everyone!! I am so excited to share with you this technique. It was supposed to be a video, but my little guy got hold of my video camera one day. I took it and hid it from him and forgot where I put it! I found it after the fact, thank goodness...hiding in plain site--LOL!


I did, however manage to take step-by-step pictures of my technique. I hope you'll enjoy it and try it out for yourself! I created this layout of my little cuties using the gorgeous December Kit from Timeless Daydreams. I really wish you could see this in person! The sparkles are so beautiful, it would make your eyes water! I even spritzed the Prima package insert with baby's breath shimmerz!
This layout was created using a Sketchy Thursdays sketch.


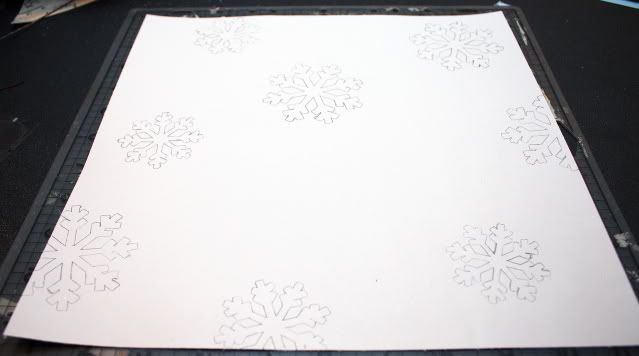
To create the first part of the mask, I started out with a plain piece of white paper trimmed to the same size as my background; in this case 11x11. (NOTE: use a cheap piece of paper for this, instead of cardstock. I used one of the inserts from an album protector sheet.)


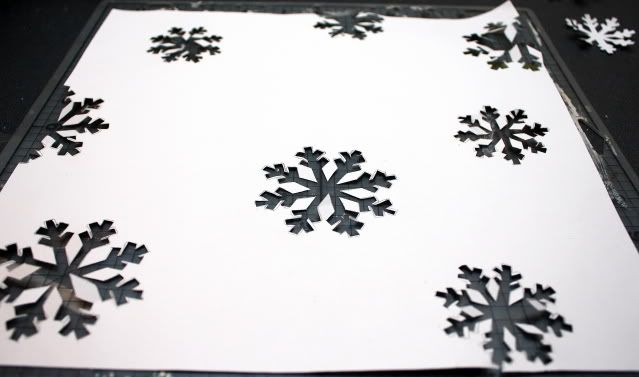
I sporadically placed Heidi Swapp acetate snowflakes on the paper and traced them.

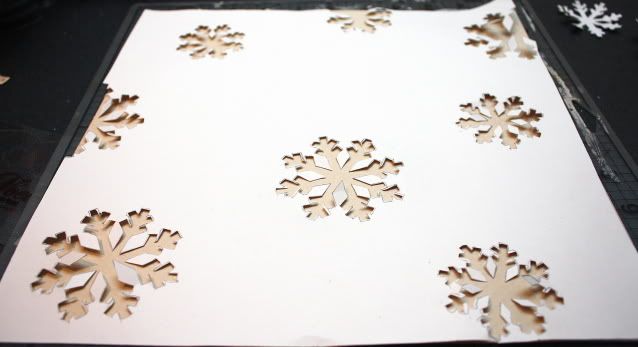
Using a craft knife and a pair of microtip scissors, I very carefully cut the snowflakes from the paper. This is going to serve as a mask for the stamping portion of the technique.

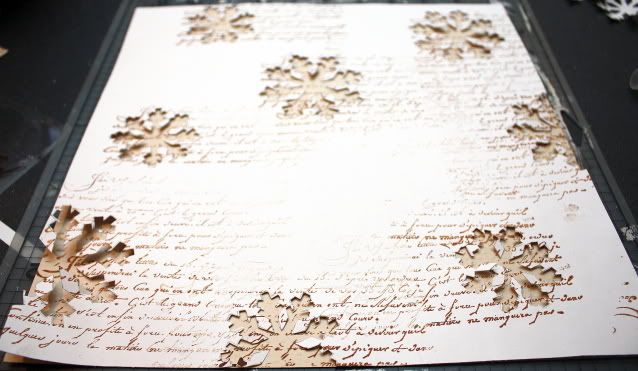
I then placed my mask over my 11x11 piece of background paper. I used Bazzill Swiss dot because it adds a little extra texture.

Next, I stamped the french script image across the negative snowflakes. You could use any small image for this part.

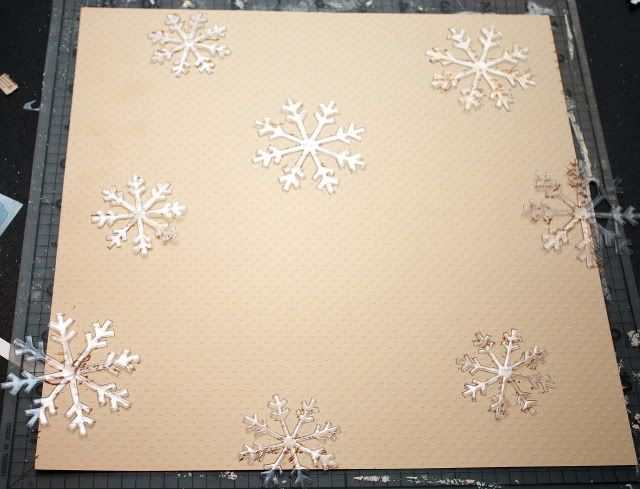
I then removed the white paper and placed the acetate snowflakes over the stamped images. This is for the second part of the masking technique.
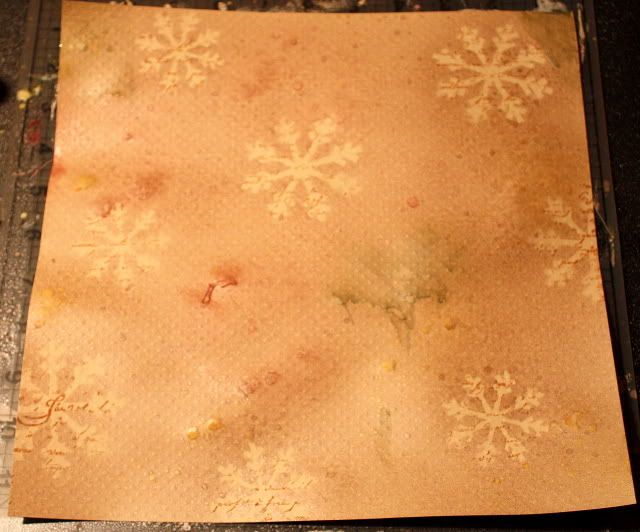
Next, I spritzed mudpie, olive branch, and barn door Shimmerz Spritz across the entire background. (NOTE: the reason that I used acetate snowflakes is because Shimmerz cleans up really easily. I just wiped them off with a piece of paper towel. )
When I removed the snowflakes, this is the result. I used my heat gun to dry the background. Shimmerz normally dries really evenly, but I found that by concentrating a heat gun over the larger drops, gives you the splattered look.

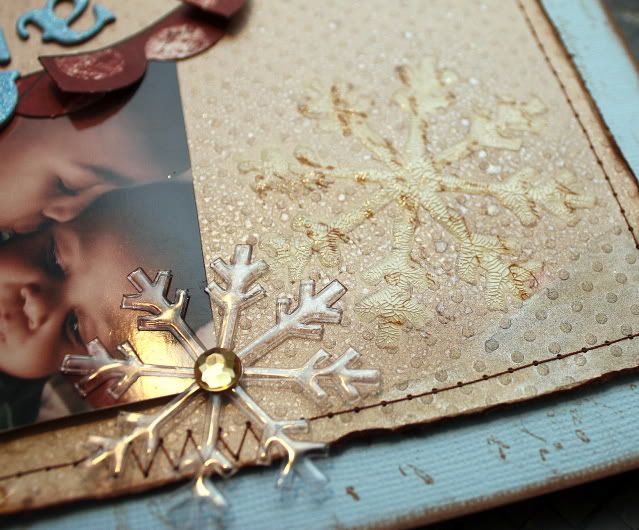
Here's a close-up of the snowflake. At this point, you can highlight your snowflakes, if you chose, with a pen, hand stitching, stickles, etc... I chose to to use Ranger's crackle accents and I just love the added texture it creates. The crackling also adds to the vintage feel of the layout as well!
The acetate snowflake seen here is one of the same ones I spritzed over. Just a little wipe and the spritz is gone...easy peasey!

I loved creating this technique; but to tell the truth, when I do it again, I'm going to use a shape with a little less detail, like a circle or something. The snowflakes were a little tedious, however, I did get a second use out of them.
All of the snowflakes that I carefully cut from the paper (in step 1 of the technique) were used on this next layout. I lightly spritzed them with seafoam, treasured hymn, and mudpie Shimmerz spritz and then stamped with the same french script stamp (one of my faves).

here's a close-up of a snowflake

I hope this post has inspired you to head out and grab some Shimmerz! There's no right or wrong way to use them!!!