Showing posts with label Chocolate Brownie Coloringz. Show all posts

Saturday, September 22, 2018

Fresh Start with Julee Tilman

Hi friends! Today I'm sharing my first card for Shimmerz. I fell in love with their beautiful products earlier this year when I asked for a sweet little collection of colors for Valentine's Day and now I am so excited to have been selected to join their card creations team! I'm a stamper at heart, and the beautiful new line of stamps, combined with all the gorgeous colors in the Shimmerz line have me giddy to create!


I started my card with a simple smooshed background. I cut a 4 x 5.25" panel of tan designer paper, then sprayed a bit of Chocolate Brownie Coloringz (Coloringz are vibrant, highly pigmented sprays with no shimmer) on a piece of acetate packaging and then smooshed onto the designer paper. I love the subtle painterly effect it gives! Would love my walls to have this exact treatment (but wouldn't love to do it myself - haha)! I splattered some of the leftover ink, then sponged around the edges lightly with a brown ink pad.


Next I pulled out the lovely Fresh Start Stampz set. This set has some beautiful multi-step floral imagery as well as sweetly lettered sentiments. I was particularly drawn to the every day is a fresh start sentiment, since I'm starting this new journey with Shimmerz.  So I stamped the sentiment on a die cut circle  and set it aside while I got to work on the flowers.

I started with the solid flower, inking first with clear Versamark ink, then adding Lil' Yellow Skool Bus Coloringz on my craft mat and then picking up with a waterbrush to give the stamp a good coat of yellow. Next I stamped the detailed flower in a salmon color and then the outline flower in brown.  I stamped three flowers all together, then fussy cut them, cutting just the center portion of one in order to add a little dimensional pop to the flower center. I used a makeup brush to pick up some of the leftover inks and sponge around the edges of my cut flower and the sentiment circle.


Since I had picked an autumn palette, I gathered a few fall embellishments... leaves from a floral pick from Hobby Lobby, a wooden leaf and some sequins from Target.  The sequins were a shiny gold, but I wanted a more subdued color, so altered them with a mixture of Tidy Widy Texturez (a fabulous white texture paste) with a few sprays of Chocolate Brownie Coloringz and some Coffee Shimmerz (Shimmerz is a beautiful super sparkly paint), then painted the sequins. I also gave the wooden leaf a coat of Coffee Shimmerz, then  pulled everything together with a raffia bow. I dipped the bow in chocolate brownie ink, then added a few rhinestones and glued everything down. For a little extra shimmer I added a bit of Limoncello Shimmerz to the orange leaf and some highlights on the lower layers of the flowers.

Thanks so much for stopping in today! If you need some Shimmerz in your life (and who doesn't?, remember to put my name, Julee Tilman, in the comment section when you place your order. ðŸ˜€ And today's the last day of our fall promotion. Be sure to use code FALL2018 for 20% off your order through tonight (Saturday, 9/22)! Happy shopping!


What's in it?
Stamps: Fresh Start (Shimmerz Paints)
Paper: Thankful Heart (Recollections), cream, early espresso
Ink: Chocolate Brownie and Lil' Yellow Skool Bus Coloringz, Coffee and Limoncello Shimmerz (Shimmerz Paints), Salmon, Palomino, Cattail Colorbox Dye-Stress inks (Clearsnap)
Accessories: Tidy Widy Texturez (Shimmerz Paints), autumn wood cuts and floral picks (Hobby Lobby), sequins (Target), rhinestones, raffia

Friday, November 6, 2015

Autumn card with Yuko

Hello!ShimmerzFriends! Yuko here.
Today  I want share with you "Autumn card".


【Autumn card】

I used to make a base   shimmeringz(Heavy Metal) COLORLINGZ(Chocolate Brownie) VIBEZ(Egg Noggin').

I gave the light and shade more in SHIMMERZ(COFFEE)(Sunflower)(marigold) BLINGZ(SPICED CIDER) after I dried it.


INKLIMGZ (TRANISHED TREASURE) was used for a chipboard.
Pearl sense of INKLINGZ is beautiful!


Mist
 Shimmeringz(Heavy Metal) 
COLORLINGZ(Chocolate Brownie) 
VIBEZ(Egg Noggin')


SHIMMERZ
COFFEE
Sunflower
marigold


BLINGZ
SPICED CIDER


Thank you!


Saturday, August 1, 2015

Textured Journal Covers with Gabrielle {Video Tutorial}


Hello friends! It's Gabrielle here with you today to share an art journal cover I recently made using beautiful Shimmerz Paints, Dusty Attic chipboard and a variety of new stencils I designed for The Crafter's Workshop.  The Stencils I used were 'Tuscan Wall', 'Moving Vines' and 'Organic Matter'.  Because I was going for the warm colors of Tuscany, I went with yellows, blues and greens with a hint of sepia.   Here are the Shimmerz Paints colors/products I used for this project...


Shimmerz Products Used:
~ Heidi Ho Blue Coloringz
~ Glorious Day Vibez
~ Chocolate Brownie Coloringz
~ Taupe of the World Vibez
~ Bamboo Leaf Spritz
~ Olive Branch Spritz
~ Emerald City Inklingz
~ Artichoked Texturez
~ Pumpkin Shimmerz

I did a video recording, a sort of step by step of the making of this journal cover (front and back) if anyone wants to recreate the look.   So take a break from the hassles of your day and let creativity flow your way! Enjoy! 


This was so much fun to make, I hope you enjoyed watching my video tutorial as much as I enjoyed creating this project!  Here are a few close-ups, that you can check out at your leisure....


Here's a view of the back and front cover.  I was going for a kind of aged, sun-warmed Tuscan doorway look.  I began by adding lots of textures using my stencils, and then just started layering on the paint colors starting with the lightest (Glorious Day Vibez) to the darkest.(Taupe of the World Vibez).


For the door, I brushed the Heidi Ho Blue on with a paint brush rather than spritzing it on, so that I would get streaks in the chipboard resembling woodgrain.  Then I lightly dry brushed some of my white Gesso over it to give the blue a more sun-bleached look. I finished the aged look by using a stamp I designed for The Scrapbook Diaries called Crackle Textures....I used the crackle paint stamp on the door and the peeled paint design on the walls.


For my vine corner, first I used my TCW 'Moving Vines' stencil with some texture paste, the  began to layer on my greens (Bamboo Leaf and Olive Branch Vibez).  For the chipboard I used the Chocolate Brownie Coloringz for the 'wood frame' and Emerald City Inklingz for the leaves.  


For the Ivy vine, I used my all-time favorite color of Texturez called Artichoked on the Ivy cut out on my Tuscan Walls stencil.  And finally I used a very light brushing of Pumpkin Shimmerz for my cracked brick design.

NOTE:  Don't forget to get your FREE/BONUS Shimmerz product in the color of your choice with your next Shimmerz Paints order....Just mention my name 'Gabrielle' in the 'Instructions to Merchant/Seller' part of your order, and presto! Stacey will bestow an extra Shimmerz product upon you!  Perfect if you're like me and have a hard time narrowing down the colors you NEED! :P

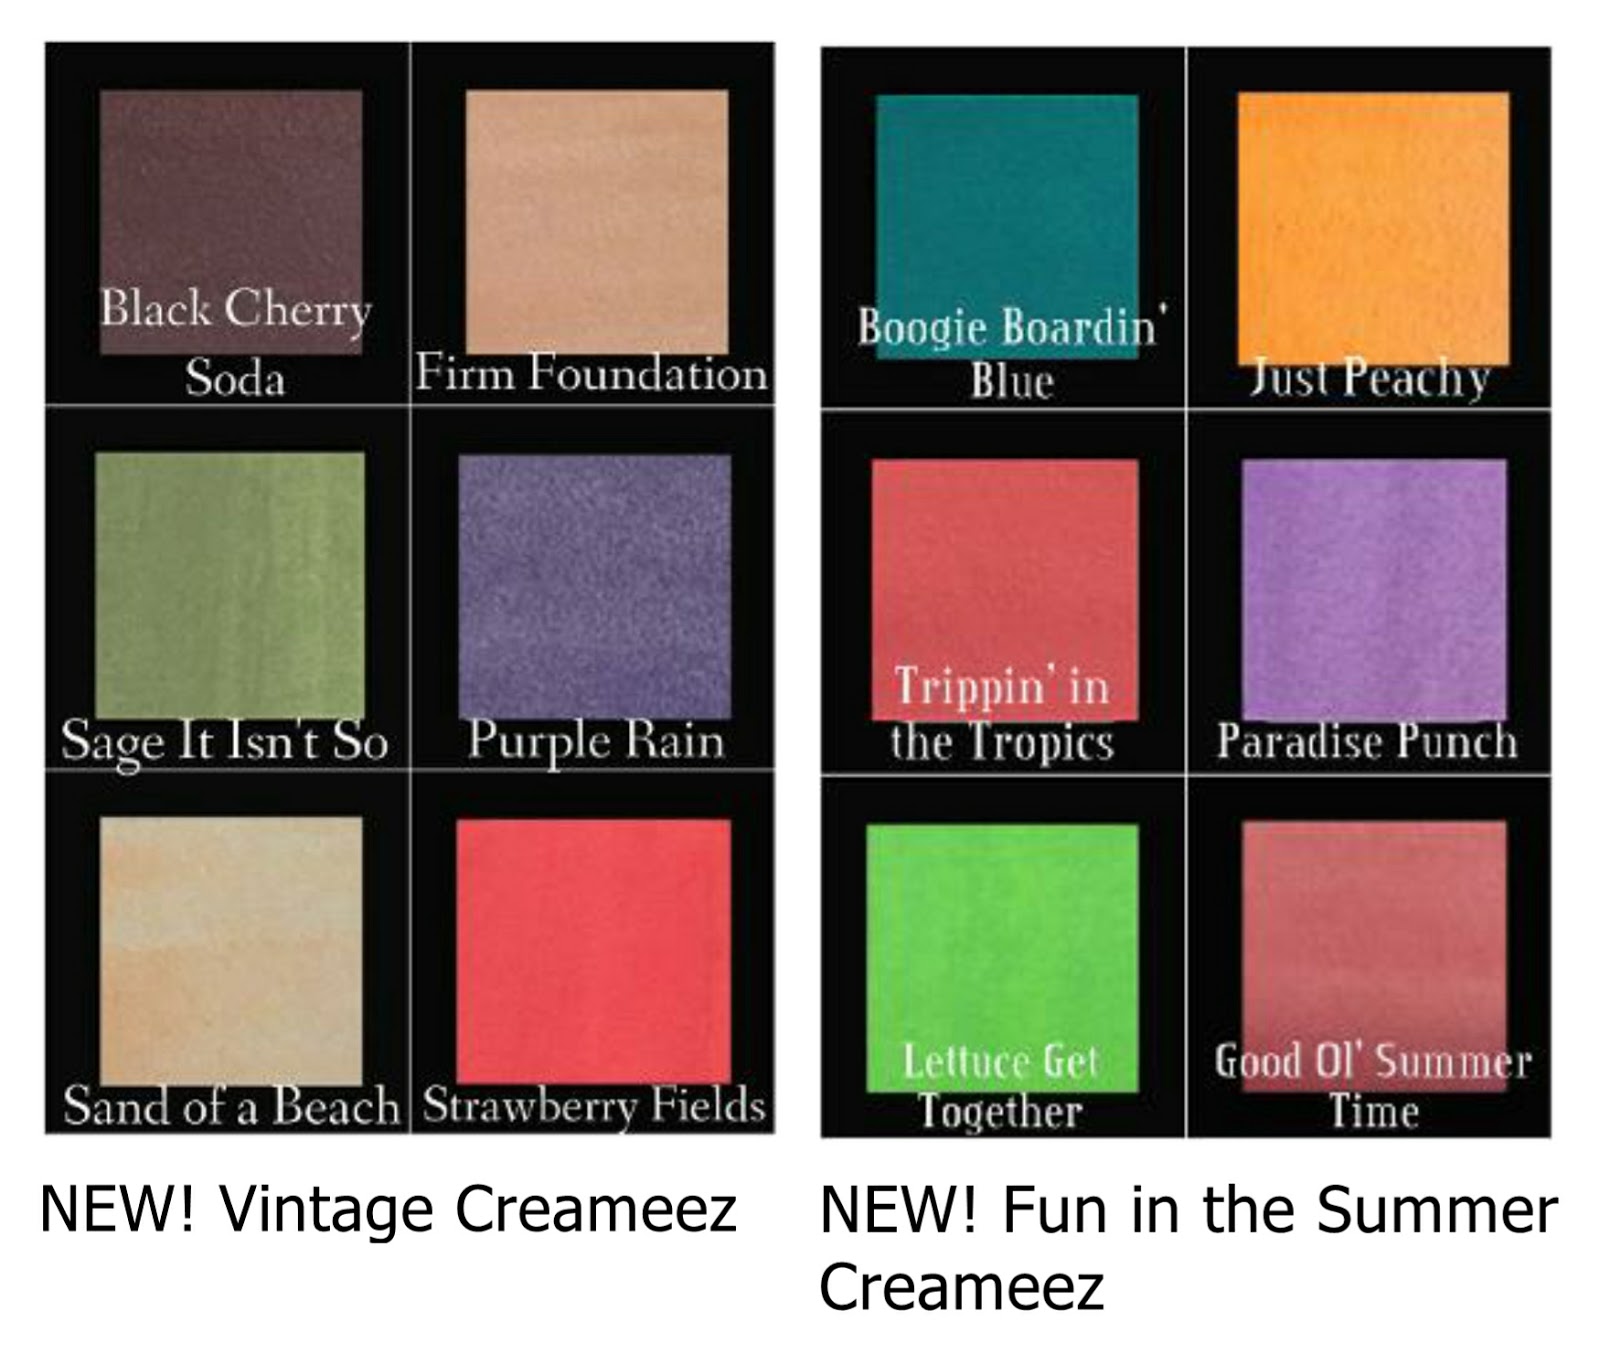
....AND....If you haven't heard the exciting news yet, Shimmerz has brought out a whole bunch of gorgeous new colors for their summer release!  I'm super excited to give these lovely colors a go!  I recently have been playing a little more with the Creameez paints and I just love the matte watercolor look they can give to a project!...I sat here trying to pick some favorite colors, but it's so hard to do, they are all so yummy! (Firm Foundation, Sage It Isn't So, Good Ol' Summer Time...seriously, how cute are those names too!). What's your favorite?


Thursday, July 9, 2015

Painting Watercolor Style with Gabrielle {Video Tutorial}


Hi All, Gabrielle here with you today to share my latest layout using Shimmerz Paints!  I find for the past year or so I have found myself obsessed with the look of watercolor paints, I just love the pretty translucence of it.  So for my project today I thought I would take some watercolor paper and Shimmerz Paints and create my own watercolor background design.


These are the Shimmerz Paints products I used on this page (above).  REMEMBER....if you are looking to order some Shimmerz Paints products, just mention my name 'Gabrielle' in the INSTRUCTIONS TO MERCHANT/Seller part of your order and you will receive a FREE/Bonus Shimmerz Paint product in the color of your choice! :)  You can order your Shimmerz Paints HERE.

As always, I have created a step by step video to show you how this page was made, hope you enjoy!....


Here are a few close-ups of the page to enjoy at your leisure....


I used some new Dusty Attic chipboard designs for this page design (Spring Blossoms #2), first giving them a coat of white Gesso, then applying my translucent color layers.....allowing the colors to lightly bleed into each other as watercolors are apt to do.


I painted the butterflies using a BoBunny Butterfly stamp with a very light ink just to give me the barest outline of the butterfly.  Then wet the wings with plain water and just dabbed in a little color with the Shimmerz paints (Heidi Ho Blue Coloringz, Power to the Purple Creameez, Glorious Day Vibez).  I then added a bit of background stamping with a few of my own stamp designs (Script and chickenwire....these can be found at The Scrapbook Diaries).


I also masked off a section of the background paper behind the photo to create a color block on which I used the Glorious Day Vibez, Chocolate Brownie Coloringz and let some of the Heidi Ho Blue Coloringz run into it so that it seems like the flower is bleeding some of its color onto the background.

I hope you enjoyed today's post and hope you give some of the techniques I employed a try, ....happy crafting! xo


Thursday, April 9, 2015

Steampunk Canvas Video Tutorial by Gabrielle Pollacco


Hi All! Gabrielle here with you today to share a new project I made up using a unique elongated canvas and some really fun Shimmerz products! I've always wanted to try doing one of these long canvas's and I found myself one in a nice manageable size for my first try, this is a 4x12 inch Artist Loft Canvas that I found at my local craft store.


I was going for a metalic/verdigris look for this one so I chose these colors and products for this project:

~ Mandarin Mai Tai Coloringz
~ Olive Branch Spritz
~ A Shade of Grey Coloringz
~ Chocolate Brownie Coloringz
~ Before the Dawn Coloringz
~ Ride the Tide Creameez
~ Miner Miner 49er Inklingz
~ Giddy about Green Inklingz

I will take you through the whole process of creating this project, from making the heart centerpiece embellishment to layering on all these lovely paint products.  So grab yourself a cup of coffee/or tea, relax and enjoy!....


I hope you enjoyed watching my step by step on creating this canvas!  Here are a few close-ups of my page .....


Close-up of the air dry clay heart I made as centerpiece for this project as well as some of the Dusty Attic chipboard pieces I used to make up the canvas design.


I added some textures with molding paste and some stencils and used the Shimmerz NEW 'Ride the Tide' Creameez and 'Giddy About Green' Inklingz with 'Miner Miner 49er' Inklingz to get the verdigris (aged metal) look.


Thanks so much for stopping by the Shimmerz Blog today! You can order your paint products at the Shimmerz Paint Store HERE.   Remember if you would like to have a FREE/Bonus Shimmerz product in the color of your choice, just put my name 'Gabrielle' in the 'Instructions to Merchant/Seller' part of your next order!  xo