Showing posts with label Christmas Card. Show all posts

Friday, November 29, 2019

Vintage St Nick

Hello All! 

Anyone else in full blown Christmas mode?  Yep, less than a month away.  That means Christmas cards need to get done. 
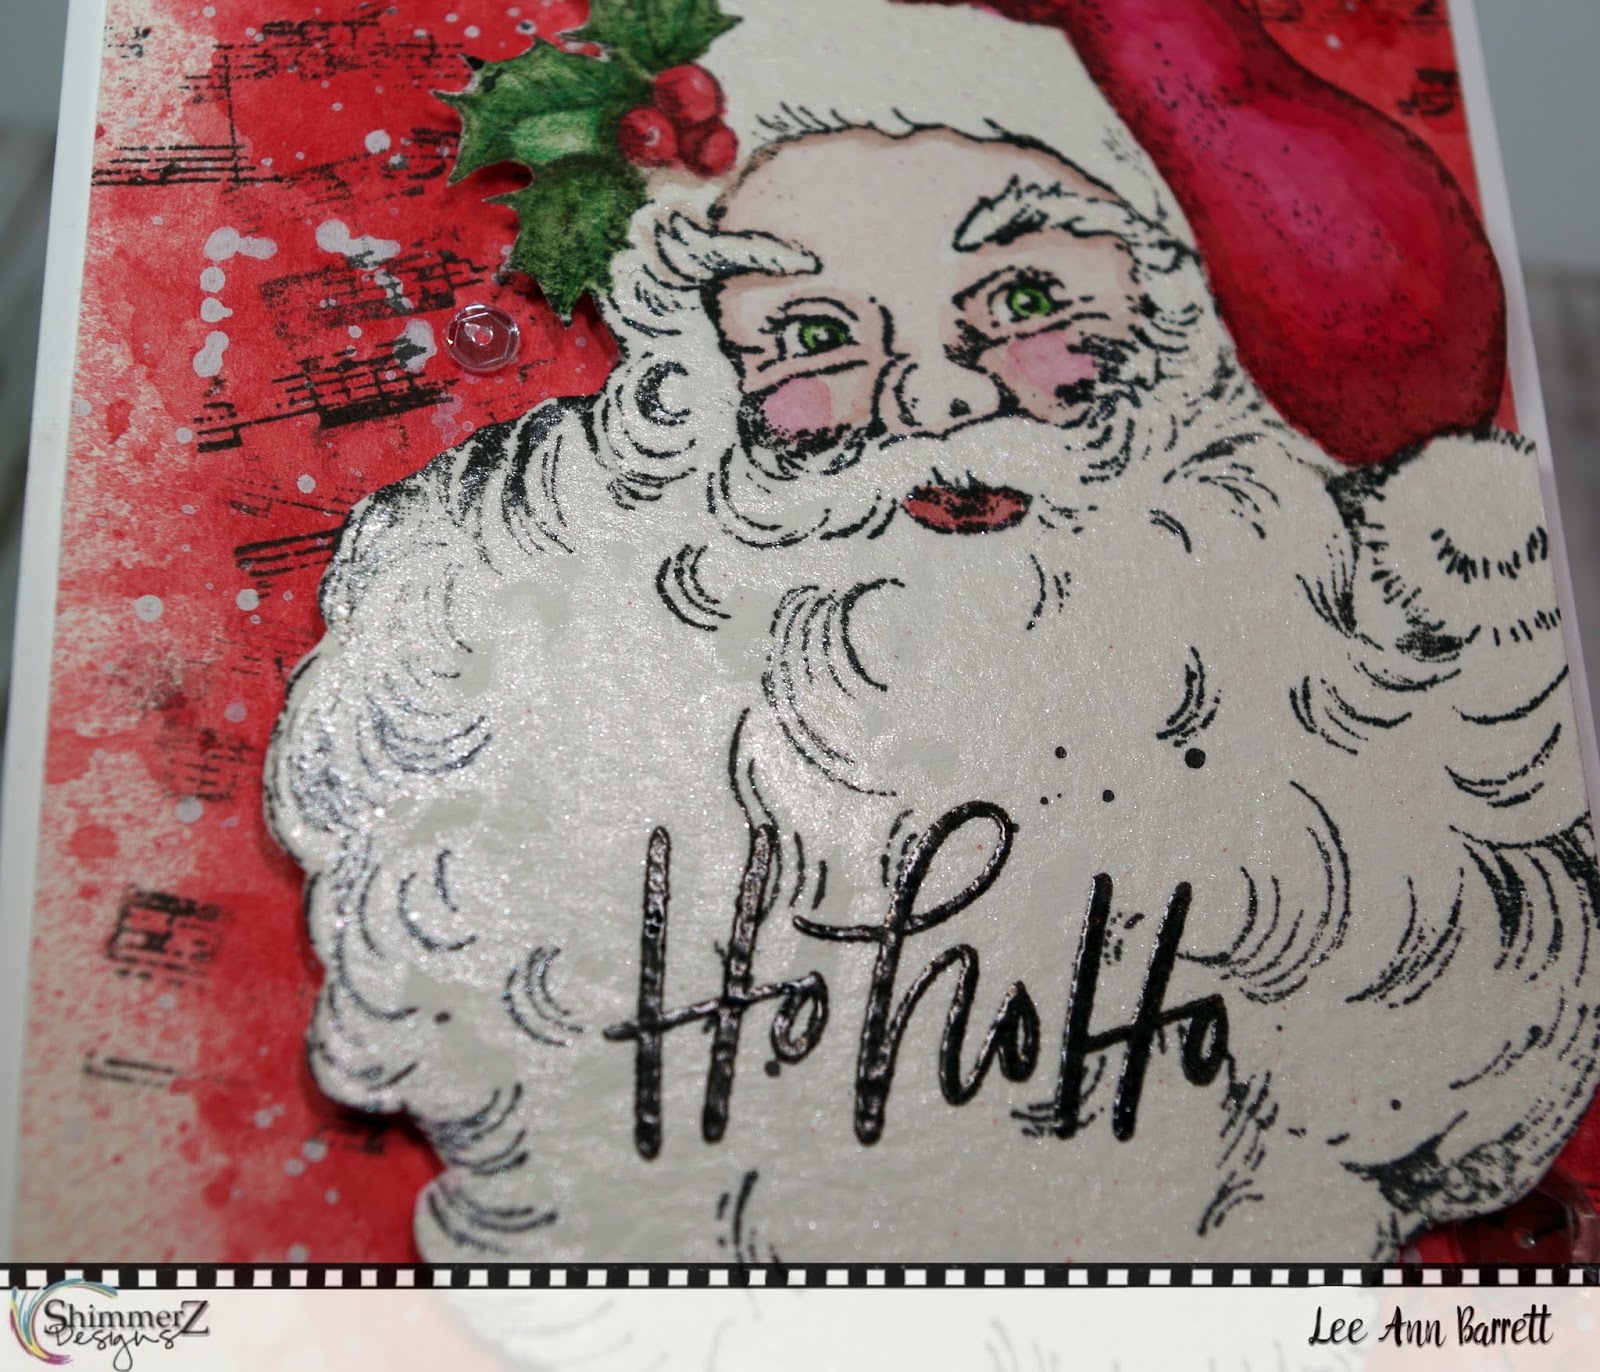
I wanted to use this gorgeous vintage Santa from Stampendous.  When I think Santa, this is what is in my head!


Now I am going to date myself here.  Ages ago, I had 12 x 12 vintage Christmas scrapbook paper from Daisy D's.  I was going for a similar look as this paper, seen below~


I stamped my Santa in Inkon 3 ink and then colored the hat with Scarlet's Fever Coloringz and Pink Stilettos Coloringz.  I also used Keep Palm mixed with the Scarlet's Fever to create a brownish grey for shadows.  The mix of the pink and the red give it a nice vibrant color.  The holly was painted with  Keep Palm Coloringz.


At this point, I decided I would like the image better with a black outline, so I stamped over it with Versafine Black ink.  I then used the same colors- Stiletto Pink Coloringz, Keep Palm Coloringz and Scarlet's Fever Coloringz for the face.  Yep, using color theory, the mixture of these colors yields perfect colors for shadows.  Santa's beard is all sorts of shiny as I used Angel Wings Shimmerz


After fussy cutting Santa out, I worked on the background using the packaging technique.  In the end, I found that the best tool for applying the Scarlet's Fever Coloringz for the look I wanted was my finger! 
Once dry, I added white acrylic paint spatters.  For added texture and depth, I stamped some music with a texture stamp from Sweet n Sassy Stamps.  I added a smidge of detail on the holly with colored pencils, the heat embossed the sentiment onto the beard.  Santa is popped up on dimensionals and a few sequins were added to finish it off. 


So what do you think?  Did I succeed in making a card in the style of the Daisy D's scrapbook paper?  Would love to hear your thoughts! 
That's it for me!  Happy shopping if you are braving the crowds today.  Don't forget to shop at Shimmerz Paints today!  Today ONLY, you get 30% in the WHOLE shop!
 If you choose to stay home and craft (raising hand here), happy crafting!


Lee Ann 

Wednesday, November 20, 2019

Holiday Cheer | Julee Tilman
Hi Shimmerz friends! It's Julee Tilman popping in with another shimmery card creation. This go round, I wanted to just watercolor, so pulled out a large flower stamp and some favorite Shimmerz colors and got to work.


The poinsettia image is embossed in white on a large panel of watercolor paper.  I then colored the poinsettia with Great Fruit, the greenery with Emerald City and did a wash around the image with Ride the Tide. I love how soft these colors are.


Next I got out a Cut-Align ruler and pen knife to help me cut the panel down to card front size without cutting off the petals or leaves. This large stamped image is larger than a card front and I love the way it just kind of sprawls off the edges.

Once the panel was cut, I added the stamped sentiment, then masked off the flower and sentiment with the stamps and splattered some Well Blue Me Down and some Snow Storm splatters around the edges.


A black mat sets it off and helps ground the sentiment a bit.  I embellished with some holeless sequins, a few pearls and a bit of sheer ribbon to finish things off.

Thanks so much for stopping by today! I hope your day Shimmerz!

If you're in the mood to shop, enter my name (Julee) in the comments when you place your order for a free mini surprise.


Wednesday, October 23, 2019

Mango Tango Bright Spirits | Julee Tilman

Hi Shimmerz friends! It's Julee Tilman popping in today to share my October color challenge creation. I selected Mango Tango Vibez for the challenge. This is one of those misunderstood colors I think. I've actually put it in my cart at least 7 times, then realized I already owned it, but hadn't used it. As I started playing around with it, I realized where the disconnect was happening. I kept thinking it was a rusty orange (the old website swatch was more orange in color, and mangos are kind of orange right? And hooray for the new website, am I right?). But Mango Tango is actually this gorgeous light red/coral color. Add in the shimmer of Vibez and this is one BEAUTIFUL color!


So I started with the idea of using a stencil with the spray and some paste, but changed gears when I set my stencil down on a page to clean it and fell in love with the resulting ghost print. I jut had to use it, so cut it down to card size and then pounced some Angel Wings Shimmerz randomly around the panel with a stencil brush to create a snowy feel.


I then pulled out the Filled to the Brim stamp set I illustrated and stamped the coffee cup, then watercolored with Mango Tango Vibez and fussy cut.  The sentiment is stamped on a circle die cut, then I layered them together adding in some greenery die cuts from pine cardstock. I pounced on these with more Angel Wings and also flicked some Snow Storm Vibez for a little more texture and depth.


Next I took a newsprint tag from my stash and spritzed with Mango Tango, covered the bottom with a bit of washi tape and then accented with a seam binding bow and a couple jingle bells.

Now it's your turn! Our entire team is trying one color that we normally wouldn’t choose. Something that helps us branch out and grow as designers. Come join us! Use the hashtag #shimmerzcolorchallenge to share your projects and how they inspired you to try something new. We can’t wait to see what you create!


As always, if you feel inspired to do a little shopping in the Shimmerz Shop, leave my name in the comment section of your order for a free surprise.


Monday, November 28, 2016

A Quick Card using Shimmerz Christmas Set

Hi There Friends,

There is nothing better than receiving a handmade
Christmas Card in the mail.

So today I wanted to share with you a Quick Card Tutorial using
Shimmerz Vibez Snow Storm & Velveteen Green
from the Shimmerz Christmas Set.


For this card I wanted to show you how easy it is to create a
chalkboard effect border using the Shimmerz Vibez Snow Storm 
and Black Cardstock.

I used my Limited Edition Clique Kit for Christmas Cards
which featured the My Minds Eye - Comfort and Joy Collection.

Here is a close-up:


How gorgeous is that Merry Christmas chipboard
that I colored using Shimmerz Vibez - Velveteen Green.
I think I have a new favourite!

Here is my tutorial for you to watch.


Thanks so much for stopping by!!

Merry Christmas and a Safe and Happy New Year to you.


Saturday, December 5, 2015

Sepia Christmas Card with Astrid

Hello Shimmerz visitors, lovely to have you visiting today.
I think like many of us, I am in full Christmas card making mode, - this time I have one in sepia tones to share with you.
I used three Shimmerz products only for this project:
I took some 5 x 7 smooth card and ran it through a Snowflake embossing folder.. I sprayed the whole card liberally with Truffle Spritz, added some water and dried it with my heat gun. I then very carefully highlighted the raised bits by dry brushing with some gesso for a wintry effect.
Next I diecut and embossed a large snowflake using the Tim Holtz Layered Snowflake die and matching embossing folder and used the same method to colour it, but darkening it in places with the Tarnished Treasure Inlinkz paint.
I just love the effect of the dry brushed gesso over the wonderful shimmering paints and sprays.
After adhering the large snowflake to the centre of my card it was time to embellish.
I coloured some white ribbon with the Truffle Spritz and threaded it through some lace as shown above.
Next I made a messy bow using the same ribbon, but I had crinkled it while still wet with the spray.

I adhered it to the side of my threaded piece of ribbon and added a little punched out snowflake to the centre.
I coloured a little wooden sentiment with the Tarnished Treasure paint, it only needed one coat, the Inklingz have so much pigment that it coloured the wood just perfectly, giving it just the right amount of silvery tarnished sparkle.
Lastly I darkened the background around the large snowflake with the Before Dawn spray, using a paint brush, - this to help it pop a bit more against the quite busy background. I adhered the card to a precut folded bit of card and that was it.

Well, I hope you like my shabby card and that you are having fun with your own Christmas and seasonal crafting. Don't forget, you can order Shimmerz products directly from the Shimmerz Paints Store. If you do,  mention my name (Astrid Maclean) in the «Instruction to Merchant/seller» part of your order form (just below your name and address). After clicking «add», you'll get a FREE product in the color of your choice. And for people from outside the US, Shimmerz do a really good deal on postage!
Thanks for your visit today and see you next time!

Friday, November 27, 2015

A snowy Christmas by Astrid

Hello lovely visitors, thanks for dropping in!
It being less than a month until Christmas now (eek) I thought I would share another Christmas card idea with you....
I love making my own Christmas cards and am always on the look out for quick and easy card designs that are easy to send in the mail. Shimmerz products offer the perfect solution.
I used 4 different sprays for this card:
Spritz Rocka Fella Blue
Vibez Princes
Vibez Before Dawn
Coloringz Heidi Ho Blue

I'm sorry that I have no process photos to share, but living in Scotland, it gets dark well before I get back from work, and as I made this in the evening I could only take photos at the weekend.
Here's at least a quick step by step...
I started with a piece of 7.5 by 7.5" neutral toned scrapbook paper. Added texture with a Tim Holtz stencil and Ranger embossing paste (I find this particular paste holds colour better than any others I have tried).

Next I used my sprays, starting with Heidi Ho Blue, followed by Princess, RockaFella Blue and a bit of Before Dawn. When dry I added a die cut (the Tim Holtz leaf) and a little Dusty Attic ribbon slider, which I had coated with gesso. Then I spritzed again, with Rocka Fella Blue. I dried the sprays with my heat gun and then dry brushed with gesso to bring out the raised bits. I love the snowy effect this gives over those blues....
A bit of background stamping, using Watering can Archival ink

A die cut sentiment
And finally some metal corner pieces. These were bright silver to start with. I coated them with gesso, spritzt them with the Rocka Fella and then again carefully dry brushed with gesso.

A vintage Santa image (from a Maja Design collection) framed with some Stampendous EP in aged silver finished it all off.

This card was great fun to do, I hope you like it....
I also hope you are having fun with your holiday projects, and thanks for visiting here like always. But before you leave, don't forget, you can order Shimmerz products directly from the Shimmerz Paints Store. If you do,  mention my name (Astrid Maclean) in the «Instruction to Merchant/seller» part of your order form (just below your name and address). After clicking «add», you'll get a FREE product in the color of your choice. And for people from outside the US, Shimmerz do a really good deal on postage!
Thanks for visiting today and have fun making your own Christmas projects! Shimmerz beautiful shimmering paints and sprays are just perfect for Christmas!

Wednesday, October 21, 2015

It's never to early for Christmas...

I don't know about you, but I love making my own Christmas cards, and as I have quite a few to make, it's never too early to start....
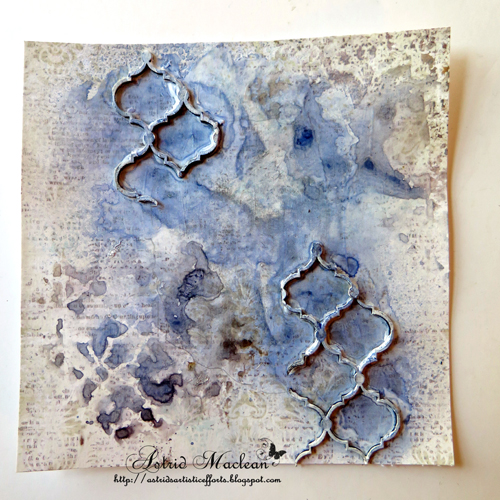
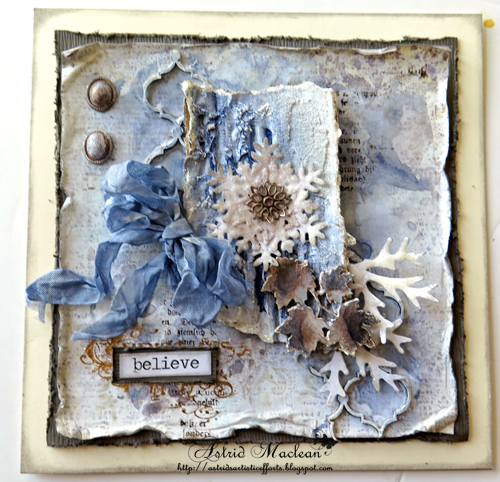
I started with a 5 3/4 by 53/4" piece of scrapbook paper and gave it a few sprays of Spritz Rocka Fella Blue and Vibez Blue Jeans.
I added some bits of gessoed chipboard and gave it some more colour. I also sprayed some of the Vibez straight onto a back ground stamp and stamped it onto the paper for some more interest.
Next I prepared a background panel. I took some corrugated packaging, scraped on a mix of texture paste and sand paste for texture, using a palette knife and when it had dried and cracked, used the same two sprays on that also. I then adhered it more or less to the center of my card. I also did some background stamping with an old text stamp.
I then layered some snowflake dies on top of each other. I covered them with gel medium, sprinkled on Rock Candy Distress Glitter and when that had dried I added some colour with Inklingz in Penny For Your Thoughts, spraying some water so the colour would not get too dark.
Next I took some wooden  leaf embellishments, gave them a coat of gesso and then used the same 3 colours to colour them.
Time to layer it all up on my card. I added a ribbon still, coloured with the two sprays, some brads, again gessoed and coloured in the same way and finally a sentiment.
I wetted the edges of the paper with water and then curled them up and let it dry to give it all a distressed and shabby look.
Next I matted on some dark card and a 7 x 7 card blank and my card was done..

Don't forget, you can order Shimmerz products directly from the Shimmerz Paints Store. If you do,  mention my name (Astrid Maclean) in the «Instruction to Merchant/seller» part of your order form (just below your name and address). After clicking «add», you'll get a FREE product in the color of your choice. And for people from outside the US, Shimmerz do a really good deal on postage!
Thanks for visiting today and have fun making your own Christmas Cards! Shimmerz beautiful shimmering paints and sprays are just perfect for Christmas!