Showing posts with label Keep Palm Coloringz. Show all posts

Friday, November 29, 2019

Vintage St Nick

Hello All! 

Anyone else in full blown Christmas mode?  Yep, less than a month away.  That means Christmas cards need to get done. 
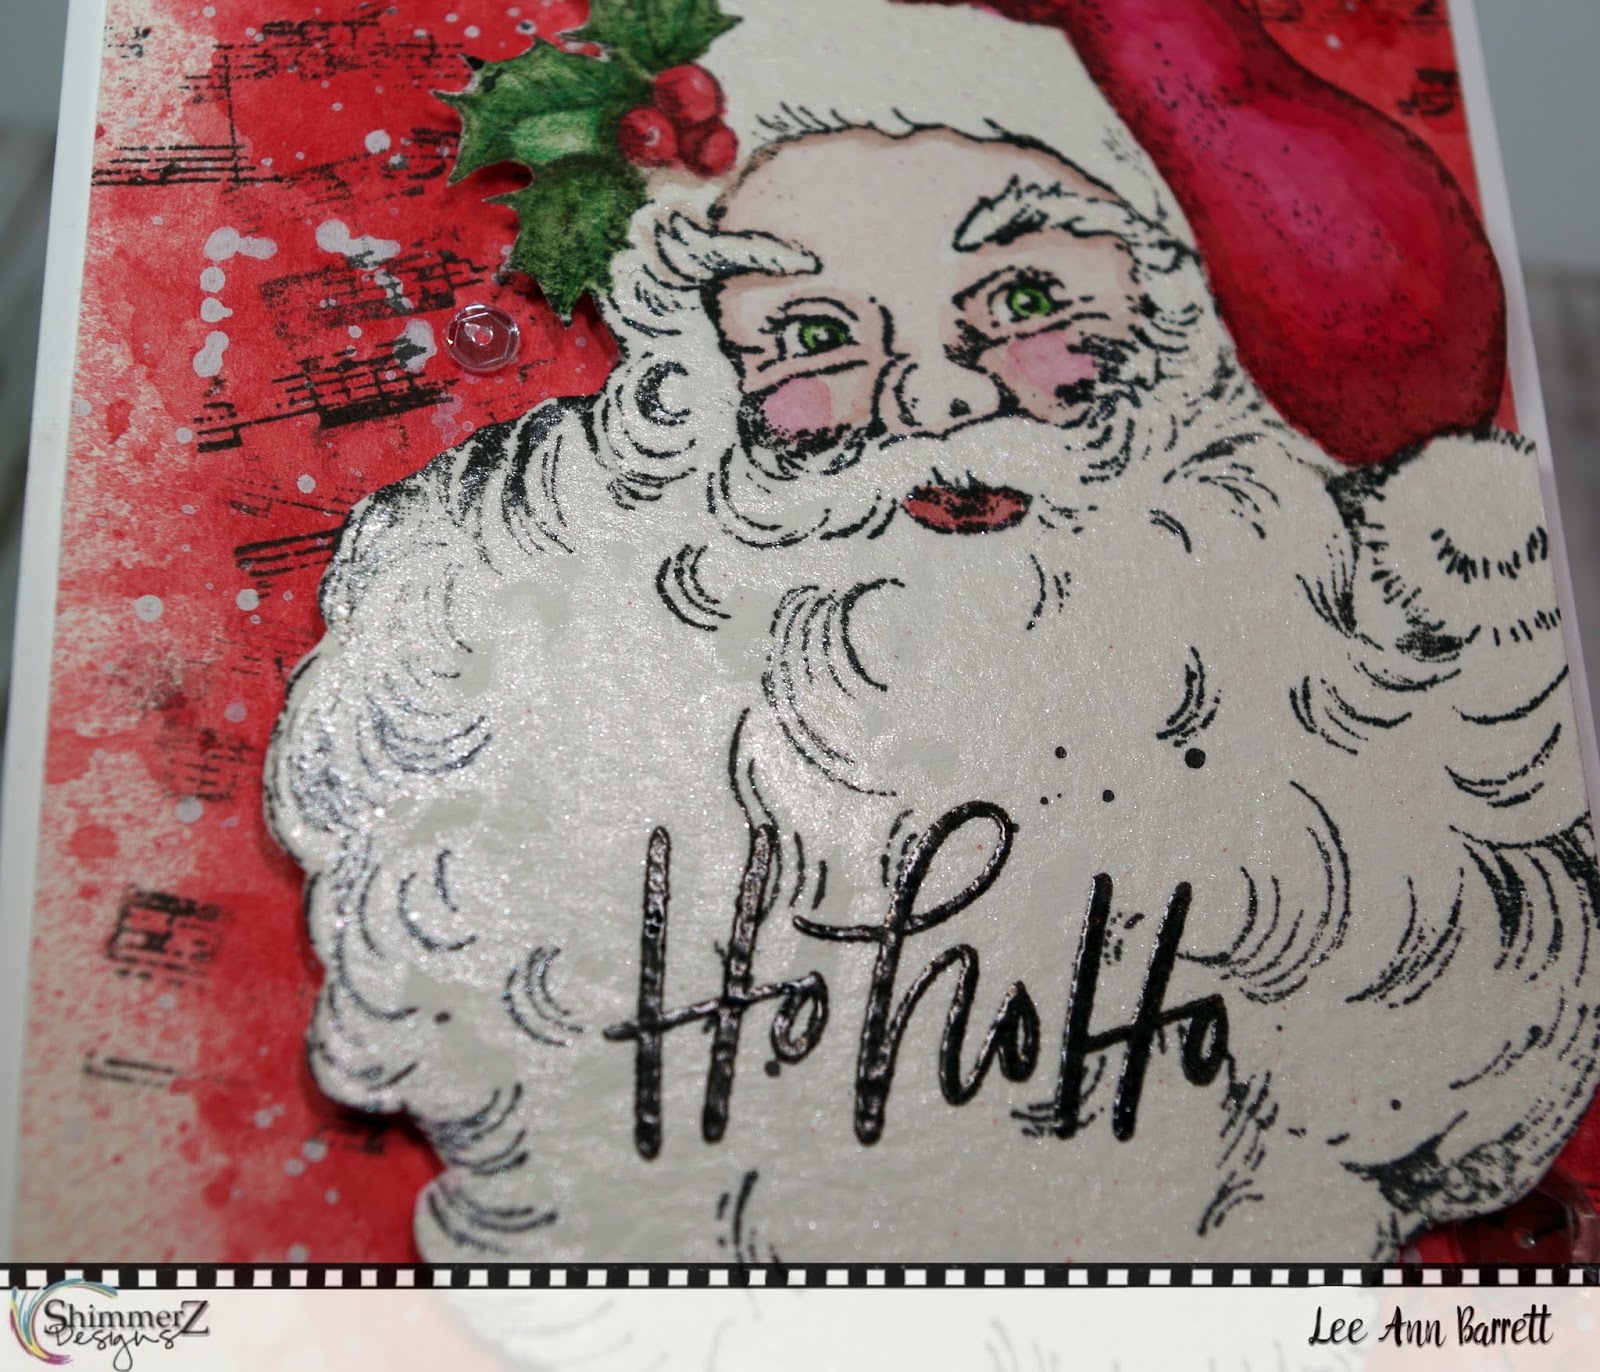
I wanted to use this gorgeous vintage Santa from Stampendous.  When I think Santa, this is what is in my head!


Now I am going to date myself here.  Ages ago, I had 12 x 12 vintage Christmas scrapbook paper from Daisy D's.  I was going for a similar look as this paper, seen below~


I stamped my Santa in Inkon 3 ink and then colored the hat with Scarlet's Fever Coloringz and Pink Stilettos Coloringz.  I also used Keep Palm mixed with the Scarlet's Fever to create a brownish grey for shadows.  The mix of the pink and the red give it a nice vibrant color.  The holly was painted with  Keep Palm Coloringz.


At this point, I decided I would like the image better with a black outline, so I stamped over it with Versafine Black ink.  I then used the same colors- Stiletto Pink Coloringz, Keep Palm Coloringz and Scarlet's Fever Coloringz for the face.  Yep, using color theory, the mixture of these colors yields perfect colors for shadows.  Santa's beard is all sorts of shiny as I used Angel Wings Shimmerz


After fussy cutting Santa out, I worked on the background using the packaging technique.  In the end, I found that the best tool for applying the Scarlet's Fever Coloringz for the look I wanted was my finger! 
Once dry, I added white acrylic paint spatters.  For added texture and depth, I stamped some music with a texture stamp from Sweet n Sassy Stamps.  I added a smidge of detail on the holly with colored pencils, the heat embossed the sentiment onto the beard.  Santa is popped up on dimensionals and a few sequins were added to finish it off. 


So what do you think?  Did I succeed in making a card in the style of the Daisy D's scrapbook paper?  Would love to hear your thoughts! 
That's it for me!  Happy shopping if you are braving the crowds today.  Don't forget to shop at Shimmerz Paints today!  Today ONLY, you get 30% in the WHOLE shop!
 If you choose to stay home and craft (raising hand here), happy crafting!


Lee Ann 

Sunday, November 17, 2019

Shimmering Poinsettia

Hello All! 

With Christmas just 5 weeks away (can you believe it??), I have been making a lot of Christmas cards with this gorgeous poinsettia stamp from Sweet n Sassy Stamps.
This card was a bit of an experiment but I love the results.  Side note- there are so many layers of color and shimmer that make this card gorgeous, but also incredibly difficult to photograph.  Depending on the light and angle that the picture was taken, the colors look different in every picture. 


Here is what I did~
-Stamped the flower in Memento Tuxedo Black, using my MISTI, then painted a light layer of Miner Miner  49er Inklingz over the entire flower. 
-Once that was dry, I painted some Tickle Me Turquoise Shimmerz Paint at the base of each petal (approximately the first 1/3 of the petal).  
-While still wet, I blended out with Keep Palm Coloringz that I applied with a brush (approximate middle 1/3 of each of the petals).
-While that was still wet, I blended out with Miner Miner 49er Inklingz.  
-Once everything was dry, I decided that the Tickle Me Turquoise was too bold and needed to be toned down so I went over the top of it with Keep Palm Coloringz.  This was where the magic happened as the Tickle Me Turquoise still showed through but was much more subtle.  I wish you all could see this in real life!
-I worked each petal a bit more with the Keep Palm Coloringz and the Miner Miner 49er Inklingz


-Once I was happy with the layers of color, I decided to emboss the image so I put it back in my MISTI and stamped with Versamark ink and heat embossed with gold embossing powder. 
-Now all that was left was the background.  I used my Well Blue Me Down Coloringz and painted in on in layers, drying in between to get all of the hard edges. 


Thanks so much for stopping by!  Should you decide to do any Shimmerz Paints shopping, put my name, Lee Ann Barrett, in the comments section of your order and you will receive a free gift with your order! 

 
Happy Crafting!

Lee Ann

Tuesday, September 24, 2019

Gather | Jen McMurtrey

Hello Shimmerz friends!

It's Jen today with a fall-themed layout documenting one of my daughter's sweetest friendships. This project uses several beautiful Shimmerz Paints with die-cut leaves and the Carta Bella Fall Market collection.

Let's take a look at what I used.

When I began this project, I cut several of the leaves using my Silhouette and the Layered Fall Leaves cut file from the Silhouette Store. While the leaves were still on the cutting mat, and before I had peeled away the excess paper, I began spraying the leaves with the various Shimmerz colors. Don't worry, this doesn't affect the stickiness of the mat and makes it much easier to keep everything in place.


To keep the colors from bleeding, I dried each one with my heat tool between coats of paint.


While the leaves were drying, I cut strips of patterned paper and machine stitched them to the woodgrain background paper.


Next, I adhered the leaves and my photo to the page using foam dots.


Die cuts, stickers, and chipboard were layered between the leaves for added dimension while the cork title was placed on the bottom cluster of leaves.


You'll even notice one of the exclusive Shimmerz Dotz embellishments tucked in with leaves.


Last was the journaling, which I typed on my manual typewriter. I love this layout and those leaves turned out better than I could've ever imagined.

Remember - you can pick up your Shimmerz Paints on the new, revamped website! You will  love it!!


Don't forget to type JENNIFER in the comments at checkout to receive a freebie with your order.


Thanks for stopping by today and I hope you're inspired to create!

- Jennifer

Saturday, June 3, 2017

Love, a fresh layout from Karine

Hi,

I'm here today to share my first layout for this month. Buds had hatched here in the trees of my part of the world (Quebec City) and we finally get to see some green. That's what inspired me to create this layout.

Love


I started out my layout with white gesso. I then used two colors: Keep Palm Coloringz and Bamboo Leaf Spritz.


I used a brush to make drops of each color. 


I love those colors together! It's so refreshing!


You like what I have used and would like to get your hands on the products ? Visit the Shimmerz Store to see all the gorgeous colors in the many ranges on offer!

Thanks for visiting and don’t forget to mention my name when placing your order to get a free product. 


Tuesday, September 6, 2016

My Everything, a fresh and soft layout by Karine

Hi,

I'm here to share with you my latest layout created with the beautiful products from Shimmerz Paints. It is called «My Everything». Here it is.


As I always do, I started out with a coat of clear gesso all over my background paper, to seal it and to let me play more easily with the colors I have chosen. 


I used three colors to create my background: Keep Palm Coloringz, Deep Blue Sea Vibez and Ride the Tide Creameez. I just love this color combo so much: it's so fresh and soft.


To apply the color, I used a round brush and I made drops here and there, spraying a little bit of water in some places to help the color to move a little better. I used my heat tool between each color to make sure the color was dry and that I didn't end up with a brownish kind of color.


And don't forget, if you want to order those beautiful Shimmerz Products, it's easy, and you could get some free paint too! The store is right this way. Be sure to mention my blog to get your free product.


Have a nice day.


Thursday, May 5, 2016

Happiness, a soft layout with Karine

Hi,

I'm sharing today a layout I made a few weeks ago during a scrapbooking week-end get away with some friends. What a great week-end!

I made quite a few layouts and this is one of them.


I wanted a soft feel for this sweet picture of my kids.


After using clear gesso and modeling paste, I used mainly two colors to build my background: Keep Palm Coloringz and Olive Branch Spritz. I used my paintbrush to make drops. I used water to help the colors blend in some places.


Next, I used my Don't Be Suede Coloringz to add a bit of contrast. Once again, I used my paintbrush to make drops.

I hope you have a great day.


Tuesday, January 12, 2016

Dream - A layout with Karine

Hi,

First of all, let me start by wishing you a happy new year. May 2016 bring you health, happiness and time to share good moments with your loved ones.

I'm sharing today my first creation for 2016. Lately, I seem to create mostly in pink and purple, so I wanted to make something a bit different. Here is what I came up with.


On my background covered with clear gesso, I used two stencils with modeling paste. To make this texture stand out, I used three colors: Glorious Day Vibez, Keep Palm and Don't Be Suede Coloringz. 


I used the same three colors to make some drops around my clusters.


All was left was the embellishments.