Showing posts with label Blingz. Show all posts

Saturday, November 27, 2021

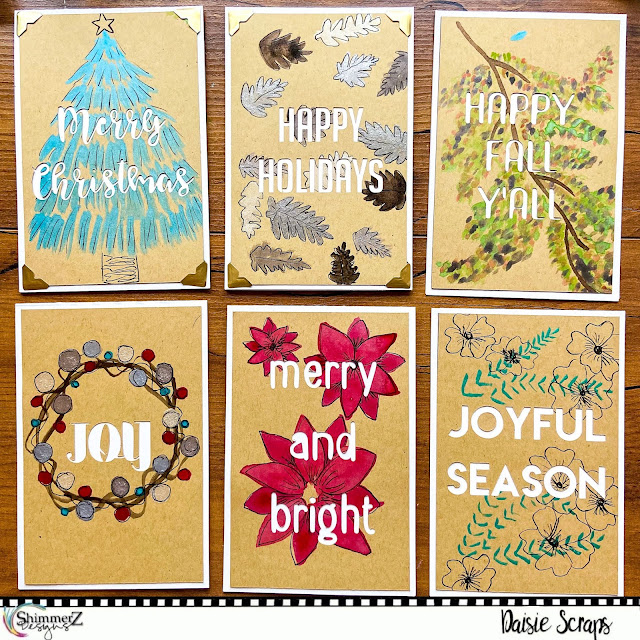
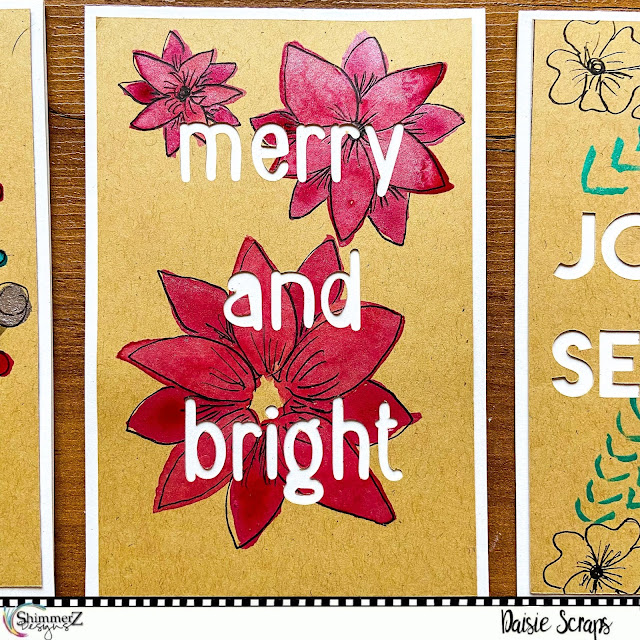
Simple Painted Holiday Cards with Daisie Scraps


Hi everyone!  Today I am sharing a set of cards that I created using my Shimmerz Paints.  I had so 

much fun just painting!  These are simple designs that you can either free-hand or even trace and paint. 

Supplies Used:


I started by dividing my 12x12 Kraft cardstock into 6- 4x6 bases.  I started with the darkest color I was 

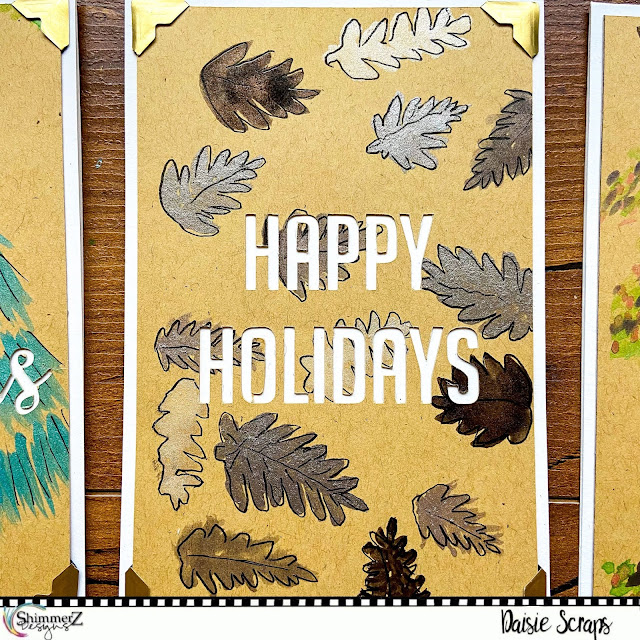
using, Penny 4 Your Thoughts, and added some base elements to a few spaces.  This was a great 

shimmery color that was perfect for a tree branch and some pine cones.
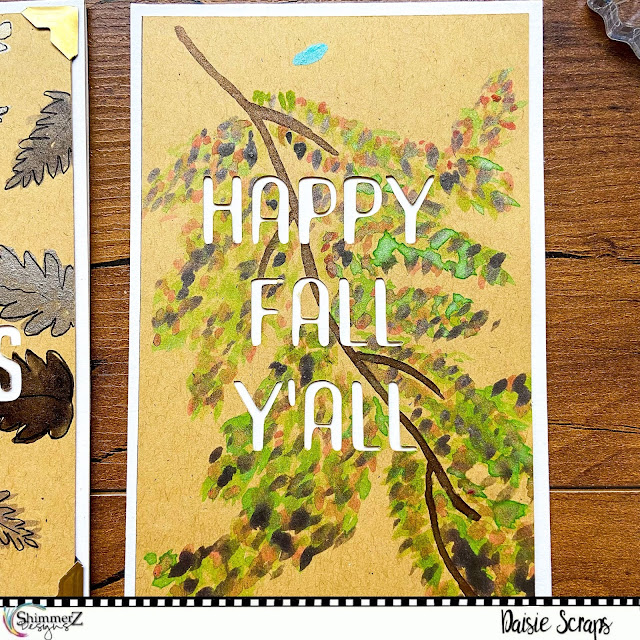


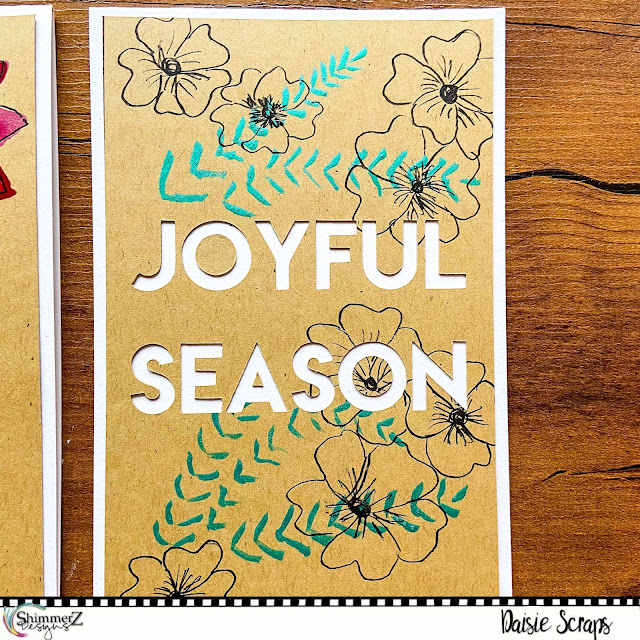
Next I went in with the greens.  I just added designs that I thought would look good.  A few sprigs and 

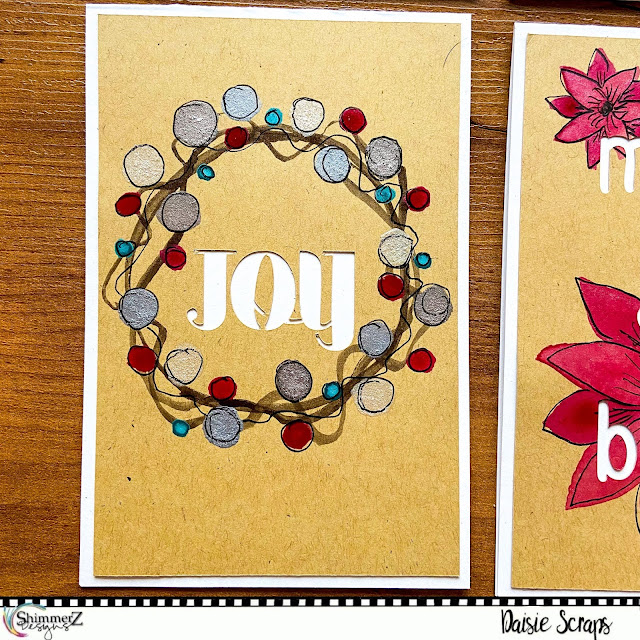
some leaves.  I used Buddy’s Favorite color to create poinsettias.  The Blingz were perfect for some shiny 

baubles on a wreath and more pine cones (that ended up looking like leaves).  I had one base left so I 

painted a super easy tree using the Blue Lagoon.  It turned out so sparkly and pretty!
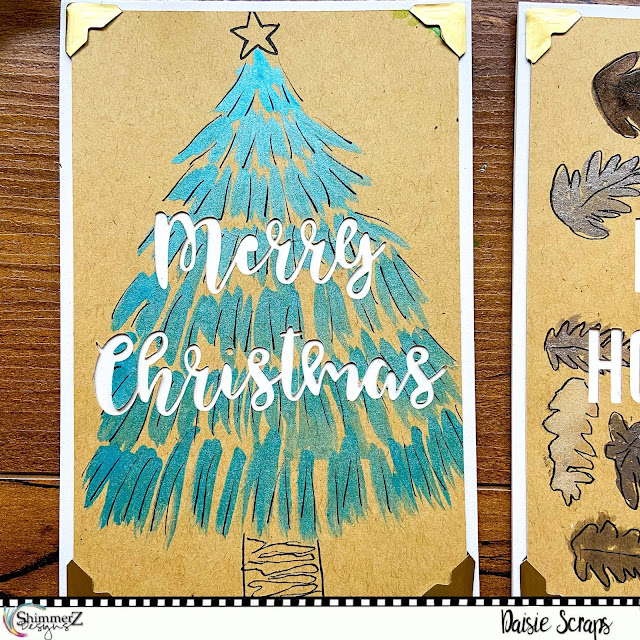

After everything was dry, I went in and added some doodle elements to each card using my Pitt Artist pen.  
I outlined the pine cones, added a trunk to the tree, outlined the poinsettias and just added detail where I 
thought it was needed. 

After I was happy with the cards, I sent the whole sheet through my silhouette.  I used various fonts from 
my computer to embellish my sentiments.  I had the Silhouette cut out the cards for me and had it shave 
¼ of an inch off so that it would fit on the base with a nice border. The only thing left was adhering everything
 to the 4x6 base.  

I created a process video to show how the cards were created.  I would love to have you check it out!  
Don’t forget you can add my name (Daisie) to the comments of your next order to receive a fun freebie 
with your order!  
 
https://youtu.be/F-SJNhY6U9c
 
Thanks for visiting!  Have a crafty day!

Daisie Scraps


Tuesday, April 6, 2021

April 2021 Color Kitz | Brianna Lepper

Hey friends!!  Brianna Lepper back with you today sharing a new layout using the oh so amazing and beautiful April 2021 Color Kitz.  This month, we get two new exclusive sprays!!  For $26.95 + shipping, here's what you get in this months kit: 

It's Mint to Be Shimmerz 
*NEW* Sweet Baby Girl Shimmeringz
Pixie Dust Blingz
*NEW* So Blue-ti-ful Spritz
1 exclusive layered process "Some Bunny Loves Youcut file created by Shimmerz Paints 
1 set of Dotz
1 package of *EXCLUSIVE* Spiegelmom Scraps Sequins "Baby Stella"

Here's my layout, make sure to check out my process video at the end of this post: 


I had so much fun with the kit this month!   The colors are beautiful and the two new sprays that we get are stunning!  To start, I cut the exclusive cut file out on a piece of white textured cardstock using my Silhouette.  I also offset and cut the backing pieces since I planned on adding lots of color to them.  In doing this, it made backing the cut file so much easier in the end!  I love backing cut files with mixed media, have you given it a try?  


Next, I got to work on my background.  I prepped a piece of thick white cardstock with gesso and painted all of the colors from the kit right onto it.  When I started painting on the Blingz Pixie Dust, I made sure to scoop a lot of the paint onto my brush to make sure I had TONS of shimmer and shine. 


 Once my painted backing pieces were finished drying, I went ahead and backed my cut file.  Then using the SpiegelMom sequins that we get in the kit, I created shakers in all of the "O's" in the cut file.  I love making shakers in a cut file, it's so fun and this sequin mix is so cute!!


Next, I popped up the entire cut file on some foam tape and adhered it down to my background.  Then I took the Dotz from the kit and added some tangled thread underneath each one.  I love the texture and interest that it gives!  


I embellished the rest of my page using the new Garden Party collection by Maggie Holmes and Crate Paper.  Talk about the perfect match!!


Here's one more up close shot!


Thanks so much for stopping by today, I hope I've inspired you in some way!  When you place your next Shimmerz order, make sure to add my name to the notes/comments section of your order and you'll receive a small freebie!  See you in my next post!

Process Video: 


Friday, February 5, 2021

I love you Bunches & Bunches! || February Color Kitz with Natalie Dill


Hey friends! Natalie here today using the February color kitz. They're so gorgeous, and perfect for a month of love!

The Kitz contain: 

  • Angel Wings Shimmerz
  • Gold-N-Roses Blingz
  • Pink-a-Boo Inklingz
  • *NEW* Cloud Wine Vibez
  • *NEW* Age Before Ruby Coloringz
  • 1 exclusive layered process "Rosezcut file created by Shimmerz Paints 
  • 1 set of "My Better Half" Dotz
  • 1 package of Rinestonez
  • 1 diamond stencil 

I used the Angel Wings Shimmerz to paint the entire background of my gessoed white cardstock to create a shimmering base for my background. Find my entire process video on my channel.


I used a brayer to apply the Cloud Wine and Age before Ruby sprays and Gold-N-Roses Blingz to rose stampts and stamped atop the gessoed background.

I also sprayed the diamond stencil with the Cloud Wine Vibez and used it as a stamp alongside the stamped floral.


I then used a brush and water to fade portions of the stamped background.

While the background dried, I painted the cut file roses I cut out of gessoed cardstock on my Cricut. I added some Ice Sage Inklingz and Olive Branch Spritz to the leaves of the roses. I tinted the petals with Gold-N-Roses Blingz and Pink-a-Boo Inklingz.


I laid out mypage in a diagonal pattern and created a gold title that says "I love you bunches and bunches," since flowers come in bunches.  I used one of the adorable Dotz for the ampersand in the title.


I added some additional foliage to my roses in green and gold. As well as gold and black splatters with gold gems and red pearls.


I hope you go grab your  own February Color Kitz. I can't wait to see what you all make!!


Monday, February 1, 2021

February Color Kitz with Samantha Robles

 Happy Monday everyone! I'm so excited to be back creating after being on maternity leave. We'll be using the new February Color Kitz Collection, featuring two new colors.

First, I start with the exclusive cut file found in the kit. These adorable roses! Each rose gets a shade of: "Pink A Boo" Inklingz
"Age Before Ruby" Coloringz
and  Gold-N-Roses Blingz
The cute little leaf petals are then painted with Pining For You Creameez.
Next, I cut out the new "Sweet Heart" cut file. I only wanted to highlight the "sweet" portion so the cut file didn't swallow up my cute girl's photo.
After glueing the pieces together, It's time to back my photo with some paper from Cocoa Vanilla's "Happiness" collection. This pink matches perfectly! I finally add some embellishments from an old stash I had from American Crafts and some sequins from Spiegelmom Scraps.

I cannot rave about the new colors enough! They're simply stunning and a must for any crafter. Supplies will be limited. If you'd like a freebie product from Shimmerz, make sure to drop my name in the comments of your order(s).

Have a happy Monday!
-Samantha Robles


Saturday, November 14, 2020

Mixed Media Home Decor with Daisie Scraps

 Hi everyone!  Today I have a super easy home decor piece you can create using a cut file and some Shimmerz Paints.

 Products I used:

 
To start, choose and cut your cut file.  I used Kraft cardstock to create the fall theme I was aiming for.  Next, I traced the cut file onto a white piece of cardstock using a white gel pen.  You could easily use a pencil for this step, just trace lightly so that your lines don't show when finished. 
 
 Once everything is traced you can start the fun process of painting in all of the spaces.  This is a great project for new mixed media peeps because if you go outside the lines a bit it won't ruin your project.  The paint is going on the back layer so little mistakes will be covered.  Just be aware of the spacing of the cut files pieces so the colors don't run into nearby shapes.   I also tried to mix up my colors so that like colors were separated a bit.  

I chose to use the Blingz Pixie Dust to paint the words on the cut file because I wanted them to be shimmery but neutral.  This is a great option for this because it is white and full of shimmer.  Then I chose a variety of colors in my fall color scheme which includes purple and pinks.  Colors like Gold-N-Roses, Sugar Plum, and Gosh Garnet are fantastic options for fall.  


When my paint was dry, I added the kraft piece of cardstock to the top.  I carefully lined up the cut file to the painted pieces and adhered it down.  I used the "off" cuts of the cut file to embellish the remaining kraft cardstock space around the cut file.  This added some texture and interest without taking any attention away from the painted cut file.  To finish, I simply put the whole thing into a 12x12 frame that I had and voila I had a prefect piece for above my mantle! 

Head on over to YouTube and check out the process video for more information.  I hope that this inspired everyone to give this technique a try!  Don't forget if you add my name to the comments of your next purchase you will get a mini freebie along with your order!  If you order in the month of November you will get a second freebie of a Turkey Dotz!  So be sure to get your order in soon!
https://youtu.be/RvTFbKnZFKQ
Thanks for visiting!  Have a crafty day!
Daisie Scraps


Thursday, March 5, 2020

Create Magic | Mixed Media Layout without Any Patterned Paper w/ Process Video

Hello everyone! Lorimar here sharing this super "messy" mixed media layout with you. Link to Process Video: https://youtu.be/on6FUoFhvEE

Have you had a chance to participate in our Spring Forward Challenge? It's a bit scary, at first, knowing that you can't use patterned paper, but I promise you, it's so fun to really push yourself and know that you make something just as amazing!

Here's my layout using the Spring Forward Challenge. Since I couldn't use patterned paper, I decided to up the ante and really use a lot of different mixed media products.

To begin, I chose a black cardstock as my base and added white acrylic paint with a palette knife to make a sort of frame beneath where my picture was going to be placed. After waiting for the paint to dry, I added Shimmerz in Mango Tango (Vibez), Jenni B Bleu (Vibez), Mustard Seed (Coloringz), and Hermit the Frog (Vibez) onto the white paint using the packaging technique, and added splatters of the same colors to the black cardstock.


If you look closely at my photo, my sons are playing with their toy cars in the midst of a big ol' mess. I don't mind the mess as long as they are playing and learning! In fact, it works out because the messiness served as inspiration for the "messy" vibe the overall layout has. After waiting for the Shimmerz to dry, I used a 12x12 star stencil and Dazzlerz in Gummy Beary Blue to add some texture and dimension to the layout. I've also used Dazzlerz Gold Mine with a Paige Evans Stencil to add even more interest and texture.


As soon as everything was dry, I dug into my stash for the eclectic array of embellishments that you see in the layout; I used ephemera, stickers, chipboard stickers, a bow, and wood veneers to further play on the boyish, messy theme. To tie everything together, I splattered some Pixie Dust (Blingz) all through-out the layout.


There you have it! Hope I've inspired you to join us in the Spring Forward Challenge. Let's get our stories documented.

Remember, you can receive some free paint if you write my name "LORIMAR" in the comments section of your next Shimmerz order.


Have a great day,
- Lorimar


Sunday, September 29, 2019

Love That Smile

Summer is officially over, but before welcoming in Sweater Weather and warmer, cozier tones, I wanted to share this stash-bashing, "controlled" mixed media layout.


love stash bashing layouts! Add multi-colored fussy cut florals into the mix and I'm floored! A while back I went to a crop and colored and stamped 3 different backgrounds on some watercolor paper. For each, I simply added color with a wet brush and then used a palette knife to scrape, swatch and blend colors (below is the complete color list). Then I stamped images from Vicki Boutin's Color Kaleidoscope stamp set with black archival ink (Lawn Fawn). Afterwards, I went to town fussy cutting everything.

  • Marigold (Shimmerz) *no longer available
  • Just Peachy (Creameez) *no longer available
  • Oakie Bear Blue (Creameez)
  • Jeni B Blue (Vibez)
  • Pink Caviar (Shimmerz)
  • Pink (Shimmerz)
  • Meet Me @ Sunset (Creameez) *no longer available
  • Rip Van Periwinkle (Vibez)
  • Cotton Candy (Spritz)
  • Caribbean Sunset (Spritz)
  • Royal Purple (Shimmerz)
  • Peacock's Plume (Shimmerz)
  • Tickle Me Turquoise (Shimmerz)
  • Hermit the Frog (Vibez)
  • Pinin' for You (Creameez)
  • Honey Dew List (Creameez) *no longer available


For the layout, I merged 2 different patterned paper to form my base. With a honeycomb stencil (Vicki Boutin), I added Puttin' On the Glitz texture paste where the 2 papers met and spread it out about 1 1/2 to each side. Once dry, I added a string of bling to each side and then began layering in the leaflets and flowers. Matted my picture with yellow cardstock and added a bunch of embellishments from my stash. Tied everything together with splatters of Plum Crazy.


Hope you liked it, and are inspired to create something like this!

Remember, if you are interested in placing an order soon, be sure to mention my name in the comments section to receive free paint!!

Stay crafty and see you back soon!
- Lorimar


Thursday, September 19, 2019

Grateful

Don't you just love rainbows? I certainly do! Today's layout features lots of texture, more than 20 Shimmerz colors used, and best of all? It took me under 35 minutes (including drying time) to make it.


For my base, I used a Vicki Boutin foundations paper because I knew from the get-go that I was going to be adding lots of Shimmerz colors. I trimmed the rainbow paper (from Paige Evans' Truly Grateful collection) to 11 3/4 x 11 3/4 so that once I had my background done, the colors could easily peek through. Using the patterned paper as a guide, I began adding colors with a wet brush. I wasn't to fiddly if they blended together because I was actually going for a look of easy transitions between colors. Below is a list of all the Shimmerz I used; first color mentioned was applied with brushstrokes, second color was added in splatters. and techinque I used with them.

     Clockwise starting with the pink color (pattern with pink leaves and acorns):

  1. Pink Caviar (Shimmerz) and Bahama Mama (Inklingz)
  2. Gold-N-Roses (Blingz) and Pink (Shimmerz) 
  3. 1 Hot Mama (Creameez) 
  4. Royal Red (Shimmerz) with Royal Purple (Shimmerz) mixed together
  5. Plum Crazy (Inklingz)  with Iris My Case (Shimmerz) 
  6. Chance of Rain (Spritz) with Anchors Away (Shimmerz) 
  7. In Deep (Coloringz) with Tickle Me Turquoise (Shimmerz)
  8. Hermit the Frog (Vibez) and Pixie Dust (Blingz) mixture with Honey Dew List (Inklingz)
  9. Hermit the Frog (Vibez) with Pinin' For You (Creameez)
  10. Pinin' For You (Creameez) with Jilted Jade (Shimmerz)
  11. Hermit the Frog (Vibez) mixed with Lil' Yellow School Bus (Coloringz)
  12. Tuscan Sun (Spritz) with Bumbly Bee (Shimmerz)
  13. Lil' Yellow School Bus (Coloringz) with Bumbly Bee (Shimmerz)
  14. Caribbean Sunset (Spritz) with Orange Sherbet (Shimmerz)
  15. Caribbean Sunset (Spritz) mixed with RazzleDazzle Berry (Vibez) and Red Necking (Creameez) + Crimson Tide (Shimmerz)
  16. Wisteria Lane (Shimmerz) mixed with Pixie Dust (Blingz) with Raisen Cane (Creameez)

I set the base aside to dry and began to work on the patterned paper. First, I added splashes of white acrylic paint and, once dry, started to heavily distress the outer borders first. Then, I cut down towards the center, without reaching all the way down, using the lines from the paper itself as a guide. Afterwards I heavily distressed these as well. I really distressed all the edges to ensure that the colors from the base could peek through, and to add more texture to the layout.
Once my base was dry, I set the patterned paper on top to check on the spacing between the gaps. Everything looked great so I taped them together. Since my picture doesn't have a lot of pinks or purples in it, I placed it near the upper right hand section as a means to cover them up a bit. The picture has double mats made from patterned paper from the Truly Grateful collection. Most of the embellishments are from the same collection with some from my stash.

Hope you are inspired to create something colorful like this! Remember, type my name in the notes section of your next Shimmerz order to receive some free paint!
Happy Craftin'!
- Lorimar


Saturday, June 29, 2019

July Color Kit : Happy 4th!

Hi Friendz! I'm so excited to get a sneak peek to you guys of the July Color Kitz! We've got 4th of July right around the corner and this kit is PERFECT for the month of July. So patriotic and sparkly. In this months kit, we have a new exclusive color for the month of July. "Sea's the Day" Vibez is a stunning shade of blue. If you love "Peacock's Plume" Shimmerz Paints, you will LOVE "Sea's the Day". Not to mention the POP of shimmer it comes with. This kit also comes with:

  • 1 jar of Royal Red Shimmerz
  • 1 jar of Blue My Mind Inklingz
  • 1 jar of Pixie Dust Blingz
  • 1 package of Spiegelmom Scrap star sequins. They're tiny but mighty.


To start, I took some Vicki Boutin Gesso (which if you haven't read in the past, I'm OBSESSED with her gesso. It's not gritty and sandy. Just smooth but thick. With my gesso, I treated it like paint and used my Felicity Jane heart stencil (I'm not entirely sure if they carry this one in their store any longer. I've had it for a couple of years.). Once my gesso is dried, I began painting the colors on super messy, blending it all in and harmonizing well together. Pixie Dust is very much a transparent white paint with TONS of glitter, so I took that and just splashed it all over the top and through out the blues and red. 
 I've been stashing these papers from Pebbles 4 of July line from last year. They made the perfect pop and flowed perfectly with the colors in the kit. These star stickers from Michaels were also being saved for a rainy day such as today. The final little piece? The star sequins. With my paint still slightly wet, I sprinkled them along the top of the page. The paint will act like a glue in a way.


I hope this guys got you all ready for our new Color  Kitz! They will be dropping Monday, 9 AM MST July 1st. Have a happy and safe 4th of July everyone!

-Samantha