Showing posts with label painting. Show all posts

Sunday, December 13, 2020

Painting a Holiday Die Cut | Audrey Yeager

 Hello everyone and Happy Holidays!

Each year, I do 12 Days of Holiday Scrapping with process videos on my YouTube Channel.  On the first day of scrapping, I used my true love: SHIMMERZ paintz!  :)


I cut this cut file from white cardstock with my Silhouette, and then used a paintbrush to paint the leaves.  For the leaves, I used: Creamez "Pining for You"; Inklingz "Holly and Ivy"; Shimmerz "Celery"; Inklingz "Twinkle Twinkle";  and Creamez "Red Neckin"


I backed just a few of the leaves with patterned paper, and on the silver ones, I used some sparkly, snowy confetti to add some shine and texture.  I backed my word die cuts with coordinating patterned paper as well.


I gessoed my background patterned paper, and used the packaging technique and some water-coloring to add a place for my photo to rest. For the background I used: Shimmerz "Going Peach Side"Shimmerz "Pink Caviar"; and Creamez "Red Neckin".  Then I splattered with some Inklingz "Twinkle Twinkle".


Finally, I glued everything to my page, machine stitched over the edges of the die cuts, and added a few embellishments here and there.


You can watch my entire process below!  


Thanks so much for watching and Happy Holidays!


-Audrey Yeager

Saturday, December 29, 2018

The Elf Made me Do It! | Niki Rowland


Hi Shimmerz fanz! Niki here today and I'm sharing a christmassy layout today. I created the background using a Silhouette cut file which I drew using the pen holder and a black sharpie pen. I usually use a sketch pen but the sketch pens are water based and therefore smudge when you try to paint within the lines. So I thought I'd try a Sharpie. It worked super well but probably has a bolder line than I would like. I'll have to do some research into other permanent pens that have a finer tip.


Once the cut file was drawn I used four colors of Shimmerz to paint within the lines:

The Creemeez Red Necking and Shimmerz Royal Red are pretty similar in colour but the Shimmerz has more shimmer. I love the Shimmerz water colors so much becuase they are already mixed and lovely and shimmery. I admit to not having many Creameez mainly becuase I prefer my paints to have lots of shimmer but I was pleasently surprised to find that the Creameez does shimmer a little bit. I like the consistency of the Creameez and Inklingz becuase the amount of liquid I add is up to me. If I add a lot of water then the paint is more fluid but if I only add a little then I have this really gorgeous thick paint that is very easy to control when painting within lines.


The light green colour is called Inklingz Freshly Minted and is such a pretty colour. Perhaps not traditional Christmas but I made it work lol. After my painting was done I then built the rest of my layout using papers and embellishments. 

To finish off I also added lots of paint splatters under the photo and along the line of my embellishment/photo cluster. I added a few gorgeous Spiegelmom Scraps sequins too from the Holly Berries mix. I've used a mixture of scrapbooking collections: Pebbles Cozy & Bright and My Minds Eye Jingle All the Way mainly. I love how there are so many Shimmerz colours that there's never any problem coordinating with paper collections!


I loved making this Christmassy layout and using the very gorgeous Christmas Shimmerz colours! Happy scrapping and don't forget to put my name in the comments if you place an order to get a free gift xx 


 Products used:


Saturday, June 10, 2017

Easy & Textured Cityscape Art Journal Page | Zinia Amoiridou


Hello artsy friends! It's Zinia here and today I'm back to share with you a really easy and full of texture art journal page I created using my Shimmerz pastes.

Before we get into the process let's take a look at our palette.


The products I'm using today are:
  • White & Black Gesso
  • Paste-eez in Baby Boy Blue, Tree Hugger & Raspberry Sherbet
  • Dazzlerz in Sea U in the Mornin', Foiled Again (mixed with a few drops of Distress Oxide in Cracked Pistachio) & Pucker Up Pink
  • Texturez in Crushed Coral, Gold Mine & Maroon Over Miami (this last color won't really make it to the final page but it is in my initial palette)
  • Shimmeringz in Heavy Metal
  • Vibez in Glorious Day
  • Coloringz in Well Blue Me Down


We are going to start on a primed page. Make sure to evenly cover the whole page with a thin layer of gesso. Then we are going to start adding intuitive brush strokes using a big flat brush.

For the first layer, I started by adding some building with black gesso and darker colors so my lighter shades will have a nice ground to sit on.


As I started moving forward I decided to tint my background with some sprays. I randomly sprayed over my page till I was happy with how everything looked. To help the drying process, I blotted some areas with a towel and accidentally left some marks on the paste that wasn't completely dry yet.

I liked that look so much that I intentionally pressed my towel on top of different areas to add even more texture.


After that I continued adding my buildings but this time I switched my brush for a palette knife. The effect you get with the palette knife is completely different and definitely worth it. I really loved how the color of the Texturez skipped at some areas when I applied it with this way.


While working on this page my brain malfunctioned for a bit and for some reason I decided that the front buildings should be smaller than the ones behind. I only realized that when I was editing my video but you know what, I'm really glad I did it this way. There's no rule that says that my art journal pages have to be realistic! Same goes for you. Never worry if you create something out of the ordinary, as long as you enjoy the process and have fun, there are no mistakes in art journaling.


The final touch was to add some white gesso around the edges with a dry brush to help every thing pop nicely.

Thank you so much for joining me today. I really hope you enjoyed the process of this page. If you got inspired and you want to grab some gorgeous Shimmerz goodies make sure to mention my name "Zinia" at the comment section of your order to receive a FREE Shimmerz product! 


Monday, May 1, 2017

A Shimmery Planner.

Hi there.  Lydell with you today sharing a Planner Page I am setting up for May. 

 (Can you Believe its May?  WHERE did April go?)


There is a touch of everything on this page, A bit of hand Lettering with Tombow Markers and Fudenosuke Brush Pen, Washi Tape and a bit of art work I photocopied and cut out and used as a side element.  It is actually a part of my Sister-in-law's birthday invitations I just finished off.  An arrangement of watercolour florals and leaves I painted and digitised, perfect for adding to my planner!  I am thinking it will show up more than once in Mays pages!!!

This time I wanted to show that having Shimmerz Paints on hand is an awesome way to add colour, and glimmer in a very simple way.  You dont need to be able to paint or draw for this.....or be artistic in any way really.

I handwrote on my page, sure.....but I also used my stamps and a very cool set of Alpha's that I could 'colour-in'...


Tips for stamping/colouring....

On this page I stamped in a similar colour to the colour Inklingz I was using.  A pale green.  The outcome is no border lines can be seen.  You can do this with images as well.  Its a cool look!

Add water to the Inklingz tub and let it sit for 5 minutes to activate and 'melt' the pigment.  You can make it watery and transparent, or thick and opaque.

If you want to add an ombre feel to your letters choose a darker shade of a similar colour (or co-ordinating colour like orange and yellow, purple and blue etc) and add it to the bottom blending where the two colours meet.

Outline the words or image in Black pen after it's dry if you like to add dimension.  It creates a more polished look than stamping in black first and covering up some of the borders with paint.

This technique as simple as it is can be used in your Cardmaking, scrapbooking, Bible Journaling or any project papercrafting you have in mind!


Heres how My May page came about


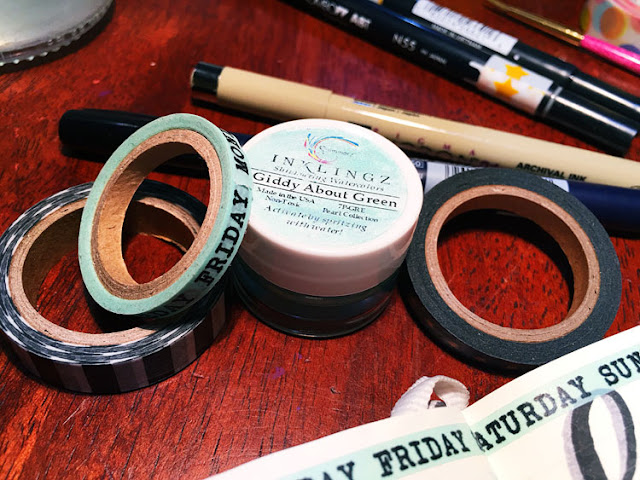
My months theme for May will be this similar colour scheme with the mint green through out.  Its a gorgeous colour  (Inklingz Giddy about Green)


So why not dig out all your alpha, number and Image stamps that allow you to colour in 
and try them with Shimmerz Paints on your next project.


Thanks for stopping in.


Wednesday, April 1, 2015

Watercolour treescapes with Shimmerz watercolour collections

So you have probably gathered what is on my desk at the moment.....(Shimmerz Creameez and Inklingz....seeing my last few projects have been using these cute little watercolour pots of goodness!...lol)  I decided seeing I had the watercolour paints out, that I would paint a quick little scene.  No clever skills....just paint play!


I used Canson 185 gsm Watercolour Paper


Just quick and easy trees with some dripping background washes and drips.

I am really enjoying these Creameez!
Have you seen the watercolour collections in the STORE?