Showing posts with label Caribbean Sunset Spritz. Show all posts

Friday, July 23, 2021

Here Comes the Sun | July Color Kitz with Process Video | Niki Rowland


Hey everyone, this is Niki @nikiclairecreates here with a new layout and process video using the July 2021 Color Kitz. The July Color Kitz consists of five colours of awesome Shimmerz Paints, an exclusive Here Comes the Sun cut file, a set of three Dotz and a pack of paper flower Embellishmentz.  The paint colours are: Frogget Me Not Vibez, Mandarin Mai Tai Coloringz, Caribbean Sunset Spritz, Green Olive Shimmerz and There She Rose Again Shimmerz. These colours are so perfect for Summer.


I loved the 60s hippie vibe of the Here Comes the Sun Cut file. I cut it multiple times. First I cut the letters from an orange cardstock, then I cut two backing pieces: one in white and one in a coral pink coloured cardstock. I painted the white one with the There She Rose Again Shimmerz paint and then layered the three pieces together. The coral backing I just used as a narrow shadow and the orange words I popped up on foam pads. What an awesome title!


I created the background using a sheet of white for the base. I cut a starburst design from yellow paper. I then cut smaller triangles out of a sheet of white Marshmallow cardstock. I then set about painting these to achieve a ombre sunset effect. I spritzed the middle section of each with Caribbean Sunset Spritz, then spritzed the outside edges with Mandarin Mai Tai and painted the point with There She Rose Again. I blended the colours with additional water where needed but they blended pretty well! I blasted them with my heat tool to dry them off and the effect was really stunning! It worked so well! I then layered these onto my yellow triangles.

I then cut smaller pink star print triangles to go on as another layer. I distressed the edges of all layers and stitched through them centrally with my sewing machine. I then stuck them all to the background and the result is a triple layered starburst – loads of hippie vibes there and it reminds me of tie-dying! 


I positioned my cut file title in the middle of the starburst. I added my photos and then began to add a few embellishments. I used a few pieces of floral ephemera, a tag and some other ephemera pieces. Really there is SO much going on this layout that I needed to keep the embellishments to a minimum. I added two of the three Dotz: the green one with a flamingo, ad the yellow one that says ‘summer vibes’.


I painted the paper flowers using the two green paints from the Color Kitz. I began by spraying three of the with Frogget Me Not Vibez. The other three are painted with Green Olive Shimmerz. I also added some Green Olive Shimmerz details to the Frogget Me Not flowers too. The paper flowers took the paint so well. I added these either side of my photos. I also added a paper cocktail umbrella which I also painted with Green Olive so that it matched my layout!

I finished off with a few Spiegelmom Scraps sequins and some label stickers around my photos. Here's another look at the finished layout:


Thank you so much for joining me today and I hope you have enjoyed this crazy layout! Happy scrapping everyone. Don't forget if you place an order via the Shimmerz Store, add my name to the comments to receive a freebie! Enjoy the video below.

Niki xx

@nikiclairecreates


Monday, August 26, 2019

Together


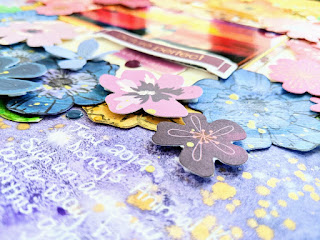
Hey everyone! I’m up on the Shimmerz Blog sharing this gorgeous layout mixing florals with the ombre look. It’s no secret that I love using florals in my layouts because they add color, dimension and shimmer! My family and I recently went on vacation and, among the pictures we snapped there, we came back with this awesome, colorful picture! I just couldn’t wait to scrap it. Like my previous blog post for Shimmerz, I’ve divided the process of making layout into 3 sections: background, florals and leaflets, and bringing it all together.


Background-
               I used Vicki Boutin’s Foundations paper because I knew that I was going to use lots of liquid with my mixed media. I grabbed a regular bowl to help me mark my center and circumference with a white gel pen. By using a white gel pen, any marks can be easily covered. Once I’d made my circle, I removed the bowl and sprayed the center with Shimmeringz Goldie Lox to give it a bit of shimmer. 

After waiting for it to dry, I placed the bowl back on the background as close to the original marking as possible, and then gathered my other mists (they are listed below) to create the ombre look. I began spraying them from the bottom up slightly overlapping the mists to achieve a smooth transition. 

Waited about 5 minutes for the mists to dry a bit, and then repeated the process. I did this to ensure that my colors were nice and bright! Without waiting for it to dry, I poured a bit of white acrylic paint and water into a mini mister and sprayed the whole background. This technique gives the colors a marbled/crackled look.


 I then watered down some white and gold acrylic paint and splattered them along the whole background. Later, I removed the bowl and set the background aside to dry.

·        Caribbean Sunset (Spritz)
·        Cotton Candy (Spritz)
·        Lil’ Yellow School Bus (Coloringz)
·        Tuscan Sun (Spritz)
·        Princess (Vibez)
·        Rip Van Periwinkle (Vibez)


Flowers and Leaflets
               Since I knew that I’d be adding floral die cuts from Paige Evans’ Whimsical, Horizon and Truly Grateful collections, I decided to make some extra florals to make the wreath look fuller. To accomplish this, I grabbed some scrap white and kraft cardstock, gold acrylic paint, a floral Vicki Boutin stamp, and archival ink and lots of Shimmerz (listed below). I made gold, yellow, blue/violet and pink flowers, and green leaflets. For the gold flowers, I used the kraft cardstock which I covered with gold acrylic paint and splatters of Miner, Miner 49er an Old Yeller. The other flowers were made one white textured cardstock. Finally, I made some green splotches from I’d punch some leaflets once dry. Once everything was dry, I fussy cut the florals out.
·        Meet Me @ Sunset (Inklingz)
·        Bahama Mama (Inklingz)
·        Limoncello (Shimmerz)
·        Miner Miner 49er (Inklingz)
·        Hermit the Frog (Vibez)
·        Goldie Lox (Shimmeringz)
·        Rip Van Periwinkle (Vibez)
·        Cotton Candy (Spritz)
·        Caribbean Sunset (Spritz)
·        Lil Yellow School Bus (Coloringz)

Bringing it all together
               I placed my photo on some layers of patterned paper from Paige’s Truly Grateful collection, popped it on 3D tape and placed it in the center of the circle. Then I began layering and tucjing in the flowers and leaflets, letting the background by my guide. Some of the flowers are completely stuck down flat; others have their tips set on 3D tape, and still others are popped up completely on 3D tape. This is how I achieved the layered look. I sprinkled a couple of epoxy dots and hearts, and stickers from Truly Grateful. To marry everything together, I splattered a bit of Miner, Miner 49er throughout the completed layout. Added my journaling at the bottom with a white gel pen. Here's the layout once more and lots of close-ups!


I loved how this turned out, love the color scheme! If you liked any of the colors you saw me use, you can find them all @ Shimmerzpaints.com.


Want a freebie? Write my name in the comments section of your order to receive some free paint!

Thanks so much for looking and I hope you are inspired to create a layout like this!

-        Lorimar


Friday, January 4, 2019

Let it Snow Layout | Lorilei Murphy

Hello! Lorilei here today with my first post as part of the Shimmerz team! I am very happy to be able to share my creations with you! I have been collecting Shimmerz colors for a couple years and love the artsy feeling they bring to layouts!


Today I made a wintery page featuring Snow & Cocoa by Crate Paper. I chose five sprays to co-ordinate with the collection. I started my page by prepping white card stock with clear gesso. I used the packaging technique to add a big pool of Oh Say Can You Sea and Deep Blue Sea to the area I knew my photo would be.


I made sure the teal colors were very dry before adding the pinks. I didn't want any mixing of these contrasting colors! Using the cap and tube I splattered Pink Stilettos, Caribbean Sunset and Sweet Heart around the teal area and extended the splatters out to the right side of the page. I love how the little sprinkles look through the acetate die cut, just like colorful snowflakes!


Once all the paint was dry I added my photo and embellishments. The addition of the Snow and Cocoa glitter snowflakes really brought out the Shimmerz splatters!


Thanks so much for joining me today. I look forward to sharing my pages with you!

Shimmerz Products Used: Deep Blue Sea - VibezOh Say Can You Sea - Coloringz / Pink Stilettos - Coloringz / Caribbean Sunset - Spritz / Sweet Heart - Vibez

* Type LORILEI in the comments section of your Shimmerz Paints Store order to receive a FREE paint!

Saturday, July 29, 2017

Stamping With Shimmerz | A tutorial With Irit

Hi! Irit here and I'm happy to share with you a new project today, showing a great stamping wtih Shimmerz technique! Here's my finished scrapbook layout-


I used the new Tim Holtz stamping platform and Dylusions stamps. I simply sprayed some shimmerz directly onto the stamp and stamped it. The look is like watercolors, the more water the messier.  Colors I used : Coloringz in Peachy Keen, Vibez in Snow Way Man and Jeni B Bleu, Spritz in Tuscan Sun & Caribbean Sunset.
 

Once dry I added my photo, papers and embellishments. I used an older Felicity Jane kit called Willow.


Make sure you watch the process video to see how simple the technique is!


Thanks for watching and check out the Shimmerz store for these goodies and more! Mention my name and get a freebie product!


Saturday, June 17, 2017

Another vintage photo with Karine

My dear crafty souls,

I hope this post finds you well. I'm here on the blog today to share my most recent layout. Recently, I found some old pictures of my dad and his family. Don't you think he is handsome? :)

Cherish


I went for a soft color combo on this one. I thought it matched the picture well.


On my background, I used The Cream Team Paste-Eez with a grid stencil.


I used Tuscan Sun, Bamboo Leaf and Caribbean Sunset Spritz and Keep Palm Coloringz, making drops with each color and drying before adding another one.


I used chipboards, flowers and die cuts to embellish.


***

You like what I have used and would like to get your hands on the products ? Visit the Shimmerz Store to see all the gorgeous colors in the many ranges on offer!

Thanks for visiting and don’t forget to mention my name when placing your order to get a free product. 


Saturday, May 20, 2017

Sweet, a girly layout by Karine

Hi crafty friends,

It's Karine here and I'm on the blog today to share with you my second layout for this month. I went with a girly layout this time. Here it is.

Sweet


As usual, I started my layout by covering my paper with clear gesso. After that, I used Salt of the Earth Paste-Eez through a stencil to add texture to my background. 


To match the colors on the paper I chose, I selected Moody Mauve Coloringz and Tuscan Sun Spritz to create some drops here and there. 


It was pretty, but I wanted to add a bit of softness to the background, so I sprayed some Caribbean Sunset Spritz here and there, to add a bit of soft pink color.


I used the Moody Mauve Coloringz to color some lace that I glued here and there in my clusters. It's so easy with the sprays!

***

You like what I have used and would like to get your hands on the products ? Visit the Shimmerz Store to see all the gorgeous colors in the many ranges on offer!


Thanks for visiting and don’t forget to mention my name when placing your order to get a free product. 


Saturday, February 4, 2017

Happiness Is This - A pink layout and a VIDEO tutorial by Karine

Hi Shimmerz fans,

Karine is here today to share a pink scrapbooking layout with you. As Valentine's Day is fast approaching, I thought it was a good idea to break out my pink supplies and get a little fun. Let's take a look at what I've created.


Going through all my pink mediums (believe me, I have a LOT!), I was inspired by the Ruby Spritz. I decided to make it my main color. 


To add a little depth to the background, I paired my main color with Caribbean Sunset and Cotton Candy Spritz. They add a softer touch to the layout. 


You can see, on the picture above, that I used Salt of the Earth Paste-Eez on my background as well, before I applied the color, just to add a nice texture. I love how the spray ink «pools» around the dried Paste-Eez. 


I used 3 Sheets to the Wind AcriTonez with water to make some white drops on the background. 


For one finishing touch, I used the Ruby Spritz to color around my word stickers (not shown on video).


All my chipboards are from 2Crafty Chipboard. 

Enjoy the process video:


You like what I have used and would like to get your hands on the products ? Visit the Shimmerz Store to see all the gorgeous colors in the many ranges on offer!

Thanks for visiting and don’t forget to mention my name when placing your order to get a free product.