
Hey everyone! I’m up on the Shimmerz Blog sharing this
gorgeous layout mixing florals with the ombre look. It’s no secret that I love
using florals in my layouts because they add color, dimension and shimmer! My
family and I recently went on vacation and, among the pictures we snapped
there, we came back with this awesome, colorful picture! I just couldn’t wait
to scrap it. Like my previous blog post for Shimmerz, I’ve divided the process
of making layout into 3 sections: background, florals and leaflets, and bringing
it all together.

Background-
I used
Vicki Boutin’s Foundations paper because I knew that I was going to use lots of
liquid with my mixed media. I grabbed a regular bowl to help me mark my center
and circumference with a white gel pen. By using a white gel pen, any marks can
be easily covered. Once I’d made my circle, I removed the bowl and sprayed the
center with Shimmeringz Goldie Lox to give it a bit of shimmer.

After waiting
for it to dry, I placed the bowl back on the background as close to the original
marking as possible, and then gathered my other mists (they are listed below)
to create the ombre look. I began spraying them from the bottom up slightly
overlapping the mists to achieve a smooth transition.

Waited about 5 minutes
for the mists to dry a bit, and then repeated the process. I did this to ensure
that my colors were nice and bright! Without waiting for it to dry, I poured a
bit of white acrylic paint and water into a mini mister and sprayed the whole
background. This technique gives the colors a marbled/crackled look.

I then watered
down some white and gold acrylic paint and splattered them along the whole background.
Later, I removed the bowl and set the background aside to dry.

·
Caribbean Sunset (Spritz)
·
Cotton Candy (Spritz)
·
Lil’ Yellow School Bus (Coloringz)
·
Tuscan Sun (Spritz)
·
Princess (Vibez)
·
Rip Van Periwinkle (Vibez)
Flowers and Leaflets
Since I
knew that I’d be adding floral die cuts from Paige Evans’ Whimsical, Horizon
and Truly Grateful collections, I decided to make some extra florals to make
the wreath look fuller. To accomplish this, I grabbed some scrap white and kraft
cardstock, gold acrylic paint, a floral Vicki Boutin stamp, and archival ink
and lots of Shimmerz (listed below). I made gold, yellow, blue/violet and pink
flowers, and green leaflets. For the gold flowers, I used the kraft cardstock
which I covered with gold acrylic paint and splatters of Miner, Miner 49er an
Old Yeller. The other flowers were made one white textured cardstock. Finally, I
made some green splotches from I’d punch some leaflets once dry. Once
everything was dry, I fussy cut the florals out.
·
Meet Me @ Sunset (Inklingz)
·
Bahama Mama (Inklingz)
·
Limoncello (Shimmerz)
·
Miner Miner 49er (Inklingz)
·
Hermit the Frog (Vibez)
·
Goldie Lox (Shimmeringz)
·
Rip Van Periwinkle (Vibez)
·
Cotton Candy (Spritz)
·
Caribbean Sunset (Spritz)
·
Lil Yellow School Bus (Coloringz)
Bringing it all together
I placed
my photo on some layers of patterned paper from Paige’s Truly Grateful
collection, popped it on 3D tape and placed it in the center of the circle.
Then I began layering and tucjing in the flowers and leaflets, letting the
background by my guide. Some of the flowers are completely stuck down flat;
others have their tips set on 3D tape, and still others are popped up
completely on 3D tape. This is how I achieved the layered look. I sprinkled a
couple of epoxy dots and hearts, and stickers from Truly Grateful. To marry
everything together, I splattered a bit of Miner, Miner 49er throughout the
completed layout. Added my journaling at the bottom with a white gel pen. Here's the layout once more and lots of close-ups!
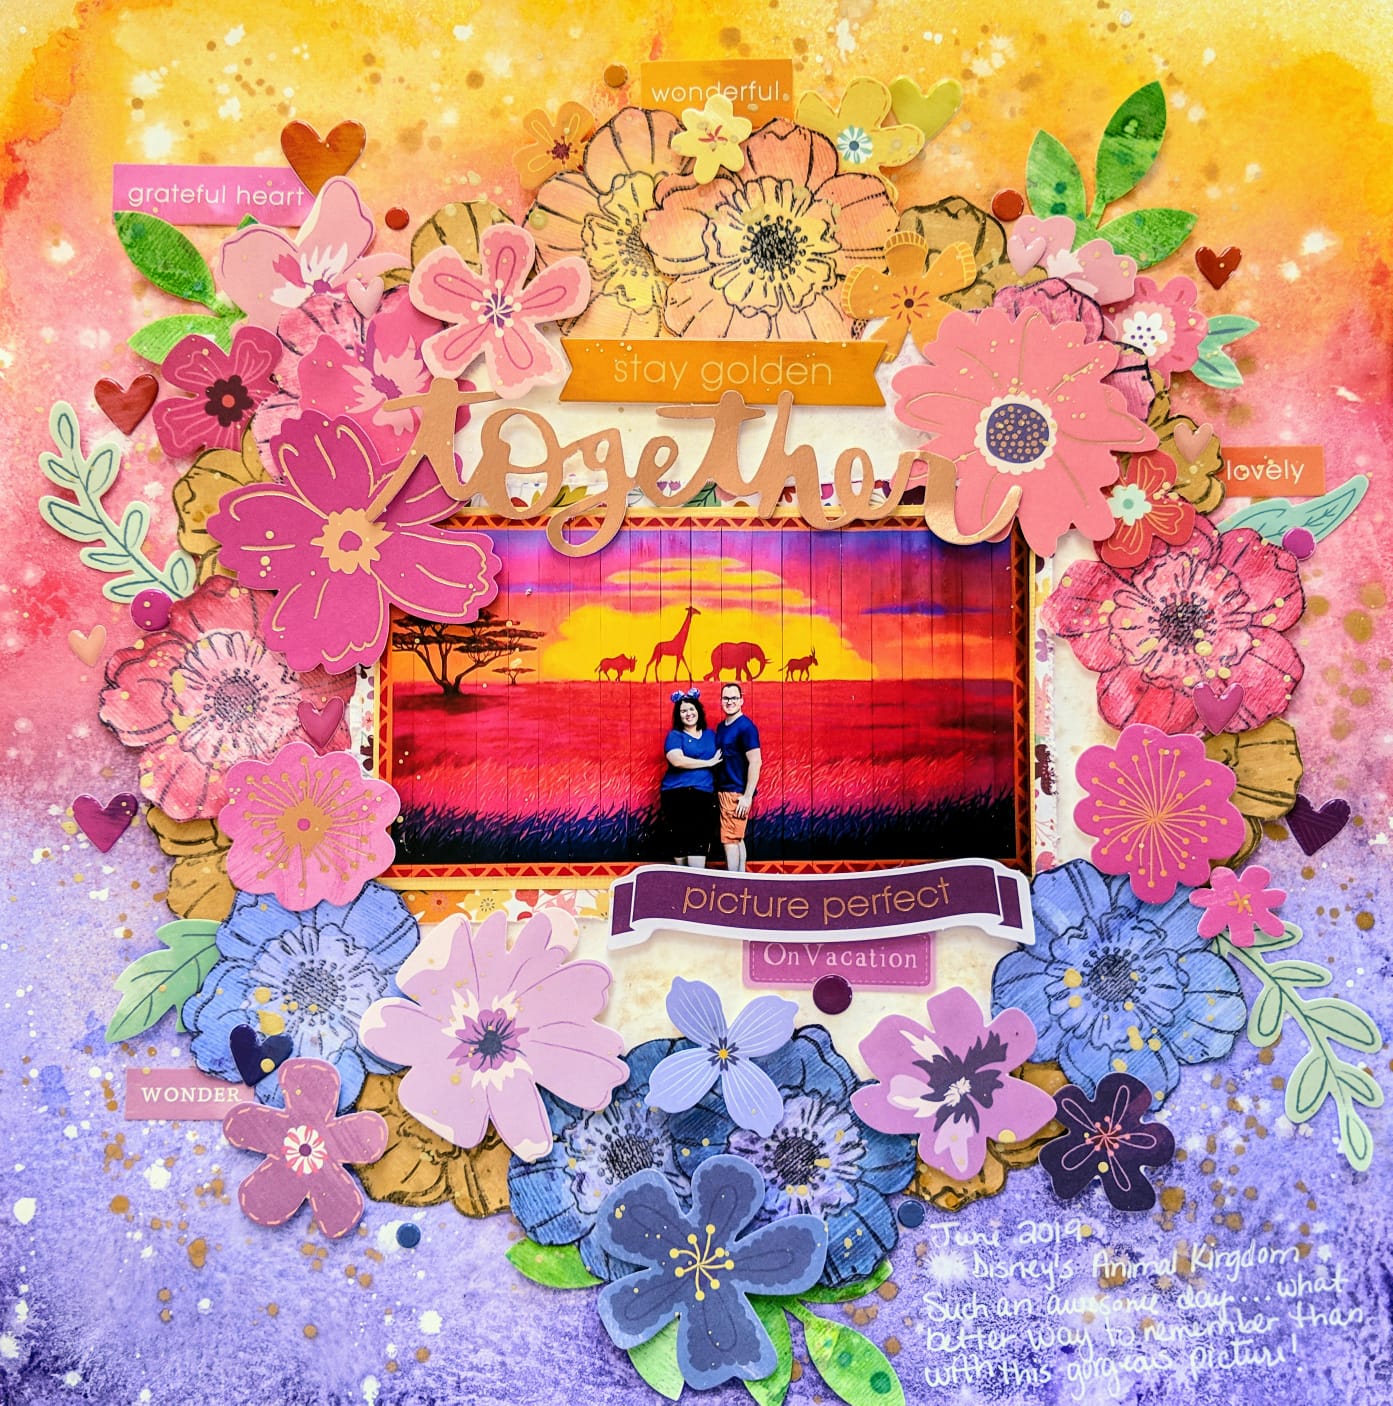


I loved how this turned out, love the color scheme! If you liked
any of the colors you saw me use, you can find them all @ Shimmerzpaints.com.

Want a freebie? Write my name in the comments section of
your order to receive some free paint!
Thanks so much for looking and I hope you are inspired to create a layout like this!
Thanks so much for looking and I hope you are inspired to create a layout like this!
-
Lorimar


