Showing posts with label Blue My Mind Inklingz. Show all posts

Monday, November 25, 2019

Be You, Bravely

Hi everyone! Melissa here with a design team page for the amazing Shimmerz Paints. I love these paints, they're so easy to use, and the colors are so rich! I've used a photo from free google by Stella de Libero,


To make this page I applied clear gesso to Prima's Moon Child paper.
              
 I put the layers under the photo together,including taping on card stock under the image to make it stronger. Below that is a layer of watercolor paper, and at the bottom is corrugated cardboard. I tore off most the paper from the surface of the cardboard, and painted it with gesso. While it was wet I poured on UTEE, and heated it until it was just melted. I put two layers of cardboard between the layers to add dimension. 

I painted Prima Moon Child paper with clear gesso, then applied texture paste with a stencil and a credit card. I poured on Ultra Thick Embossing Powder (UTEE) onto the paste, and heated it with a heat gun. Don't use Hobby Lobby brand texture paste, it takes way too long to dry,even with a heat gun. Liquitex works a lot better.

I picked out Reneabouquets Beautiful Board,arranged it around the page, took it off, and prepped it with gesso. I painted it with Blue My Mind, and Dear John Letter  and Imperial Amethyst Inklingz. I topped it with a thick coat of Ranger Clear Rock Candy Crackle. A lot of the textural elements are from Reneabouquets. 

I drew out the colors of the photo to the watercolor mat, and the page too.


To add visual interest I added micro beads, seed beads, glass glitter,glass beads, pearls, Swarovski crystals, rhinestones,sequins, shells, pressed flowers and leaves,tulle, metal from Tim Holtz and Reneabouquets, pieces of floral picks, and bling and metal from my stash. The gorgeous butterfly is from Reneabouquets.


I sponged and brushed on a lot of gesso around the page, because it was getting too busy. I used   gold and silver mica powder.


]

Thank you so much for looking, and have a great week!


Tuesday, July 10, 2018

Travel Far and Wide


Hi everyone! Melissa here with a page for Shimmerz Paints! What a pleasure to work with these rich, delicious paints to express my love of the colors in this photo. 


To make this page I used watercolor paper for both the mat, and the background.


I stenciled on texture paste with a credit card. I arranged chipboard around the photo, prepped it with gesso, and applied paint. I put on a thick layer of Clear Rock Candy Crackle, and topped it with more paint,gesso, and gold mica powder.


I put a thin layer of paint over a lot of the page, but then wound up painting over a lot of it with gesso,things just got too busy.


To add visual interest I added the following: several little poppy flower stamps from Shimmerz stamps, tulle, cheesecloth,lichen, dried flowers,birch bark, embroidery floss, pearls, mica flakes, metal glitter,glass glitter, rhinestones, charms, rub ons, metal, seed beads, micro beads,dry embossing powder,sequins, and more. As I added things, I brushed on Shimmerz around to tie them in with page.


To the right of the metal I added clear glass glitter to wet paint. The glitter kind of drew the paint close to it.


Here's a list of colors I used
Inklingz:

Shimmerz:

Vibez:

Creameez

Stamps

Thank you so much for looking, and have a great week!

Remember if you write my name in the comments section when you order, you can get a surprise freebie!


Tuesday, March 10, 2015

 Love INKLINGZ !


Hello!friens!
In Japan spring coming soon near!
Spring is very gently beautiful!
I love this season.


【perfect】


Was put a chip board or to punch the butterfly to the board.
To paint the gesso to fill all.
I was colored with INKLINGZ from above.

Additionally glass beads, glass glitter and lame powder were used.
First a point is colored thick.
It's to suppress the tone in JESSO at the end.

INKLINGZ
FRESHILY MINTED
PINK-A-BOO
FIRST BLUSH
ME&BLUE
MEET ME SUNSET


If you next order Shimmerz .mention my name(Yuko Tanaka)in note to merchant.You get  something!
Thank you!


Saturday, January 10, 2015

Beginning the New Year with Tranquility!


Hi Shimmerz Fans! It's Gabrielle here with you today to share with you my latest Mixed Media Canvas using some of those, oh so gorgeous Shimmerz paints products!  This month I combined Shimmerz Paints with some of my favorite Dusty Attic Chipboard pieces.  I based my project on the January Mood Board from Dusty Attic.  I found all the perfect colors to match the moodboard in my Shimmerz paints stash!  Here are the Shimmerz Paints products I used for this project....


Shimmerz Paints Products used in this project:

~ Moody Mauve Coloringz
~ Heidi Ho Blue Coloringz
~ Tuscan Sun Spritz
~ Don't Be Suede Coloringz
~ A Shade of Grey Coloringz
~ Spiced Cider Blingz
~ Blue My Mind Inklingz
~ Good as Gold Inkingz
~ Gosh Garnet Inklingz

Yep, I used a lot of Coloringz...I just love the rich intense color you get with these color sprays!  As always, I created a Video Tutorial for you all, so that you can see step by step how I put this project together.  Grab yourself your favorite beverage, kick back, relax and enjoy!....


Here are a few close-ups of today's project that you can view at your leisure...


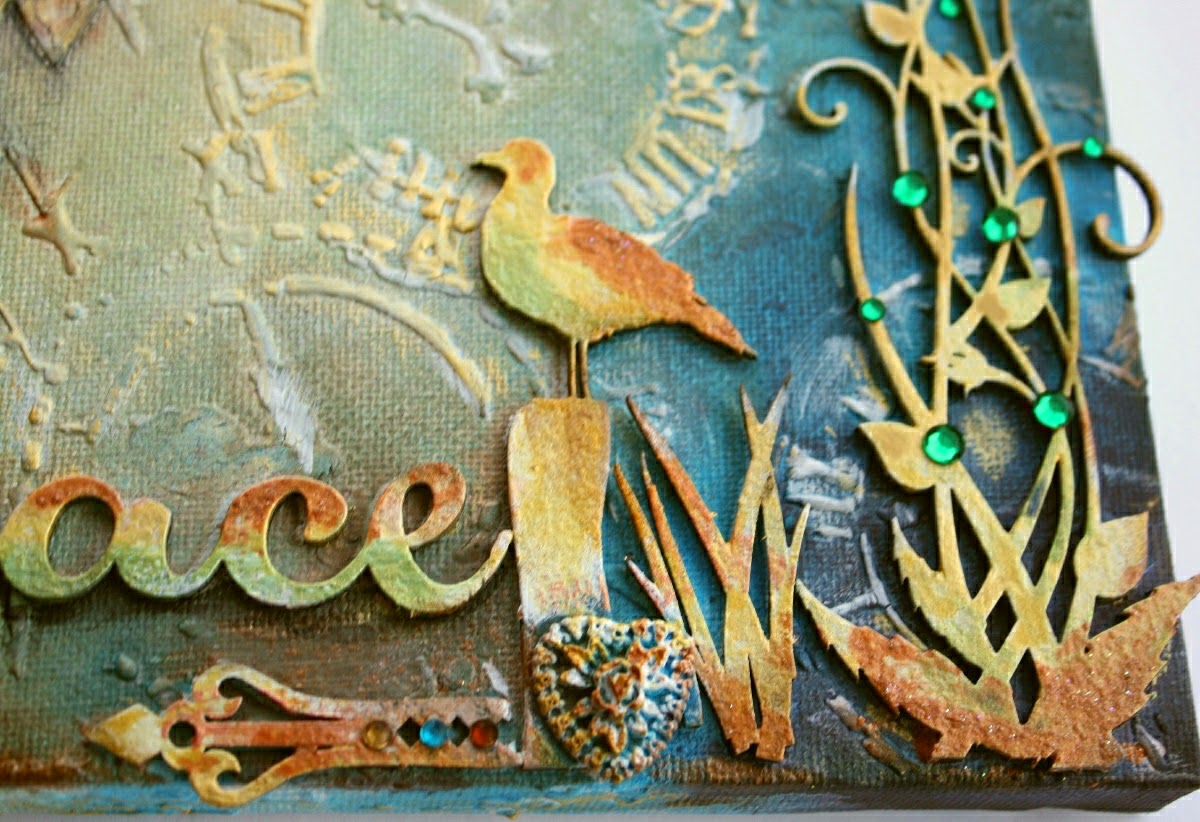
I love the lovely metalic sheen the Inklingz give to the chipboard pieces!


I like to apply my colors in 2 ways, layering them on and drying between layers....this can give a nice intense coloring to your project.  I also like to apply complimentary colors in different sections of the canvas at the same time and let the colors blend together in some areas, this creates a variety of colors on your canvas.  As you can see above adding the Blue My Mind Inklings to the Good as Gold while still wet, created a lovely hints of green on my chipboard pieces.


I love the intense blue I got with the Heidi Ho Blue Coloringz. To get even more depth of color, I added a spritz of 'A Shade of Grey' Coloringz to each of the corners layering it over the blue....this gave me deep intense color on my canvas.


I hope you all enjoyed my project and video tutorial today!  And hope I've inspired you to give these gorgeous products a go!  You can order your own Shimmerz Paints directly from their website Shimmerz Paints Store, and don't forget!....Just mention my name 'Gabrielle' in the 'Instructions to Merchant/seller' part of your next Shimmerz paint purchase and you will get a FREE/Bonus Shimmerz Paints product in the color of your choice!


Thursday, November 13, 2014

Watercolor Card Video Tutorial


Hello friends!  Gabrielle here with you today!  I have a fun and easy little card tutorial to share with you all today.  It's the weekend and I wanted to have a little fun playing with some of my Shimmerz Paint products, and some of my Dusty Attic chipboard.  So I gather up a few supplies, some watercolor paper and got playing!

Here is a quick l'il video tutorial I made up to show how I put it together!  (Note:....my lighting is bright when I film so the card appears softer in color in the video...above is the actual colors)  Enjoy!


Here are a couple of close-ups of the card design: 


I used some old stash for this card, some Prima Hydrangea blooms I had from an old kit.  I also used Martha Stewart leaf punch for the green leaves (just punched from cardstock and given a bit of a wrinkle.


I used one of my stamp designs, the Dandelion, as my center piece.  I used some white embossing powder with it....I would recommend not to press as hard as I did for this card as I feel I lost a lot of my detailing because of this :)


Products Used in this project:

Dusty Attic Chipboard:  Filigree Frame


Shimmerz Paints Products:
~ Moody Mauve Coloringz
~ Don't Citron Me Coloringz
~ Plum Pudding Sprtiz
~ Punked Up Purple Coloringz
~ Blue My Mind Inklingz

I hope you enjoyed watching me create this card today and hope you have some fun just gettin' loose and playing with your Shimmerz Paints!  You can shop for Shimmerz Paints HERE. NOTE:  Don't forget to mention my name "Gabrielle" in the Message to merchant part of your order to get your FREE/Bonus Shimmerz product in the color or your choice!  Go check out the shop, there are lots of amazing deals on Seasonal color groupings going on right now! xo


Thursday, June 26, 2014

Getting Whimsical with Shimmerz {and NEW INLINGZ!!}

 
Hi everyone!  Gabrielle here with you today to share with you my first project as a Shimmerz Educator!  I was so excited to get my happy little hands on some of the NEW Inklingz and was just amazed by the beautiful effect you can get with them. 
 
 
As soon as I saw the color 'Blue My Mind' from the Inklingz, I knew I had to do something whimsical with it.  I pulled out some polymer baking clay (Sculpey or Fimo) and made a mermaid tail to act as a center-piece to my canvas design. I also made a few little accent pieces (Starfish designs) to add to the canvas as well.  The mermaid was made by sculpting the clay by hand and the 'scales' were added by using the tip of a pen (with the pen retracted so that the ink tip doesn't touch the clay).  I used the pen tip on the starfish as well.  Baked it for 15 minutes and gave the piece a coat of Gesso....now it is ready to paint!  I gathered together a bunch of my gorgeous Shimmerz products and an 8"x10" canvas and got started.  Here is a list of the Shimmerz products I used for this canvas.....
 
 
Shimmerz Products: 
Inklingz (Blue My Mind, Miner Miner 49er), Texturez (Patina), Spritz (Treasured Hymn), Vibez (Egg Noggin', Jenni B Bleu), Dazzlerz (Tutti-Frutti), Shimmerz (Key Lime, Green Olive).

And to make it easy to follow along, I created a video tutorial to show, step by step how I created this canvas.  Enjoy!


Here are a few close-ups of my project....

 
The Inklingz create such a wonderful two toned, shimmering effect, I think my favorites are in the 'Gold' collection, I know I'll be using these again and again!

 
As you can see in the video, Shimmerz products are easy to use.  The Inklingz are a little different because they are a dry cake, much like a watercolor pigment cake.  You just add a little sprtiz of water let it sit for a moment and do a little stirring with your paint brush.  The more you stir, the thicker and more luxurious the paint becomes.

 
For my chipboard piece I used some Shimmerz paint, they have wonderful little flecks of mica in them that not only add glitter to your design but even a tiny bit of texture as well.

 
And finally here is a photo of the corner cluster of embellishments I added to my project.  I hope you enjoyed my project and that I've inspired you to give a mixed media canvas a try. 
 
If  you would like to purchase some of the NEW Inklingz or any other Shimmerz products, just head on over to the SHIMMERZ STORE .....and remember if you would like a FREE bonus Shimmerz product, when you put your order in just put my name 'Gabrielle' into the 'INTRUCTIONS TO MERCHANT' area and you will recieve a FREE full sized bottle of Dimensionz or Shimmerz or a sample sized jar of Dazzlers or Textures in the color of your choice!
Note: right now you can get extra savings on your Inklingz by purchasing full sets of the Pearl, Gold or Metal color groups!
 
Thanks so much for stopping by today and checking out my project! xo