Showing posts with label tutorial. Show all posts

Thursday, October 1, 2020

The October Color Kitz Collection | Samantha Robles

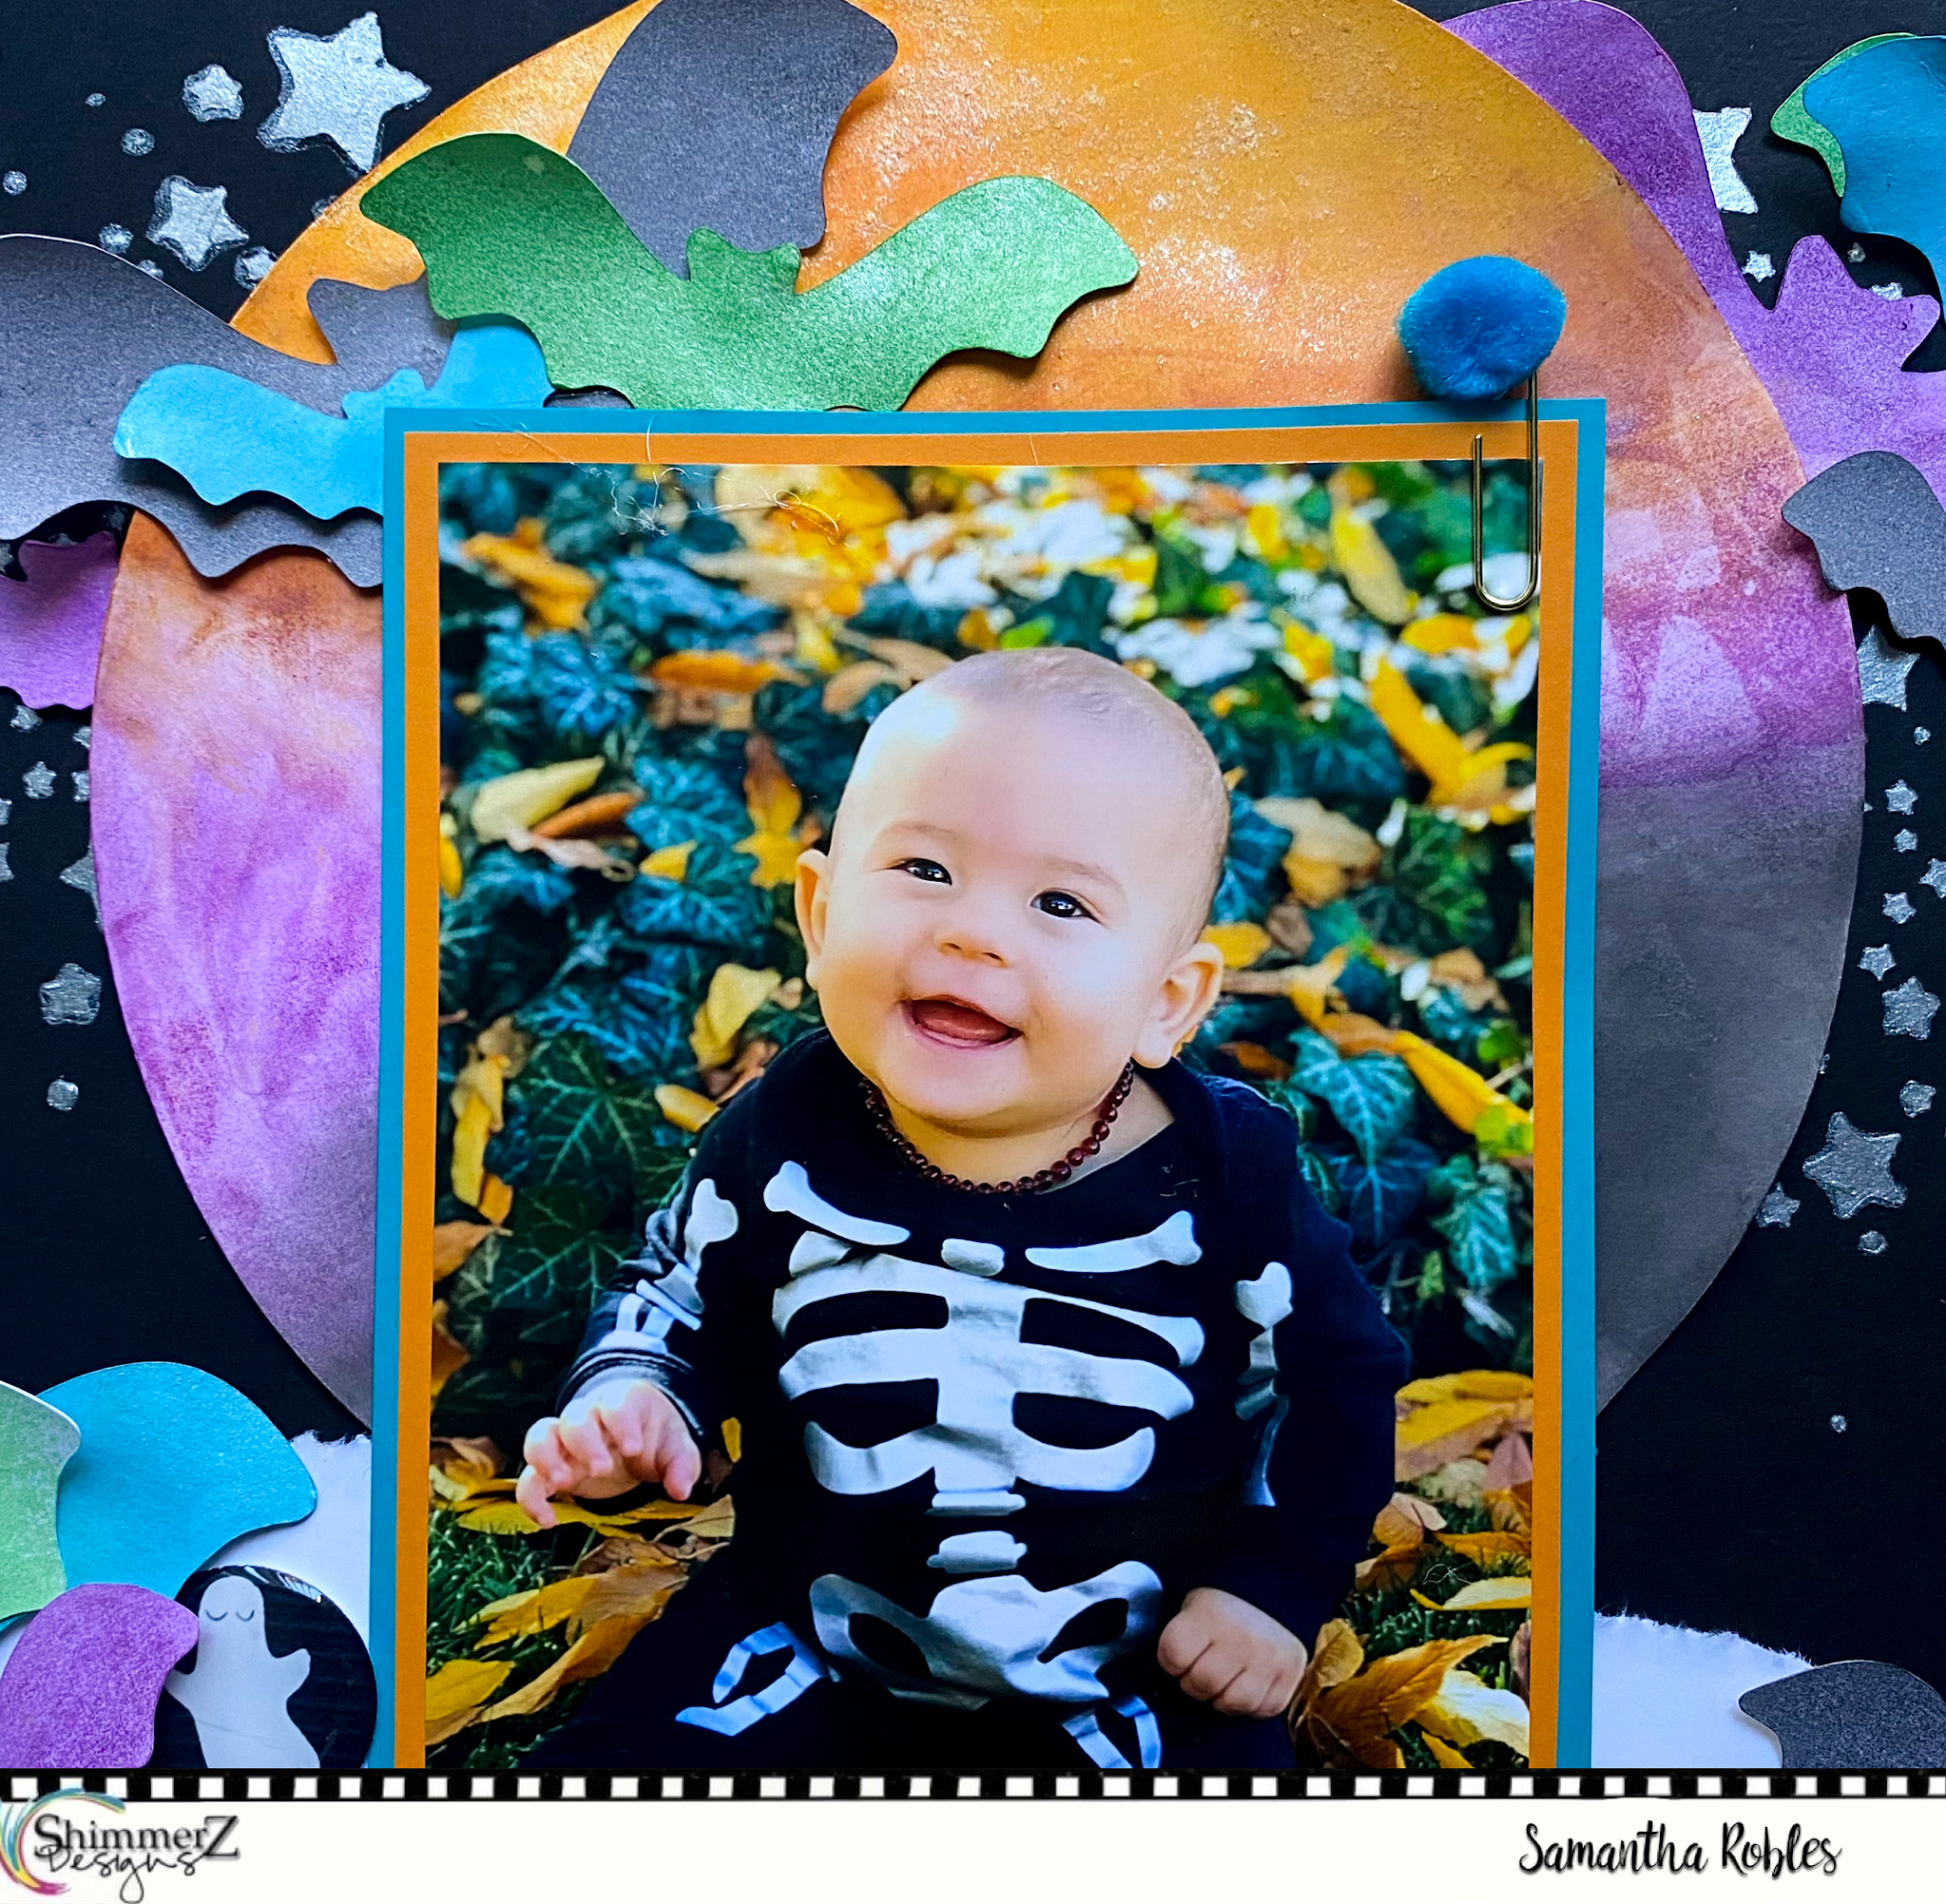
 Hi everyone! It's finally October, which I think is the best month of the year. The changing colors, cooler weather, Halloween! I'm all about the skulls and spooky things. Which is why The Shimmerz Paints October Color Kitz Collection is by far my FAVE of this year. I've had this photo of my son saved for years now. He's dressed up on his first Halloween as a tiny skeleton. The cutest one I've ever seen. The perfect brew for this month's kit!

I started my process by cutting the exclusive cut file available in the kit. I'd like to think it's Justin Timberlake approved (wink wink). I then back my cut file with a sheet of "Night Sky" by Carta Bella. After that, I then stencil on some Shimmerz Paints Foilz in "Silver Dollar" with my Paige Evans Stars Stencil. I wanted a spooky night's sky to go with my moon.

I started my moon soon after by cutting a circle out and using clear gesso all over. Once my gesso is dried, I take some cheap makeup sponges (such as THESE) and smudge in my:
  • Taupe of the Mornin' Spritz
  • Marigold Shimmerz + a small touch of Bumbly Bee Shimmerz
  • Plum Pudding Spritz


Let that sit for about 20 minutes or so. While my moon is rising (Haha, get it ;) ) I then cut out four of the new Layered Bats Cut File and begin to spray them with all the sprays in the kit. Including the new exclusive Vibez shade: Love Potion #9.
Once all my pieces are dry, it's time to glue and add the adorable exclusive Dotz to add the finishing touch. So boo-tiful and spook-tacular for the season!

Thanks so much for stopping by. Don't forget, we only have limited supplies of each Kit. Make sure you grab them while you can. While you're at it, treat yourself to some other Halloween faves in the Shimmerz Shop. We have tons of new cut files, embellishments and our new product, Foilz.

Have a wonderful weekend!


Saturday, January 12, 2019

Happy Heart | Amanda Baldwin


Hi Shimmerz Friends! 

Welcome back for more shimmering paint delights!
Amanda here, & boy oh boy have I got some sweet Heart Day inspiration for you!
Valentine's Day is one of my all time favorite Holidays,
& I just LOVE creating all the heart things!
But enough chatter, here's my layout......

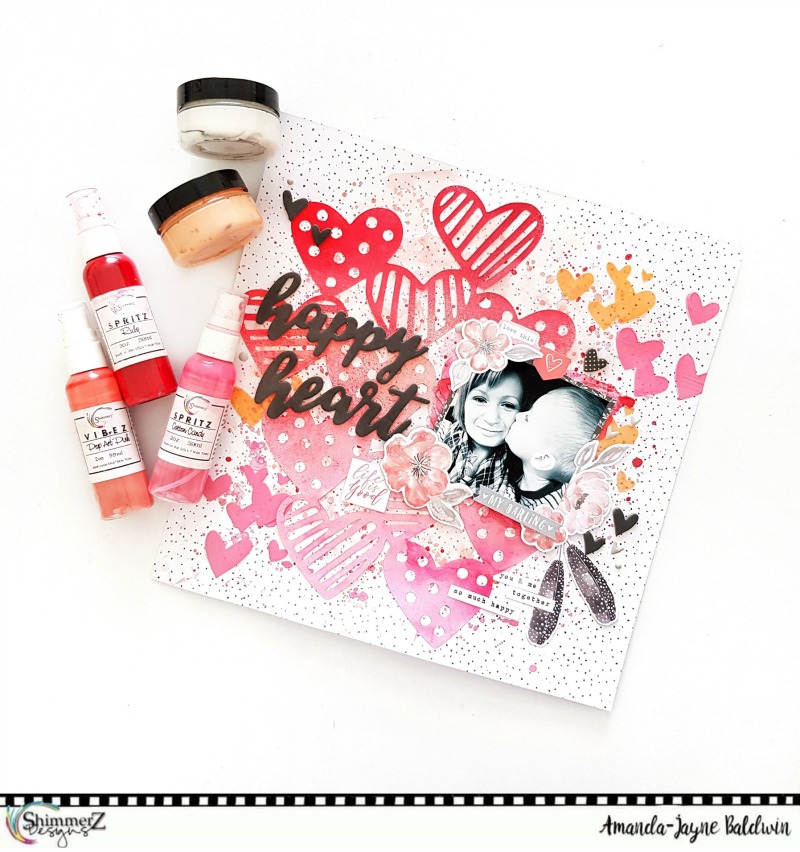
"Happy Heart"


Oh.my.heart!!!
This is so super sweet and completely melts me!
You'll spy the following Shimmerz Paints products:

Spritz Ruby
Spritz Cotton Candy
Vibez Pop Art Pink
Paste-eez Peach Fuzz
Paste-eez Salt of The Earth

What a wonderful color combination!
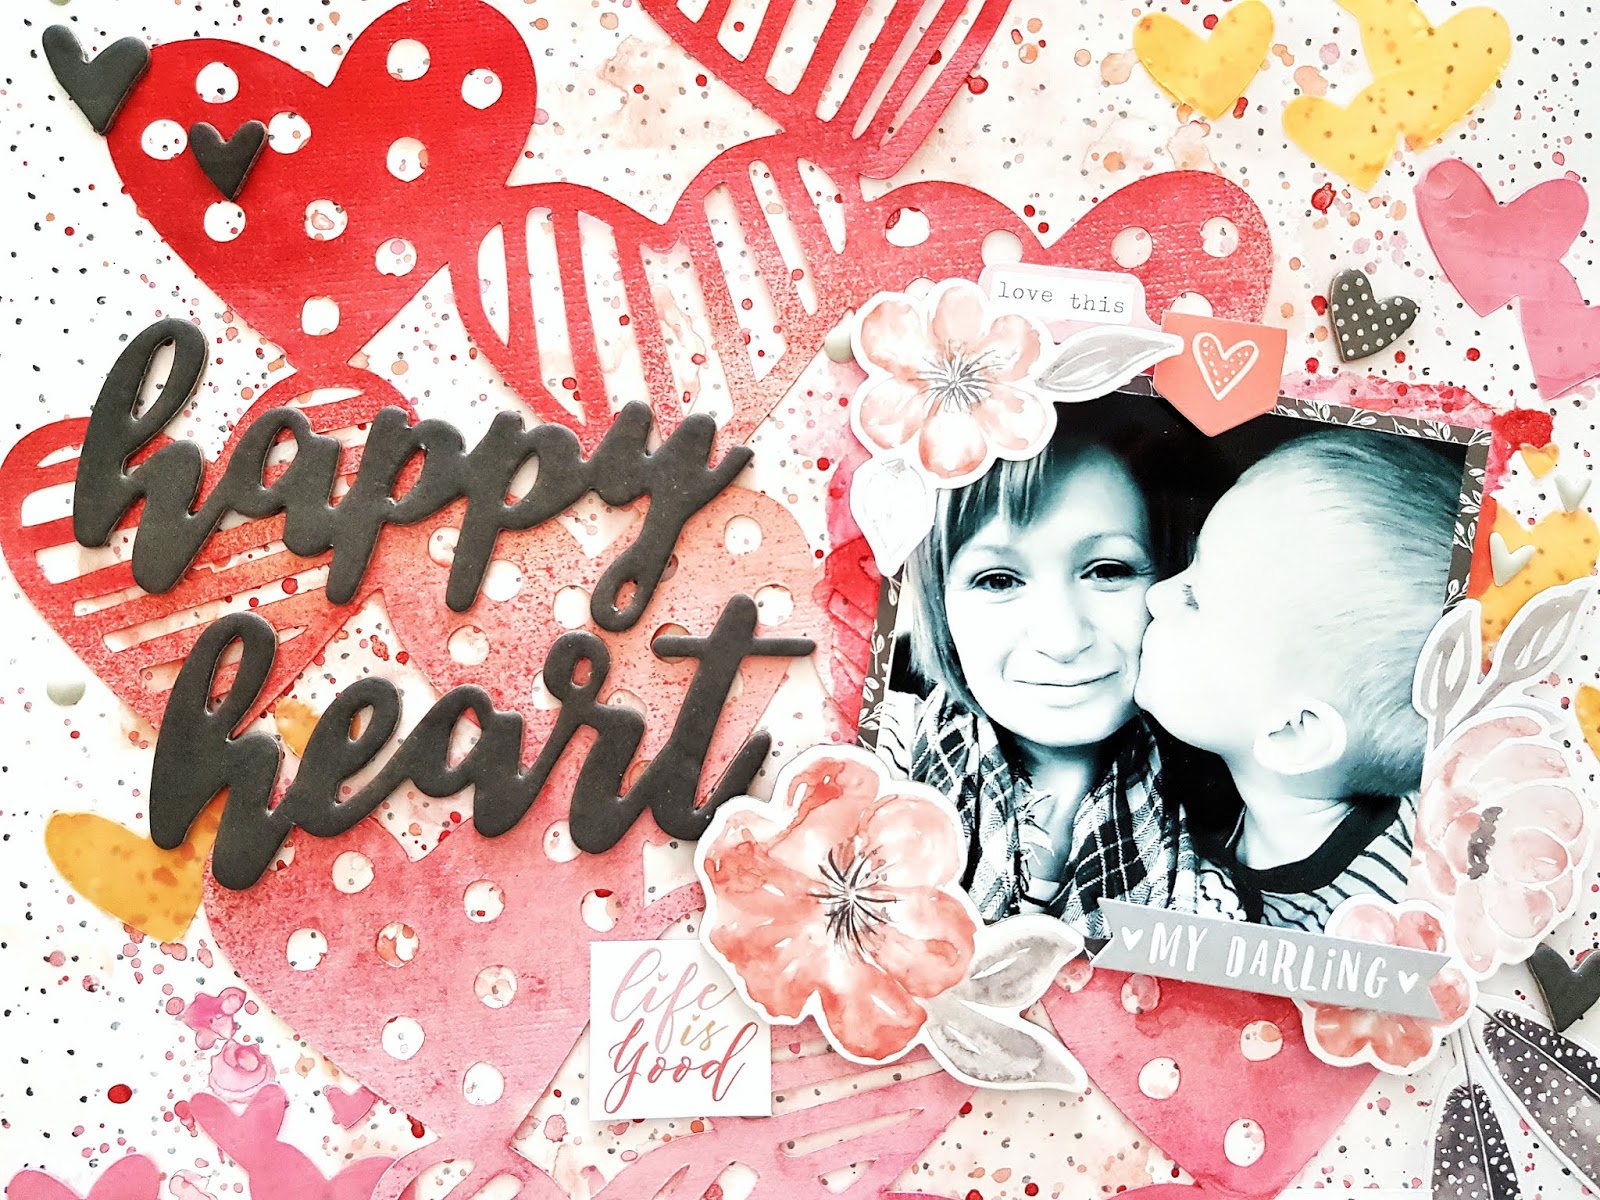
Here's a closer look for you.....


Gor-jus!!!
As well as our super shimmery, and divine paints I've also used the Cocoa Vanilla Studio: More Than Words collection & the Hello Hearts cut file from The Cut Shoppe.

I start this layout by spraying Spritz Ruby to the top of the Hello Hearts cut file.
This very pretty red is so vibrant!


Next, I apply Vibez Pop Art Pink to the center of the cut file, and at the base of the cut file I spray Spritz Cotton Candy. I also add a couple more light sprays of the Ruby to add a lil tonal interest too!
Just look at the golden shimmer from the Pop Art Pink - Stunning!!!


These colors have my heart!

Before I attach the Shimmery cut file to the pattern paper base, I prep the paper with a light coat of Jo Sonja's White Gesso. I then apply Pop Art Pink with a very watery paint brush, creating a soft base of color. I then add splatters and droplets in Spritz Ruby & Cotton Candy, as well as the Vibez Pop Art Pink. I then apply those beautiful textured hearts with a Vicki Boutin Stencil & Paste-eez Peach Fuzz. So pretty!


The pink textured hearts are made from combining Paste-eez Salt of the Earth with Spritz Ruby - another gorgeous color combination!


For finishing touches, I add more Ruby droplets and a lil paint around my photo to complete my Happy Heart themed layout. 
Here's one last close up for you....


Absolutely beautiful! 

Want to see more of how this layout came together?
Please watch my Process Video HERE & thanks for subscribing! 

https://youtu.be/1uKHFpsMNiw


I hope you enjoy watching! 

*REMEMBER*: Type AMANDA in the comments section of your Shimmerz Paints Store order  HERE to receive a FREE paint! Yay! 
(No minimum spend, not valid with any other offers & code can be used repeatedly) 


Thanks for stopping by, 
til next time, 


Monday, April 30, 2018

Art journal page Love yourself | Rocío López

Hi!!

Rocío here with a new project to inspire you to use your paints. In this ocasion I've created an art journal page. I think that art journal gives you a freedom to create that other projects don't and I get so much fun when I am creating one page. 


In the background I added some scraps of decorated paper to get some texture. Then I applied a coat of gesso and draw my whimsical face.

One I had my girl, I started to play with my Shimmerz's paints to add color to the background and to the girl. I used Vibez Deep Blue Sea, Vibez Grape Escape, Shimmerz Peacock's Plume, Inklingz Green Goddess and Inkling Plum Crazy for the background.

For the girl I used: Inkling Lover's Lips, Shimmerz Magenta, Inklingz Green Goddess and Dazzlerz Tutti Frutti.


When I got the background and the girl colored, I used a few stencils with Dazzlerz Tutti Frutti, Dazzlerz Sea U in the Mornin', Dazzlerz Grapetastic and modeling paste to get more texture.


Of course, I had to use my new Stampz! I used the set Fresh Start in some places around the border with black permanent ink (Archival).

Now I leave you with some close ups of the details and the process video.


Don't forget to write Rocío in the comments of your order to get a freebie

I hope you like it and see you soon!

PRODUCTS USED:

STAMPZ: Fresh start
SHIMMERZMagenta, Peacock's Plume.
INKLINGZPlum Crazy, Lover's Lips, Green Goddess.
DAZZLERZ: Tutti Frutti, Sea U in the Mornin', Grapetastic.
VIBEZ: Deep Blue Sea, Grape Escape. 

Tuesday, April 18, 2017

OH so cute Owl

Hey Everyone, Beck Beattie here today with a sweet off the page project share.  

A little while ago I picked up this cute wooden Owl at my local Kaisercraft outlet.  I have been dying to use it and I knew some Bella! papers teamed up with my Shimmerz products would look perfect for what I had in mind.


Products Used:

Shimmerz Vibes Spray - Hot Fudge
Shimmerz Spritz Spray - Cotton Candy
Shimmerz Texturez - Sandy Stone

Bella! New York Paperz - Chevron
Bella! Raw & Rustic Paperz - Valentine
Bella! Raw & Rustic Paperz - Bunting
Ruby Rock-it 'Bolt' floral
Bella! Bling - Hearts
Bella! Bling - Small Borderline
Kaisercraft Wooden Owl
Assorted metal flowers and embellishments
Assorted lace trim

I created a video for you to watch it come together, it was sure fun creating it!  If you want to head over to my blog you can check the video out HERE

I love how my Shimmerz products really helped me match in the various products I wanted to use to create my sweet owl.

The base for my project is a sweet Kaisercraft Owl that I recently picked up at my local outlet store.  After choosing my pattern papers to use, I stitched them together with a wide but close together zig-zag stitch and adhere them to the owl.  I used a sanding block to remove the excess paper from the wood.  This is best shown in my video.


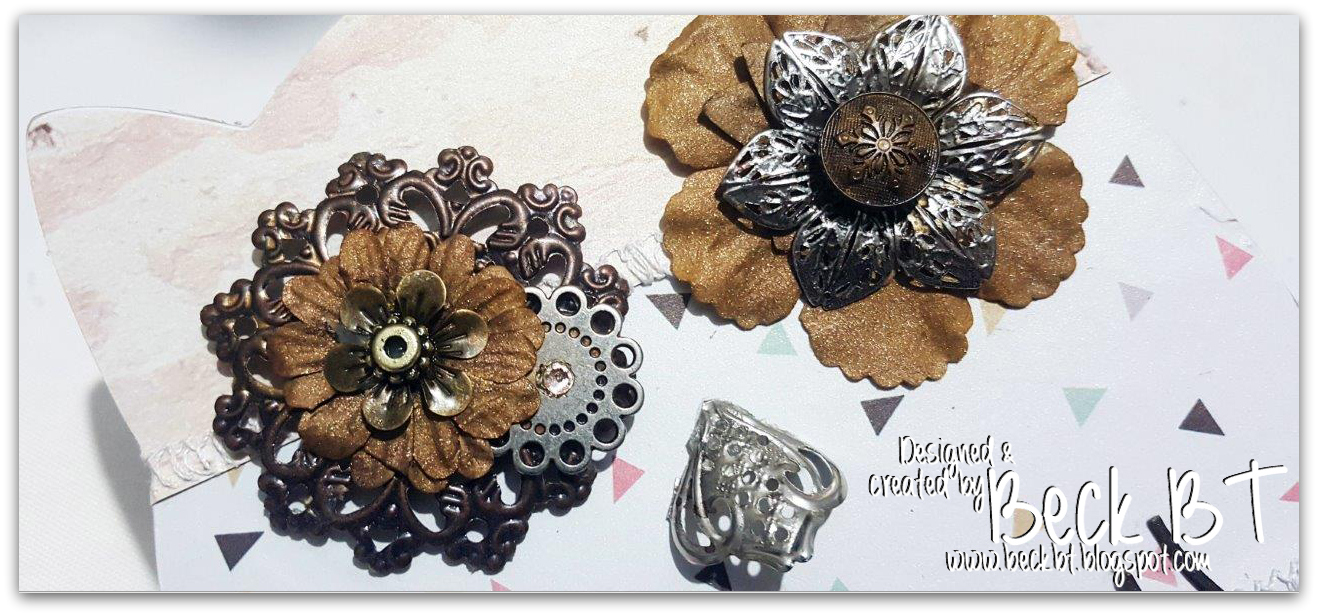
To create the eyes I sprayed the yellow 'Bolt' flowers with the Shimmerz 'Hot Fudge' spray and layered with metal flowers and embellishments using silicone adhesive.  I also used Silicone adhesive to adhere them to the wooden owl


Next I colored up the lace trim using the Shimmerz Vibes and Spritz sprays along with the Texturez paste for this divine glimmery color.


Additionally I colored up the chipboard pieces using the same Vibes spray in Hot Fudge for the lovely dark brown color it became.


My Shimmerz products really helped me match in the decorative flowers, trim and chipboard I used to embellish the owl.

I hope you enjoyed my share today and I might have inspired to you go a little 'off the page' and create something fun and a little different!

Happy Crafting!

Sunday, March 26, 2017

Underwater layout with Anna Komenda

Hello Shimmer fans. It's Anna here with my next project created with fabulous paints and mists. To be honest - when I started creating this page, I didn't know how it will end. I had this cute picture of y daughter in the swimming pool and I had this cute mermaid from Crate Paper collection. All I knew is that I want them together on one page.


For my mermaid layout I needed to create whole sea of water. I used watercolor paper and sprayed it with mists. I used wet brush to blend them together.


I wanted bubbles so I added this fun bubble foil. I sew it with sewing machine but it can be tricky. Foil is stopping the step from moving. But there is a solution - put a piece of vellum on top of your foil, sew through it and after sewing is done - just tear off the vellum. I also made some bubbles on my background using Dazzlers and stencil.


To get more whimsical effect I painted seaweed using all sorts of green paints. All my underwater layout needed right now was a little of embellishing.


Thanks to paints and mists I created colorful and busy design with almost no patterned papers. This is what I love the most while working with paints. You can make any kind of design using any color scheme in just a minutes. 

I have a process video for this page for You.


Shimmer products:
Aqua Huez - Leapin' lizard
Inklingz - Honey do list

Remember to mention my name while shopping at the store. You will get free mini product :)


XO Anna


Friday, February 17, 2017

Grunging it up with Beck BT

Hey Everyone, it's Beck BT here today grunging it up on a fun masculine scrapbook page.  I had so much fun creating this page of my boys.  It was so much fun to create the layers of color and texture on the page with the help of some of my favorite Shimmerz products!


Products used:
Shimmerz Texturez - Gritty Graphite
Shimmerz Texturez - Tidy Widy
Shimmerz Paste-eez - Baby Boy Blue
Acritonez - Tar Tar


I started out on my page by creating the background using a stencil I had previously stencilled with on the background of another page.  I used the excess on my stencil to stamp with the Texturez pastes in both colours listed above onto the background of some white cardstock and this was the base for my page.

Next I added the Paste-Eez over the top brusing up and down. These are SO SO yummy!  They are like tubs of soft goodness spreading onto the page so easily.  I love that they are not opaque either so you can still see the sweet layers peeking out from underneath.

For the darker black I used the AcriTonez to add some black stamping.  This was so cool for this technique as the AcriTonez need no priming at all and give immediate opaque coverage.  Sometimes layering non opaque and opaque can give stunning effects.


Here are some more pictures of my page for you to get up close with all the layers.  As you can see I teamed my background up with some of my favorite papers from Simple Stories and also some elements from Coco Vanilla Studio.


I hope you enjoyed my share today!!  Keep scrolling down to see how you can get some free paint!  

Till next time


Wednesday, October 26, 2016

Can Spring inspired projects produce Spring weather?

Hi Everyone, it is Beck BT here again this week.  I'm still trying to encourage Spring weather to hit us down in Melbourne with a love of sharing spring inspired projects.  I'm hoping it might work something like a rain dance because gee the weather has been so cold windy and wet so far this season. This week I am sharing with you a card with a cool wood veneer altering technique using Shimmerz products of course!!


I've created a video so you can see how I altered the wood veneer as well as how my card came together.


Shimmerz Products used:

Texturez paste in Patina
Vibes Sprays in 'Taupe of the mornin'

Here are some step pictures getting you nice and up close to that wood veneer altering process.

The process:
Add Texturez paste to the wood veneer piece liberally.


Apply a heat gun to the area allowing the paste to bubble up and then shrink back down


Apply a spray of the Shimmerz Vibes spray in a contrasting color


Wipe over very gently with a wet wipe to remove some of the vibes spray and allow the paste color to show through


Add as a beautiful embellishment to your project as seen on this card


It was so much fun creating this card, so I can't help but share more pictures.  I adore how the wood veneer pieces came.  They made the perfect accent to the sweet florals on the card.


What do you get inspired by?  Maybe you can find some inspiration from your local weather!

 Thanks so much for heading over to the blog today to check out my project!  

Don't forget to mention my name when you order for some free product!  WOOT!  

Till next time


Like what I have used and would like to get your hands on some?  See below: