Showing posts with label Ali Manning. Show all posts

Monday, July 6, 2009

Shimmerz and Impression Obsession

We are super excited because Impression Obsession is sponsoring the Shimmerz Design Team this week. If you're not familiar with this stamp company, you should really check them out. They offer wood mounted, unmounted and acrylic stamps and with thousands of images in their catalog, there's something for everyone's taste. And both their line art and solid images are perfect to use with Shimmerz!

For my project I made a gift set, which includes a card, reading journal and bookmark.

Both the card and journal use the clear stamp set Damask Floral. The leaves and flowers in this set reminded me of peacock features, so I paired it with their Peacock stamp on the bookmark. Keeping with the peacock theme, I chose shades of blue, green and gold for my project.

The main panel of the card is a piece of water color paper that I created a salted background on with yellow ink. To create the flowers, I stamped three different images from the Damask Floral set with navy ink and colored them with Celery and Evergreen Shimmerz. I highlighted some areas with a gold paint pen and added extra sparkle with Gold Glimmer Blingz. Here's a closer look:

For the reading journal, I covered a chipboard album with Basic Grey patterned paper and sprayed it with one coat of Baby's Breath Spritz. The leaves are one image that I stamped onto the front of the journal with black ink and onto a piece of cream c/stock. I colored the three leaves with Copic markers and painted them with Celery and Evergreen Shimmerz and December Sky Blingz. I cut out the leaves, accented them with pearls and added them to the journal with foam pop dots.

And finally, the bookmark.

I sponged the background with numerous shades of green and blue inks, then covered it with a wash of December Sky Blingz. I stamped this gorgeous Peacock over the top with black ink and highlighted him with a gold paint pen. I cut the image into three, mounted it onto black card stock and added an eyelet and fibers. Here's a closer look:

Many thanks to Impression Obsession for sponsoring our team!

Keep a look out for more Impression Obsession projects on the Shimmerz blog this week....

Saturday, June 20, 2009

Thank You Cards and a Shimmerz Tip

After all the Shimmerz Birthday Blog Hop excitement, I decided to make some quick and easy thank you cards. You always need thank you cards after your birthday, right?

(All images by A Muse Art Stamps)

I made a big batch and they came together really quickly. Although their design is very simple, I still want the recipient to feel special. So, I highlighted the Zinnia centers with Angel Wings Shimmerz and three black pearls. By choosing one neutral pot of Shimmerz ie Angel Wings, I was able to speed up my production time, but still add that all important sparkle!


Now a quick tip:

I've been asked several times about mixing up Shimmerz because it can separate between uses. Here's what I do:

I keep a pot of toothpicks in my Shimmerz drawer. When I need to mix up my Shimmerz, I use one to stir it up. The sharp point scrapes along the bottom and sides, and mixes it up really well. Toothpicks are cheap, can go straight in the trash afterward and they don't waste any of your precious Shimmerz!

Thanks for stopping by the Shimmerz blog!

Wednesday, June 3, 2009

Spritzing Ribbon

One of the first things I sprayed with my new Shimmerz Spritz was ribbon. I rounded up all the white or cream colored ribbon and trim I could find in my stash and began spritzing. I used Bed of Roses Spritz on all the samples, so I could compare the results. And they were fabulous!

The photos below show one plain piece and one spritzed piece of ribbon. Most pieces received two coats of Bed of Roses. The samples made from natural fibers, such as the cotton rick rack and twill tape absorbed the most color and sparkle, even though it's hard to see the shimmer in the picture.

The spritz beaded a little on the surfaces of the synthetic fibers, such as felt. But once they were blotted with paper towels, there was plenty of color and shimmer.

Grosgrain and velvet ribbons:

Here's the complete cheat sheet I made for myself for future reference.

This is a card I made with some dyed organdy ribbon.

The flowers (Sweet Peas by Flourishes) were painted with Burgundy Shimmerz.

I hope you're inspired to dig through your ribbon and start spritzing!

Don't forget to check out our new Shimmerz Darez - you could win a great Shimmerz prize package!

Wednesday, May 20, 2009

Spritzed Candle

Holy moly this Shimmerz Spritz is GOOD STUFF! Have you guessed that the Design Team love the new Shimmerz Spritz?

Here's the first project I made with it - an altered candle. This was a humble glass candle I bought from Michaels craft store for a couple of dollars, but with some patterned paper, a silk rose and some Shimmerz Spritz, it's now a special gift for someone.

Here's now I made it:
  • I attached Graphic 45 patterned paper onto the glass candle with strong sticky tape.
  • I lightly misted the wired ribbon with Babys Breath Spritz, tied it around the candle and attached a stamped, tea-dyed shipping tag.
  • I liberally sprayed Bed of Roses Spritz onto this beautiful silk rose by Prima. It took about 10 minutes to dry.
  • I covered the candle lid with the same patterned paper and attached the rose with foam dimensionals and strong sticky tape.
I could never have achieved this gorgeous, shimmery effect on the rose or ribbon without the Shimmerz Spritz - it would have been impossible with paint, ink or any other medium. I'm looking forward to trying it on lots of different three dimensional objects and large areas of c/stock and paper - it's going to be a lot of fun!

Tuesday, May 5, 2009

Get Scrapping

Just a quick reminder that there's still time to link your scrapbook pages using any Shimmerz product here to earn yourself some free Shimmerz.

I'm a clean and simple scrapper, so I didn't want to overwhelm my layout with too much bling. But you've got to have a little sparkle, right? So, I jazzed up the fabric flower with Fire Engine Red Shimmerz and added Gold Glimmer Blingz to the stamped flower centers. I think it's just enough.

We can't wait to see your shimmering scrapbook pages!

Sunday, April 19, 2009

Got Scraps?

Do you ever run out ways to use up all those scraps of card stock you have laying around your craft area? Here's a quick and easy card layout for you to try - all you need is some Shimmerz, a punch and your scraps.

Chose three different color scraps of card stock or patterned paper from your stash and paint with coordinating colors of Shimmerz or Blingz. Don't worry if you don't have a coordinating color, use a neutral such as Angel wings or Pixie Dust, which is what I did in the butterfly card below.

Once the c/stock scraps are dry, punch out shapes using some of the fabulous punches out there.


Chose nine shapes in three different colors and attach to a card in a grid format with glue dots. You could eyeball it, but I had to draw grid lines with a pencil and ruler to line them up properly and erased them once the card was finished.

Here are two cards that I made using this technique: [Each measures 5.5" x 5.5".]


Have fun with your scraps!

Monday, April 6, 2009

Sponge & Shimmer

I love to make my own backgrounds and so I wanted to show you a technique I use a lot - I call it 'sponge and shimmer'. Trust me - it's super easy!

Sponge a couple of different colors of ink in several shades onto a white or cream piece of card stock. I generally use at least five different inks and move from light to dark. Then using a wide, damp brush, paint a coordinating color of Shimmerz or Blingz over the top of the sponging. It doesn't matter which type of ink you use, but keep in mind if it's a water soluble/dye ink (eg Stampin' Up! Classic Ink) that the damp brush will further blend the colors. The piece needs to dry completely before you can stamp your image on it.

Here are a couple of cards I made with this technique:


Thanks for stopping by the Shimmerz blog - have a super day!

All images by Artistic Oupost.

Tuesday, March 24, 2009

Blue Bird of Spring

Several of the new Shimmerz colors arrived in my mailbox this week and they are fantastic!

This little Memory Box bird was just crying (cheeping) out for some sparkle, so I cracked open the new Under the Sea Blingz for him.


First, the image was stamped with Stazon ink on water color paper and painted with a light wash of SU inks. Then Under the Sea Blingz was painted onto the bird, Celery Shimmerz onto the leaves and Bubblegum Shimmerz onto the flowers. [Sorry this close up is a little dark, Spring has barely begun where I live.]
Head over to the new website and check out all those yummy new colors.

Happy Spring!

Supplies:
  • Stamps: Bluebird Branch (Memory Box)
  • Paper: Baja Blue, Very Vanilla, water color paper, Basic Grey Two Scoops 6x6 pad
  • Ink: Stazon, reinkers
  • Shimmerz: Under The Sea Blingz, Celery & Bubble Gum Shimmerz
  • Accessories: Valet Ribbon (SU), pearls (Kaiser)
  • Tools: Aquapainter


Monday, March 9, 2009

Salted Background

Hello! We woke up to yet more snow here in the North East today, which is no longer fun when Spring should be here, but the upside is I got to play with my Shimmerz!

One of the features I like about Shimmerz is its consistency. It's fluid enough to use with techniques you would normally use with watercolor paints. One of my favorites is making salted backgrounds, so why not with Shimmerz? Here's how:

You'll need: Shimmerz/Blingz, watercolor paper, spray bottle filled with water, flat paint brush and salt.
1. Generously spray the paper with water and apply a wash of Shimmerz or Blingz with the wide paint brush. Be liberal with water and paint so that the salt has something to absorb.
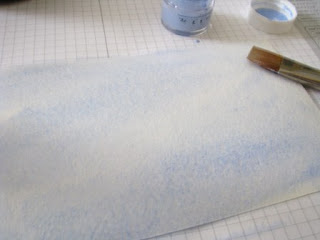
2. Sprinkle the wet paper with salt and set aside to dry. This can take up to an hour, but you can use a heat gun to speed things up. The salt will absorb the Shimmerz or Blingz and leave the surface with a speckled look.

3. Once paper is completely dry, brush off the salt. If a few pieces of salt stick to the paper, rub these off with your finger or thumb. The dried piece will curl up at the edges, but you can flatten it in a book if you need to.

4. I love the subtle texture that the salt gives to the paper and the final piece can be used as background for a card, an ATC or scrapbook page. It is smooth enough to stamp on, for journaling or to run through a die cutting machine.

From this piece I punched out some butterflies and to add a little more texture, I spritzed and edged them with a navy marker.


Thanks for stopping by the Shimmerz blog and have a wonderful week!

Supplies:
  • Stamps: Silhouette Branch (Memory Box), Essence of Love (Stampin' Up)
  • Paper: Not Quite Navy & Very Vanilla c/stock, watercolor paper
  • Ink: December Sky Blingz, Old Olive craft ink, markers: Certainly Celery, Sage Shadow, Not Quite Navy
  • Accessories: Dew Drops, clear embossing powder
  • Tools: Butterfly punch (Martha Stewart), Color Spritzer Tool (Stampin' Up!), flat brush, salt, spray bottle, heat gun

Wednesday, March 4, 2009

Shimmering Roses

Well, here goes my first Shimmerz post! I'm so excited to be part of this super talented design team and am loving all the projects that have been posted in the past few week.


I made this card using one of my favorite techniques - watercoloring with reinkers. The roses, from I Love Roses by Flourishes, were stamped with Regal Rose ink and watercolored with Regal Rose and Pretty in Pink reinkers. Once the roses were completely dry, I hightlighted the areas that I thought would catch the light with Bubble Gum Shimmerz.

Here's a closer look:


Supplies:

  • Stamps: I Love Roses (Flourishes)
  • Paper: Certainly Celery, Very Vanilla & Pretty in Pink c/stock (SU), watercolor paper (Fabriano)
  • Ink: Regal Rose, Pretty in Pink, Certainly Celery, Old Olive
  • Accessories: Bubble Gum Shimmerz, Silk Ribbon, green rhinestones (Kaiser)
  • Tools: Doily Lace Edger punch (Martha Stewart), aquapainter, Colluzzle

Thanks for stopping by the Shimmerz blog and have a sparkling day!