Showing posts with label Olive U Truly. Show all posts

Thursday, January 23, 2020

Born To Explore | Boy Layout using Run! Forest, Pumpkin, Bumbly Bee | With Process Video

Hello Shimmerz friends!

Hope you are doing well and bright! Sharing this gorgeously starry layout with you today using oranges, yellows and greens. Link to process video can be found at the end of the post:

Started out with a white piece of cardstock that I've trimmed down to 11.5 by 11.5 in order to fit a border behind it later. Played a bit with the placement of patterned paper and pictures before getting out my colors:

- Can't Elope - Inklingz
- Bumbly Bee - Shimmerz
- Olive U Truly - Inklingz
- Run! Forest - Shimmerz
- Pining For You - Creameez
- Pumpkin - Pumpkin
- Orange Sherbet - Shimmerz
- Marigold - Shimmerz

I added the mixed media by colors; I began with the oranges (Can't Elope, Pumkin, Orange Sherbet) and let them dry a bit. Then added in the yellows (Bumbly Bee, Marigold) and finally worked with the greens. Each color group was worked with the packaging technique and splatters.


Once all the colors were dry, I glued my patterned paper (Amy Tangerine | Slice of Life | Rainbow Hall) and placed my pictures on craft foam for dimension. Added two small clusters of embellishments near my pictures. Had some leftover stars from a cutfile I had previously used (Circle Of Stars by Virginia Walker | COAPA Cutfiles); sprayed some of them with Tuscan Sun (Spritz) and others with Goldie Lox (Shimmeringz) and formed a sort of star burst effect on the layout with them. Each white star was added in on craft foam; I was punched out a few vellum stars and glued them unto the cardstock. Finished off the layout by added some Nuvo Drops, placed my title, wrote my journaling and then mounted the white cardstock unto a patterned paper (Amy Tangerine | Hustle and Heart). Below are a few more close-ups.


I love how this layout turned out! It's so colorful and star-filled, perfect for documenting boy memories. Hope to have inspired you and I'll see you back soon! Link to process video: https://youtu.be/wWoPn2s1mb8 
Remember, if you write my name in the comments section of your next Shimmerz order, you'll receive some free paint.


Stay crafty!
- Lorimar

Saturday, January 19, 2019

Bloom Where You Are Planted | Melinda Beltran

Happy Saturday crafty friends,
Today I am over on the ShimmerzPaints.com blog sharing my latest design team creation.
Here's a look at my completed card. It is an A2, top folding card base from some Parakeet Bazzill cardstock. I then used a piece of whit cardstock for my mat. I brushed on a combination of some Marigold and Bumbly Bee Shimmerz Paints to create the shimmery Golden background.

Here's a closer view of the background. The picture doesn't accurately capture the two shades but they are there!

Next, I went to work creating my flowers. I cut them out of plain white cardstock and then painted the die cuts with my Corney Flower Blue Shimmerz Paint and Honeymoon Inklingz. I then staggered and layered the two sizes of die cuts to give the flower some fullness. I slightly curled the petals to give them some added dimension. For the leaves, I started again with plain white cardstock and then painted them with a combination of Olive U Truly Inklingz and Green Olive Shimmerz Paint.

I then created the SVG file for the pretty decorative frame and then layered that along with the flowers to my mat. Here you can see I added some pearl embellishments for a little extra flair.


I then used the Bloom Where planted sentiment from the Hello Happiness Stampz set and stamped my sentiment onto a cross stitched square die. I then cut out another cross stitched die from some green cardstock for an additional layer. I mounted both of those onto my card.

Here is one last look at my completed card. I think it turned out so vibrant and pretty. I think the recipient is really going to enjoy it. 

Supplies Used

DON'T FORGET, ADD MY NAME IN THE COMMENTS SECTION OF YOUR ORDER AND GET A FREE MINI FREEBIE TO TRY!

As always, thank you so much for stopping by. Be sure to come back by and see what the rest of these incredibly talented designers are creating! Until the next time, you have a wonderfully crafty day!

Saturday, December 15, 2018

Peace Cards | Melinda

Hello crafty friends,
Melinda here and I am super excited to share my cards with you today!
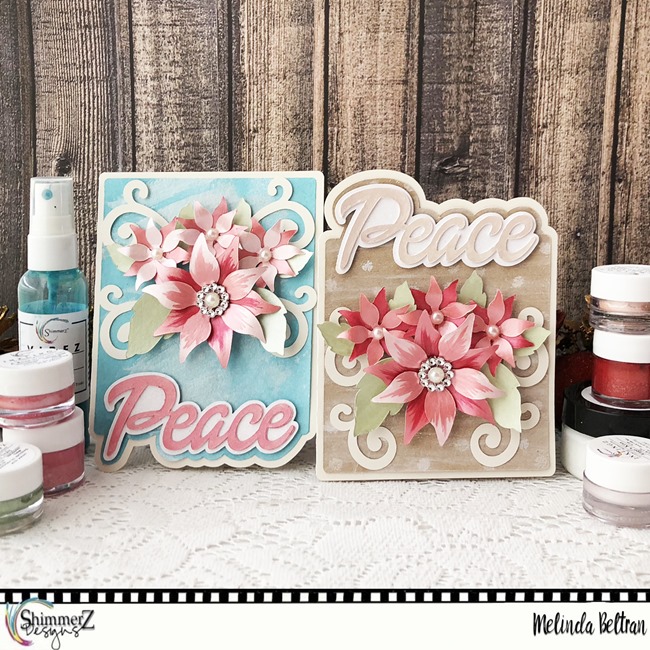
peace card3
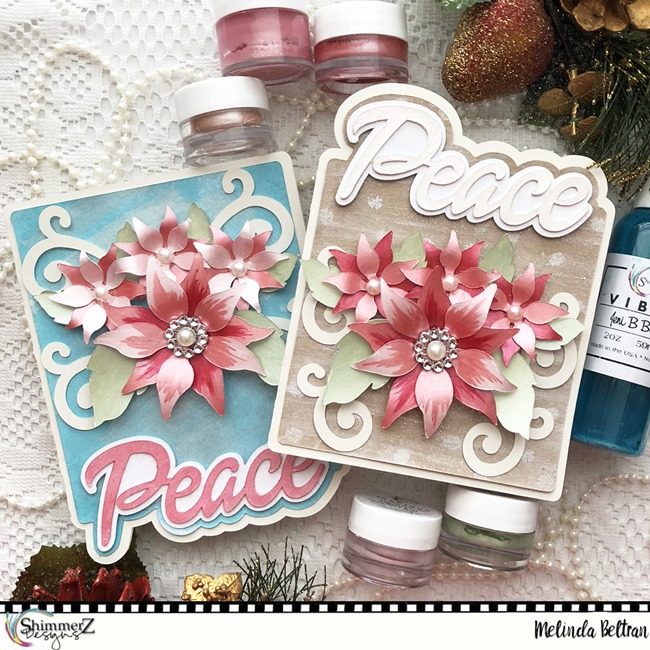
I created two cards featuring a variety of the beautiful Shimmerz Products!  They are both a finished size of A2, so they will fit in an A2 sized envelope. Of course they are a bit chunky with the dimensional Poinsettias.

peace card4
For both, I started by creating the card bases. I then cut the bases out of some cream colored cardstock and then cut the titles and flower pieces out of plain white cardstock. I absolutely love to start with just plain white cardstock and see where these beautiful Shimmerz products take my projects! The only other non-white pieces are the flourishes and the Kraft paper background mat for the card on the right.

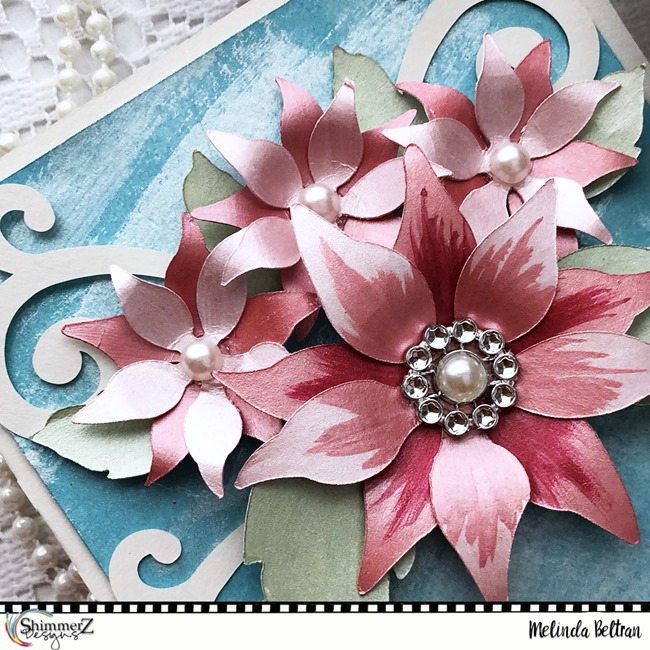
lg poinsettia1
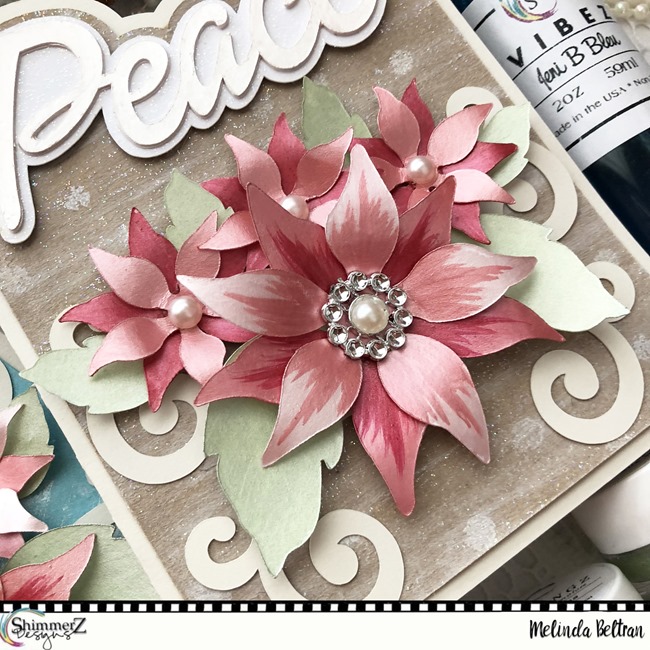
For this first card, here is a closer look at the beautiful poinsettias. I used a combination of the  and   the    to paint the poinsettias. For the smaller ones I just made the two layers two solid tones. For the large one, you can see I brushed the   on first and then added in the  darker shade.  For the leaves, I used the Olive You Only Shimmerz paint.  You can also see in the background that I stamped some tiny snowflakes using the tiny snowflake stamp from the     stamp set.  I then brushed on some of the Puttin’ on the glitz pasteez and brushed it horizontally to make the mat look a bit “snowy”.

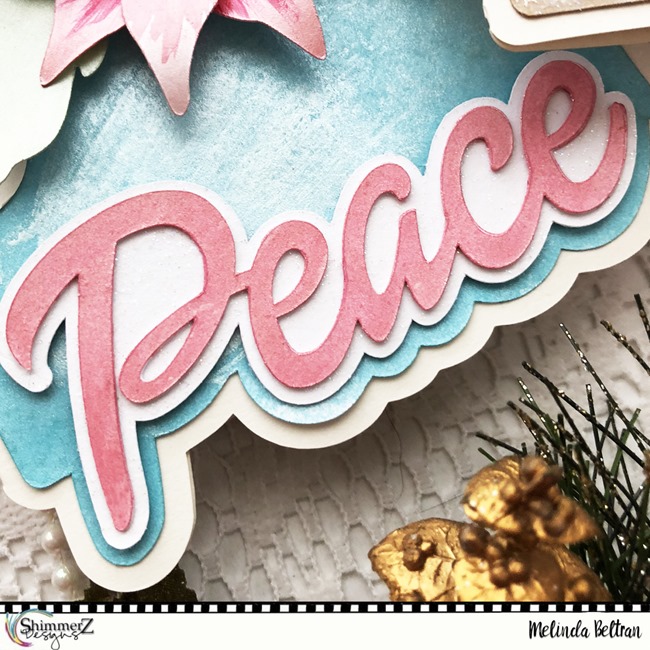
peace kraft
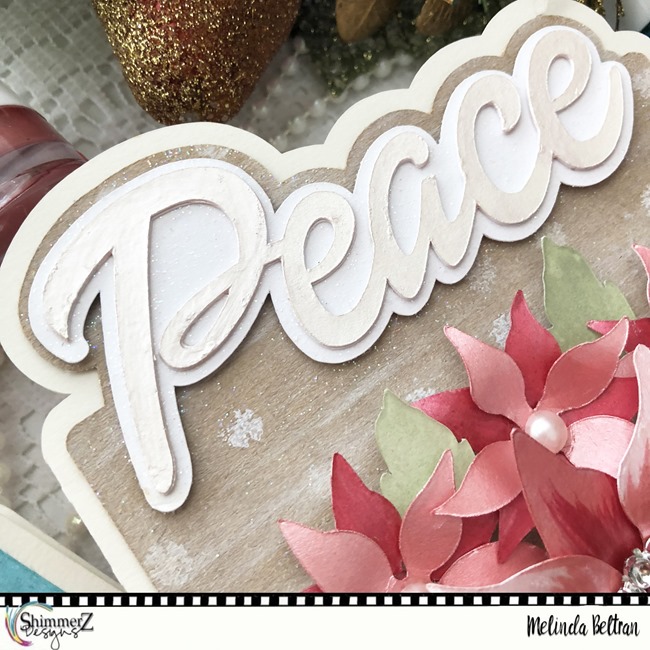
Here’s a closer look at the peace title. I layered three of them together to give them some depth. I painted some of the Angel’s Kiss Inklingz onto the die cut. You can’t tell in the picture, but it has a very soft and subtle shimmer to it. Reminds me of a pearl like finish. The bottom outline layer has some Puttin’ on the Glitz dabbed onto it.

close blue back
Here’s a closer look at the Poinsettias on the second card. I painted these the same as the other card. For the background on this card, I started by spraying some Jenni B Bleu Vibez onto the background. Once it was dry, I just brushed on some of the Angel’s Kiss Inklingz onto the background.


blue peace


peace card4

CHECK OUT THIS GREAT INCENTIVE!!!
ShimmerzSurpriseFreebie SQ3-JPG

Supplies Used
love never melts lg

jenni b bleu vibez

puttin on the glitz - pasteez


Now all that's left is for your to go pick up a little Shimmerz Paint and you can make your own!

Don't forget to mention my name in the comments when you place your order there! You will get a little freebie to try!


Thank you so much for allowing me to share with you. Please leave me a comment and let us know you were here. Don't forget to check back to see what the rest of these amazing designers are working on! Until the next time, you have a wonderfully crafty day!

Wednesday, September 21, 2016

Truly Grateful with Yoonsun

Hello crafty friends, Yoonsun is here! Today I have an autumn-themed card to share with you using some Inklingz shimmering watercolors. For today's card, I tried to stamp solid autumn leaf images instead of colouring. 


To create the card:
1. Die cut a piece of watercolour paper using the A2 sized rectangle panel die.
2. Colour directly on the solid autumn leaf images from the Penny Black Nature's Gifts set using some Inklingz shimmering watercolors: Honey Do List, Olive U Truly, Mochachino, Can't Elope, She Packs a Punch, Naughty or Nice, and Dear John Letter.
3. Stamp the image on the watercolor paper panel. Allow this to dry completely.
4. Stamp the sentiment from the MFT Geometric Greenery set on the bottom half of the panel in black ink.
5. Mount the panel on A2 top folded white card base using double-sided tape.
6. Embellish with a few clear droplets.


Thank you so much for stopping by. Have a wonderful day!!

Hugs,
Yoonsun

Wednesday, September 14, 2016

Beautiful poppies with Yoonsun

Hello crafty friends, Yoonsun is here! I am guest designing with Shimmerz Paints from this month. I am so excited and happy to be a part of the amazing team!!


Look at these beautiful colors!! I will show you flower cards with these 15 beautiful INKLINGZ Shimmering Watercolors this month!

Here is my very first project with them:

To create the card:
1. Die cut a piece of watercolor paper using the A2 sized rectangle panel die.
2. Stamp the poppies from the MFT Delicate Pretty Poppies set on the watercolor paper panel using Memento Dye Ink Desert Sand.
3. Color the poppies with INKLINGZ Naughty or Nice (red), The Holly & The Ivy, Honey Do List, and Olive U Truly Shimmering Watercolors.
4. Color the background with INKLINGZ Can't Elope Shimmering Watercolors. Allow this to dry completely.
5. Mount the panel on white card base using double-sided tape first, and then add the sentiment banner using foam tape.


Thank you so much for stopping by. Have a wonderful day!!

Wednesday, August 24, 2016

Elegant layout with Yuko


Hello!everyone! Yuko here.
I am also like to introduce a very elegant work today!


【cherish】
I was using the Attic charm collection of Blue Fern Sudios
It was perfect for this image.


Product of shimmerz was used to 
tint the background of the chip board.

Mainly of green-based IKNLINGZ,
 CREAMEEZ, AQUAHUEZ.used 4-colors.
The blurring because the coloring of watercolor system is elated!
Especially INKLINGZ is very beautiful because even enter Pearl.

Round sparkling've used the Stikles as liquid pearl.
It is difficult to see in the image, 
but the real thing is quite beautiful and sparkling!


It was stamped with the gesso to circle (such as a pen cap).
I think you increase the feeling soft with only white enters doing this.


<shimmerz>

INKLINGZ  Olive U Truly/GreenPastures
CREAMEEZ  Sage It Isn't So/Hide the Tide
AQUAHUEZ  Sea Weed

  Thank you!


Wednesday, May 18, 2016

Rose Garden Layout with Yuko


Hello!Shimmerz Friends! It's Yuko here!
Today.I made the layout of the springlike hue using the photograph 
in the rose park.


【LOVE】
These are very gentle spring of the color of the paper.
(however, the paper was a thing of the collection of Valentine!LOL!)


It was cut in a circle colored with INKLINGZ on white card stock.


shimmerz like the coloring of the system used by Dissolve with water
If you do not chipboard with a thickness it was firmly become limp.
A thick chipboard is the best!

I used green-based three colors.
Shimmerz Products really beautiful color!!!

Here also colored with pink to white card stock
Cut to the heart, I press the letter stamped with the white ink.


<The item which I used this time>

INKLINGZ・・・ Greener Pastures/Olive U Truly
CREAMEEZ・・・Great Fruit/Strawberry Fields/Sage It Isn't 


Thank you!