Showing posts with label Daisie Scraps. Show all posts

Wednesday, April 6, 2022

Mixed Media Heart Embellishments with Daisie Scraps

 Hi everyone! Today I have a video up on YouTube sharing how I created these lovely hearts.  I really allowed my self to get messy and used all of my favorite pinks and reds.


Products Used:

  • Pink Stiletto
  • Pink Moscato
  • One Hot Mama
  • Piggy Pink
  • Buddy’s Favorite Color
  • Scarlet’s Fever 
I started with my background stamps. They don’t see enough love so I pulled them out and used some Stazon ink to ensure that the ink would not smear when I added the paints to it. I had gessoed my background paper so that it was able to accept all of the water and paint and allow them to blend. 
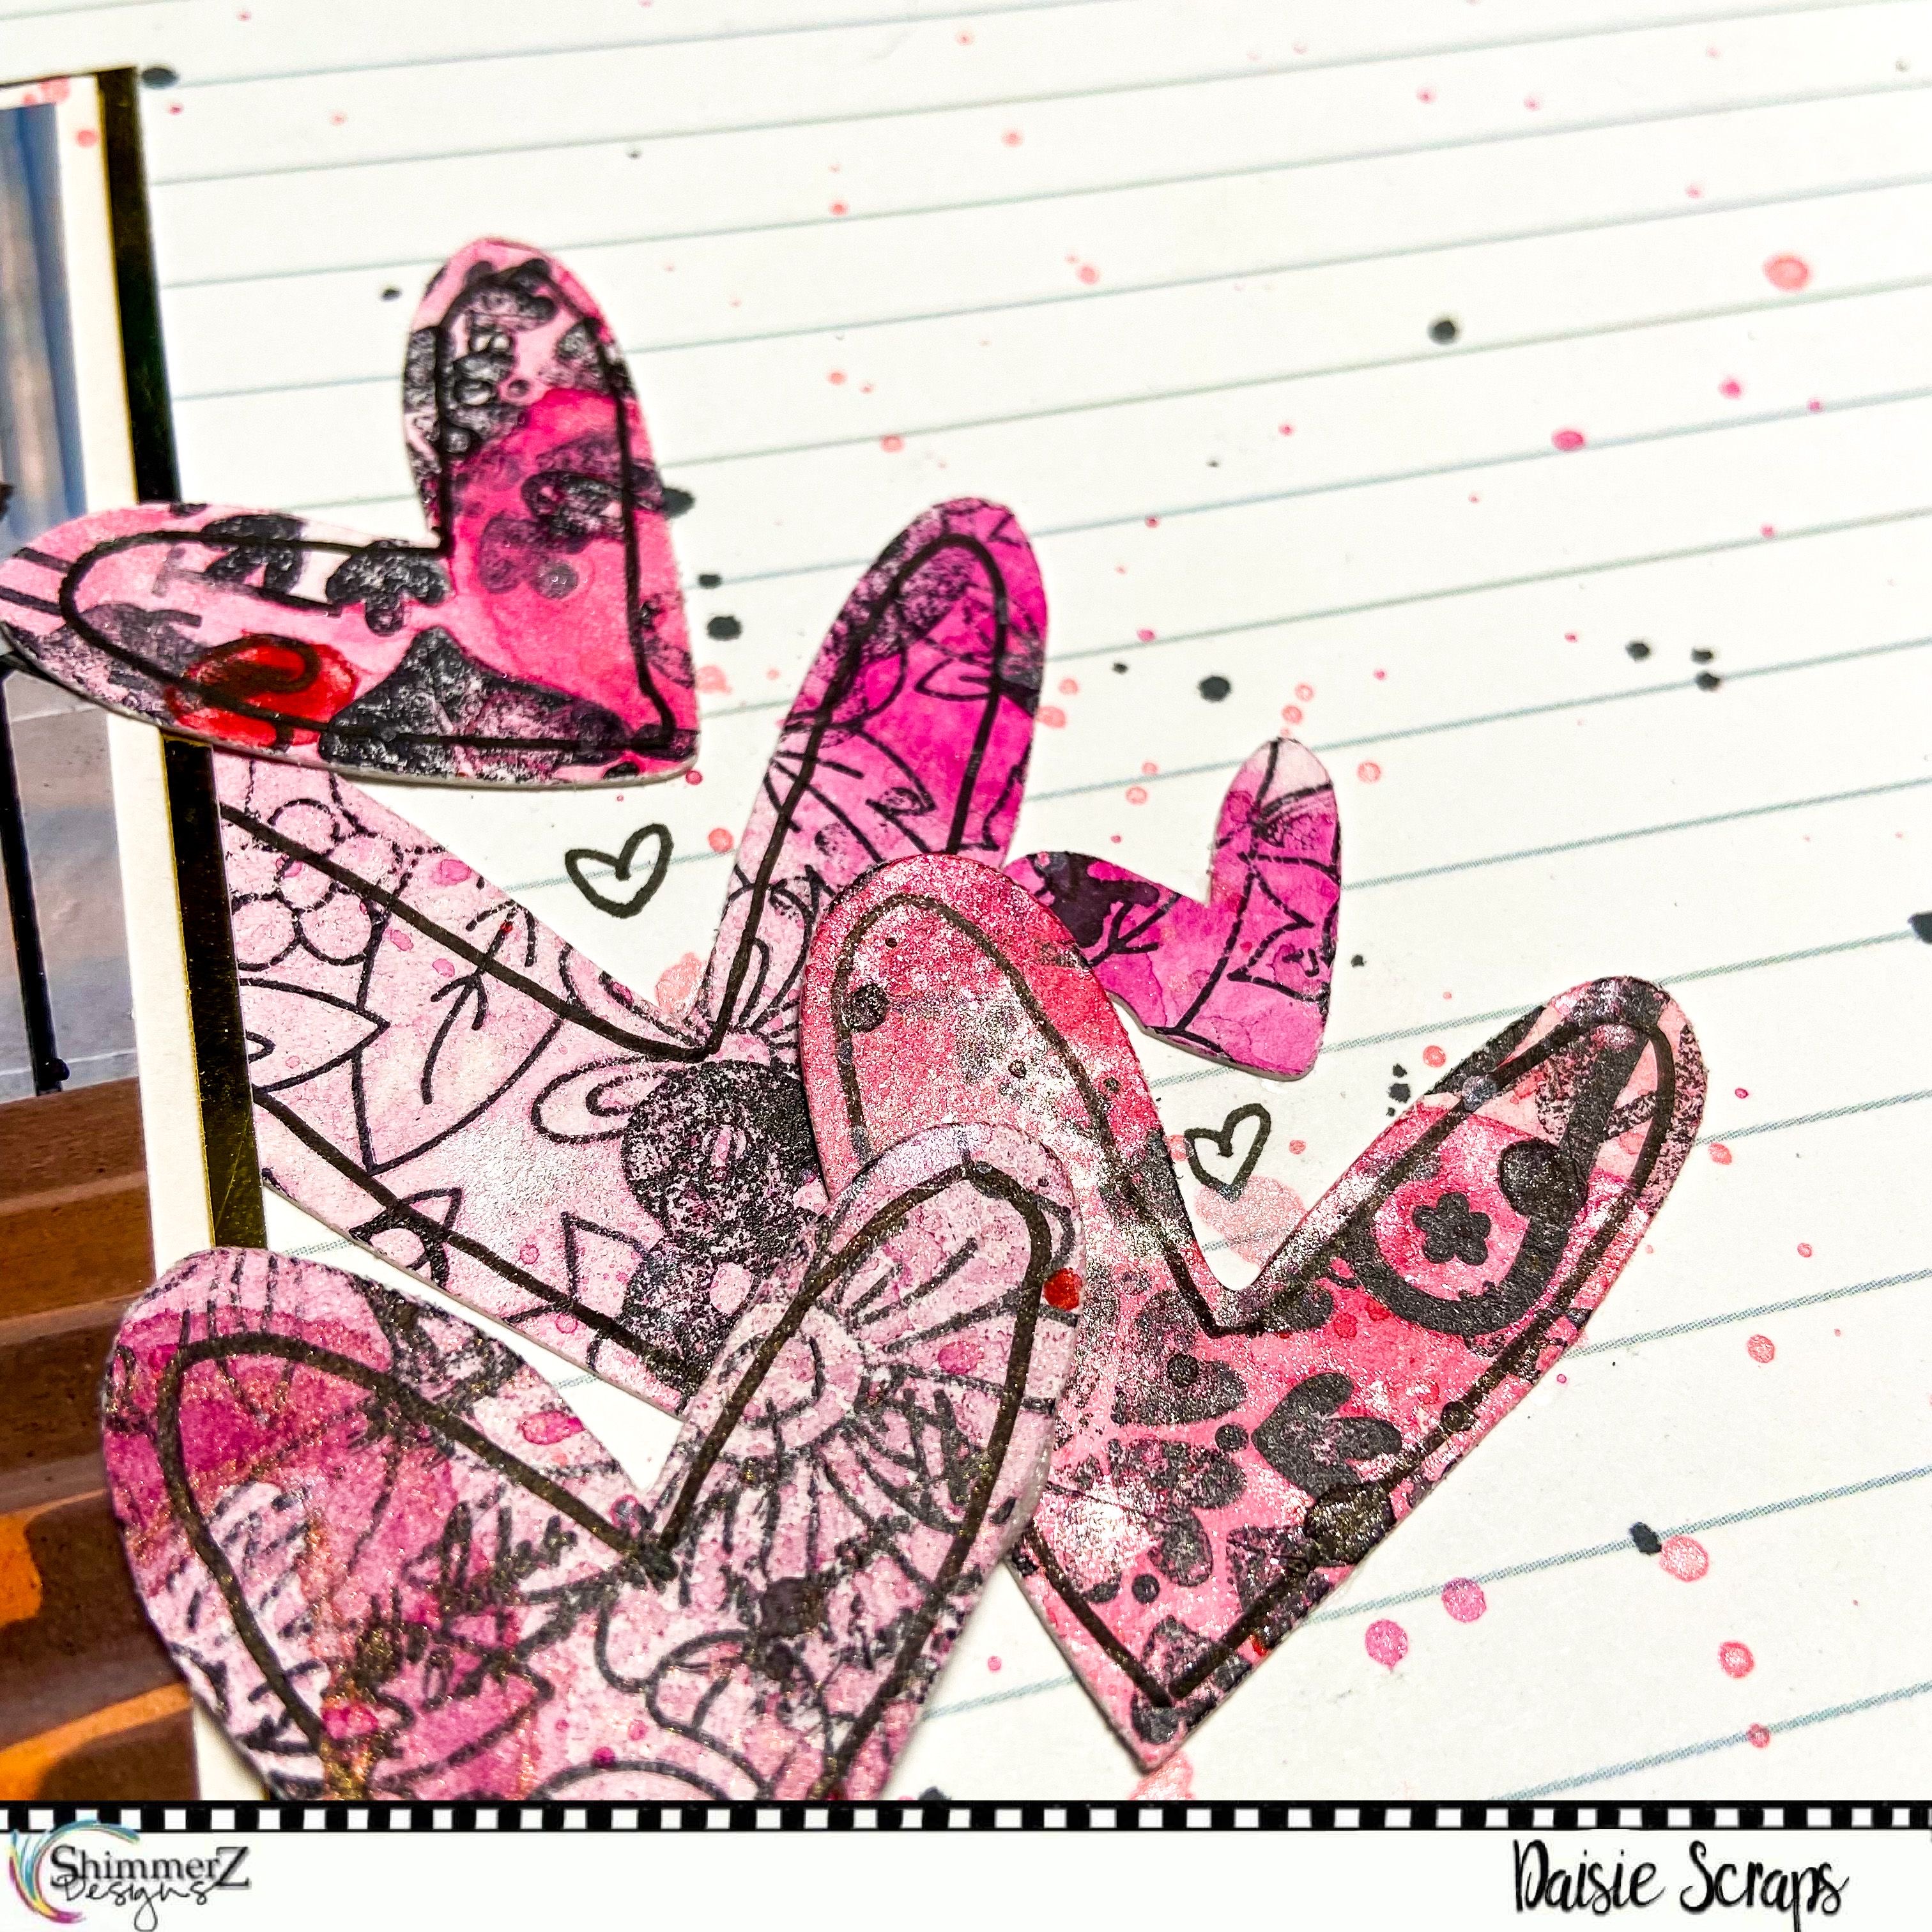

While adding my paints I was mindful of mixing some pink and reds together in the same area so that it would not look like blood splatter. I think the mixture created a good color and tone to avoid that. I really just added color where I felt that it and it needed it. I knew I was going to be using a cut file to cut this up so it didn’t really matter what one specific area looked like 


After cutting all the hearts out using my Silhouette, I outlined them with a Pitt artist pen. This also has permanent ink so if I wanted to add more color it would not smear. I then started playing around with some layout design ideas and ended up with a vertical design using a Dear Liszt paper as the background.


Head on over to YouTube and check out the process video.  Don’t forget to add my name (Daisie) to the comments of your next purchase for a fun freebie!


I can’t wait to see what you can do with this inspiration! Tag me on Instagram so I can see (@daisiescraps).

Have a crafty day!

Daisie

Sunday, December 5, 2021

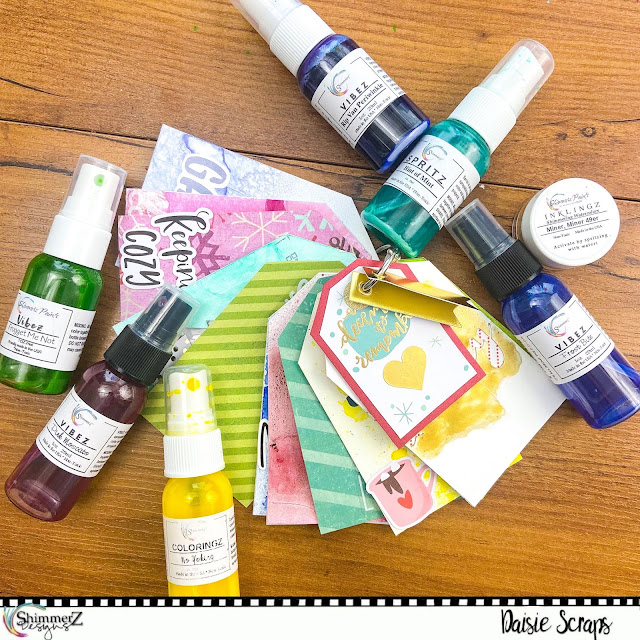
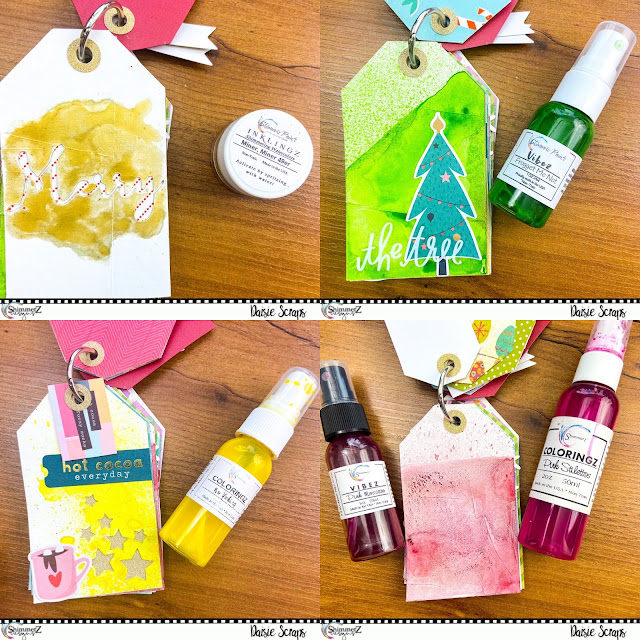
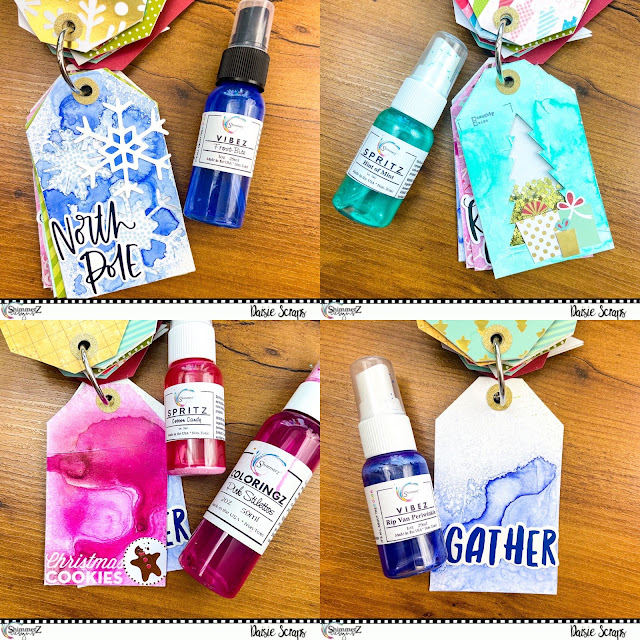
Documenting December in a Mini Album with Daisie Scraps


Hi everyone!  I’m here to share my December Memories mini book that I created using some tags.  

I am not one that can keep up with December Daily but still enjoy documenting the big or special moments.  


To begin, I prepped a 12x12 sheet of white cardstock with some gesso.  I knew I was going to do a lot of 

mixed media so I wanted to protect my paper.  The gesso acts like a shield to keep the paints from 

immediately absorbing into the paper.  It also allows for some time to correct mistakes. 


Once that dried, I used my Silhouette to cut out the tags I decided to use.  Some of them are embellished

 with cut files or titles.  I thought it would be perfect for this project.  While it was cutting I selected my color 

palette.  I chose a pattern paper that I really liked and chose my colors based off that.  


Next, I started painting.  Not every tag got some color but most did.  I loved playing around with the 

different tags.  I was able to use the color to make the album flow.  When the paint dried they were 

slightly warped.  To fix this, I backed each tag with some pattern papers.  The added thickness really 

helped to flatten the tags.  I also placed a bunch of paper pads on them to help weigh them down and 

flatten them.  


Finally, I embellished each tag.  It took some time to do this part.  I fussed over each tag pulling in 

different elements.  I added some paint to a few of them to add some shimmer.  I love altering products 

to make them mine.  Now I just have to make and add the memories!

 
  Please head over to YouTube and check it out!  Don’t forget that you can add my name (Daisie) to your 
next purchase from the Shimmerz Shop to get a fun freebie with your order.
 
 https://youtu.be/iQLvGpOgSUg

Thanks for visiting!  Have a crafty day!


Daisie Scraps

Saturday, November 27, 2021

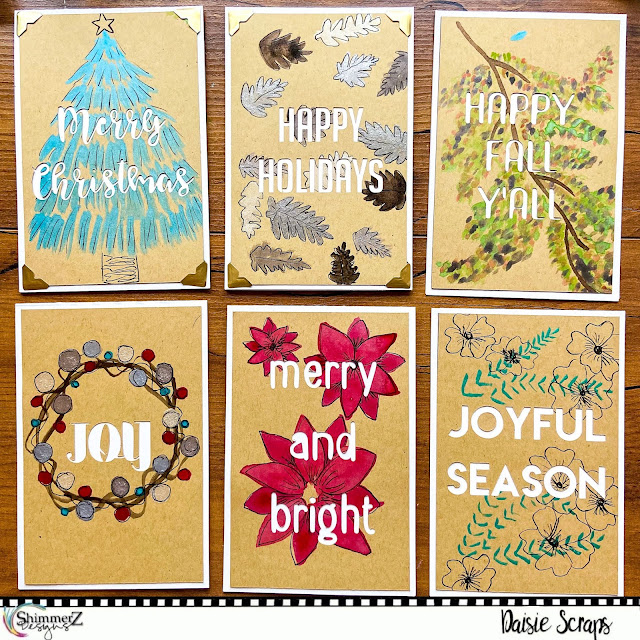
Simple Painted Holiday Cards with Daisie Scraps


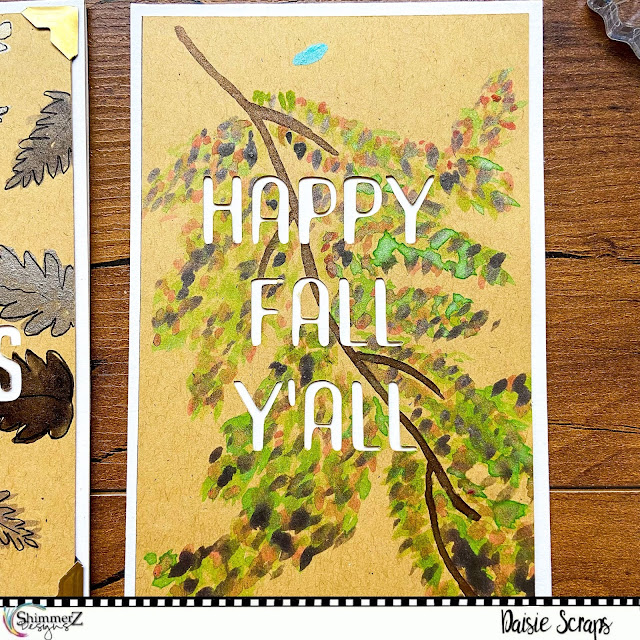
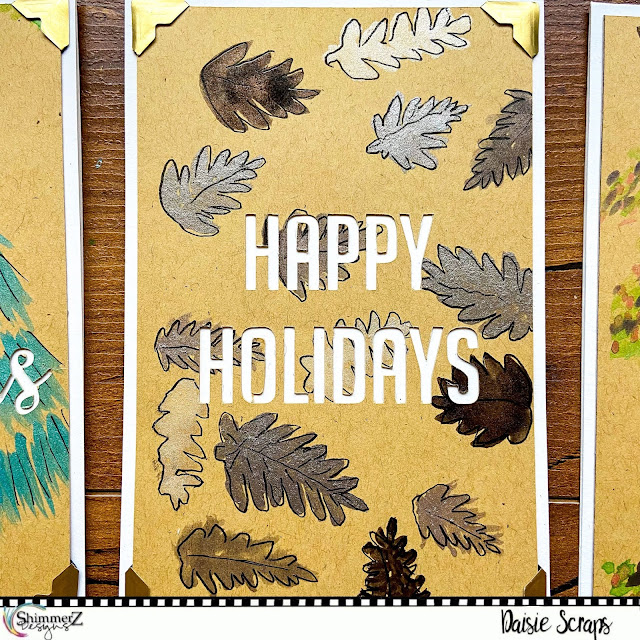
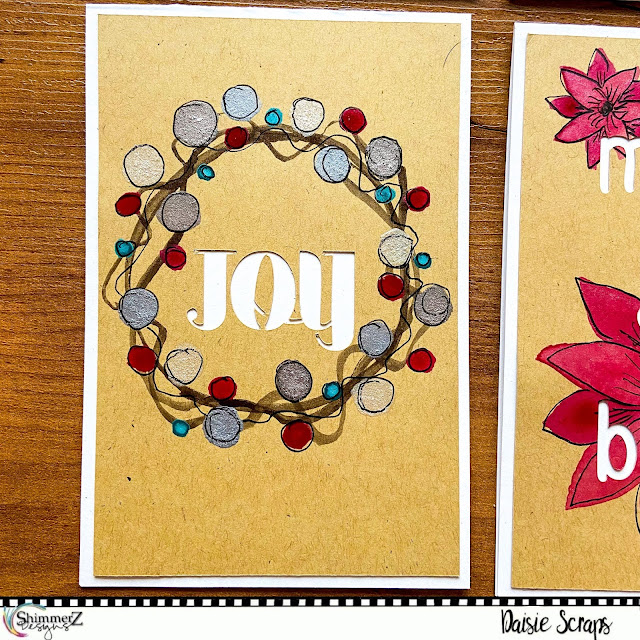
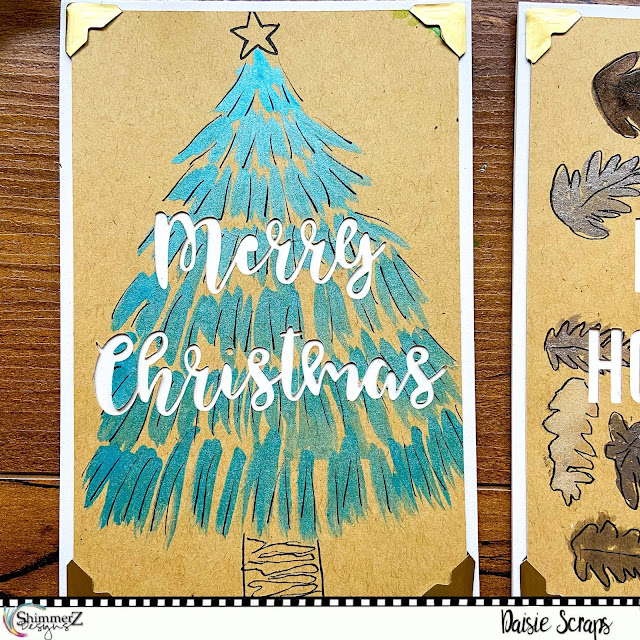
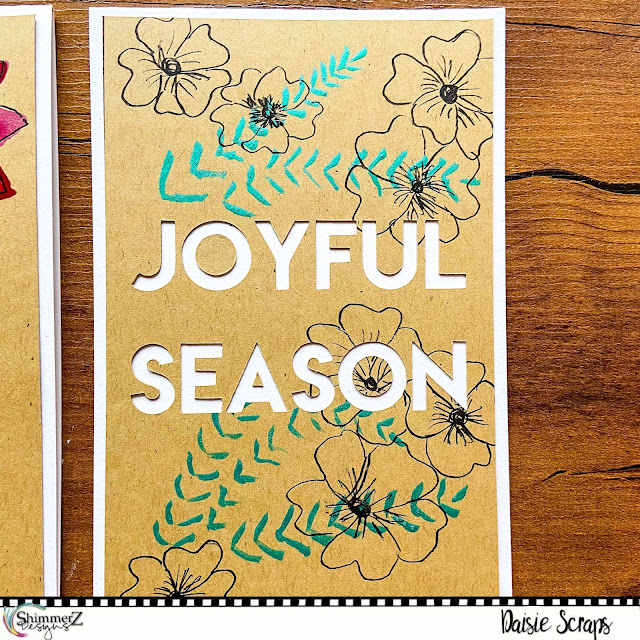
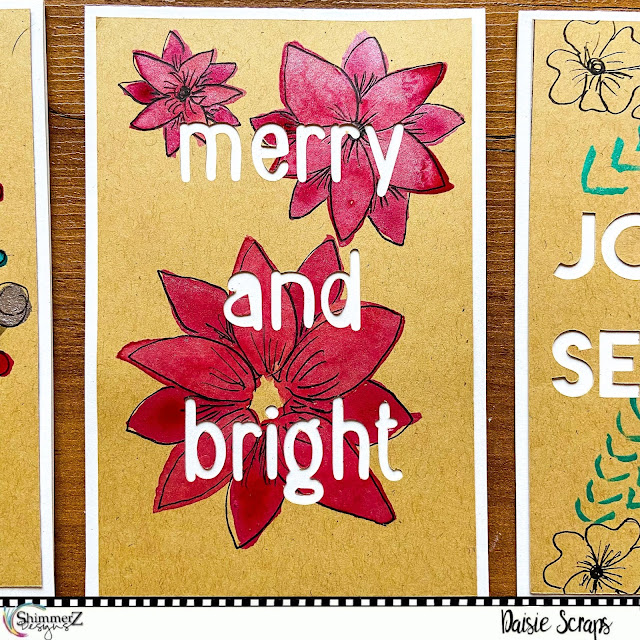
Hi everyone!  Today I am sharing a set of cards that I created using my Shimmerz Paints.  I had so 

much fun just painting!  These are simple designs that you can either free-hand or even trace and paint. 

Supplies Used:


I started by dividing my 12x12 Kraft cardstock into 6- 4x6 bases.  I started with the darkest color I was 

using, Penny 4 Your Thoughts, and added some base elements to a few spaces.  This was a great 

shimmery color that was perfect for a tree branch and some pine cones.


Next I went in with the greens.  I just added designs that I thought would look good.  A few sprigs and 

some leaves.  I used Buddy’s Favorite color to create poinsettias.  The Blingz were perfect for some shiny 

baubles on a wreath and more pine cones (that ended up looking like leaves).  I had one base left so I 

painted a super easy tree using the Blue Lagoon.  It turned out so sparkly and pretty!


After everything was dry, I went in and added some doodle elements to each card using my Pitt Artist pen.  
I outlined the pine cones, added a trunk to the tree, outlined the poinsettias and just added detail where I 
thought it was needed. 

After I was happy with the cards, I sent the whole sheet through my silhouette.  I used various fonts from 
my computer to embellish my sentiments.  I had the Silhouette cut out the cards for me and had it shave 
¼ of an inch off so that it would fit on the base with a nice border. The only thing left was adhering everything
 to the 4x6 base.  

I created a process video to show how the cards were created.  I would love to have you check it out!  
Don’t forget you can add my name (Daisie) to the comments of your next order to receive a fun freebie 
with your order!  
 
https://youtu.be/F-SJNhY6U9c
 
Thanks for visiting!  Have a crafty day!

Daisie Scraps


Wednesday, May 26, 2021

Beautiful | Daisie Scraps

 Hi Everyone!  Today I am sharing with you a layout that I used 2 paint colors to create.  I usually go all out and use all of the colors but today I felt that I wanted to simplify.

Products Used:


This layout was pretty simple to put together.  I knew I wanted to use black cardstock as my background because the Inklings would really pop and shimmer on it.  I chose the Beets Me Inklingz because it is a gorgeous pink-purple color.  I started by free painting 2 flowers on the background.  I used 2 coats to make sure that the black didn't show through.


Next, I added the vines and leaves.  I used 2 coats of the Green Goddess Inklingz for this too.  I wanted the paint to be as opaque as possible.  The shimmer in the paint really shines on this background!  I chose to rip part of the cardstock off the right side and add some pattern paper and crepe paper for some added dimension and texture. 


I used some pattern paper to back my photo and popped it up on some foam adhesive.  I pulled out the green and pink butterfly Dotz because they match the colors of the paints perfectly.  I created embellishment clusters around the Dotz.  I finished with the title and some sequins.


There is a video up on YouTube if you are interested in more of the process for this layout.  Don't forget that you can add my name (Daisie) to the comments of your next order for a fun little freebie to be added to you order. 


https://youtu.be/9M6Yrew5x7w

Thanks for visiting!  Have a crafty day!

Daisie Scraps


Friday, April 30, 2021

Sweet Tweet \\ Daisie Scraps

 Hi everyone!  Today I have a fun spring layout to share with you.  I love when the birds come back in the spring.  As soon as I see the first robin I know that spring is finally here.  So I chose a cut file that represented that and painted the birds to match the birds I watch from my window.


Product Used: 

First, I painted each of the birds.  I did look up some photos to use as inspiration and to get the coloring right.  I layered the lighter colors then added in the darker colors so that they would blend a little nicer.  I also let the paint dry a bit between layers of color. Once that was dry, I adhered the top of the cut file to the wreath.  This gave definition to the birds. 


Next, I worked on my background.  I added gesso to a piece of white cardstock and waited for that to dry.  Then I spritzed the paper with some water and started adding the mists to it.  I chose to use a paintbrush to get that watercolor look.  I used the Sapphire Spritz, Rip Van Periwinkle Vibez, and the Frost Bite Vibez.  These are all amazing blue colors.  I thought that they represented the sky behind the birds.


Finally, I added all of my embellishments, photo, and title.  I kept it pretty simple because I really love the birds and wanted them to stand out.  I did a simple layer of a bag behind my photo.  I added a tangle of blue bakers twine behind the wreath.  I finished it off with some sequins for more sparkle.  


I hope you enjoy this layout!  It's one of my favorites.  If you are interested in more of the process please head over and check out the YouTube video.  Don't forget to add my name (Daisie) to the comments of your next purchase for a fun freebie to be added to your order!

https://youtu.be/eIeGNzJHQtA


Thanks for visiting!  Have a crafty day!

Daisie


Saturday, March 27, 2021

Somebunny Loves You \\ Mixed Media Scrapbooking \\ Daisie Scraps


 Hi everyone!  Today I created a layout using an Easter cut file for a non-Easter photo.  I find that I collect all of the adorable Easter things and then often fail to get great Easter shots.  So I decided to use one of my favorites anyway. 

Products Used:

Creameez Purple Peony

Shimmerz Wisteria Lane

Shimmerz Lilac Blossom

Creameez Pink Champagne 

Shimmerz Going Peach Side 

Creameez Dandy Lion

Creameez Refresh Mint 

Inklingz Green Goddess 

Vibez Hermit The Frog 

Shimmerz Celery 

Shimmerz Pool Me Close 

Spritz Hint of Mint 

Inklingz Blue Lagoon 

Shimmerz It's Mint To Be 


I started out by painting my cut file.  I left all of the inside bits in because I like the darker line you get when the paint pools a bit in the cut line.  I used all the pretty purples and some light pink tones to really make the flowers pop.  I used the lightest green (Refresh Mint) to paint in the leaves.  I kept dabbing on the paint here and there to make it have the true watercolor touch with the areas of dark and light.  Then I set this aside to dry.  Very important step to avoid tearing of your cut file while removing the bits.


The next step was my background.  I went with the tried and true packaging technique.  I used all of the greens I had for this background.  I wanted my bunnies to look like they were in a field.  So I started with my mists, then moved to the other paints.  I just kept adding the color until I was happy.  Then I added some splatters.


Finally, I put everything together.  The bunnies were backed with some parchment paper to soften the background seen through them.  The cut file was glued down using liquid adhesive to make sure it would stick.  I added an adorable black and white photo of my husband and daughter.  I thought it worked great with the title I had chosen " Somebunny Loves You".  So cute.  I embellished with some labels, puffy hearts, and phrase stickers to complete the design.  


If you're interested in seeing more of the design process, check out my video on YouTube.  Don't forget to add my name (Daisie) to the comments of your next order for a mini freebie to be added to your order!

https://youtu.be/6h99Is4EvbA

Thanks for visiting!  Have a crafty day!

Daisie


Thursday, December 10, 2020

Creating a Mixed Media Background with Daisie Scraps

 Hi everyone!  Today I am sharing how I like to create my own pattern paper using Shimmerz Paints.  

Products Used:

First I used the black and gray mists to create my plaid background.  It was super simple to do.  I just dipped a paint brush directly into the bottle and used a ruler to paint on straight lines.  This was a super simple process!  Plaid is the easiest design to create because it's only lines.  
 
Then I embellished my cut files.  I used the wreath cut file from the December Color Kitz and cut it on green cardstock.  I then used Shimmerz Celery and Inklingz Green Goddess to create depth in my wreath.  This really upgraded the cut file pieces and made my wreath really shine.  

 
Next I used the pieces to create a wreath on my page.  I glued all the pieces down alternating the light and dark shades in the branches.  I embellished the wreath with some glitter stars and some red circles to represent ornaments.  I added a title and some ribbon to finish everything off!
 

Check out the process video for a more in depth look at my process!  Let me know if you have any questions about any of the techniques I used.  Don't forget to add my name ( Daisie) to the comments of your next purchase for a fun little freebie to be included with your order!
Thanks for visiting!  Have a crafty day!
Daisie

Saturday, November 14, 2020

Mixed Media Home Decor with Daisie Scraps

 Hi everyone!  Today I have a super easy home decor piece you can create using a cut file and some Shimmerz Paints.

 Products I used:

 
To start, choose and cut your cut file.  I used Kraft cardstock to create the fall theme I was aiming for.  Next, I traced the cut file onto a white piece of cardstock using a white gel pen.  You could easily use a pencil for this step, just trace lightly so that your lines don't show when finished. 
 
 Once everything is traced you can start the fun process of painting in all of the spaces.  This is a great project for new mixed media peeps because if you go outside the lines a bit it won't ruin your project.  The paint is going on the back layer so little mistakes will be covered.  Just be aware of the spacing of the cut files pieces so the colors don't run into nearby shapes.   I also tried to mix up my colors so that like colors were separated a bit.  

I chose to use the Blingz Pixie Dust to paint the words on the cut file because I wanted them to be shimmery but neutral.  This is a great option for this because it is white and full of shimmer.  Then I chose a variety of colors in my fall color scheme which includes purple and pinks.  Colors like Gold-N-Roses, Sugar Plum, and Gosh Garnet are fantastic options for fall.  


When my paint was dry, I added the kraft piece of cardstock to the top.  I carefully lined up the cut file to the painted pieces and adhered it down.  I used the "off" cuts of the cut file to embellish the remaining kraft cardstock space around the cut file.  This added some texture and interest without taking any attention away from the painted cut file.  To finish, I simply put the whole thing into a 12x12 frame that I had and voila I had a prefect piece for above my mantle! 

Head on over to YouTube and check out the process video for more information.  I hope that this inspired everyone to give this technique a try!  Don't forget if you add my name to the comments of your next purchase you will get a mini freebie along with your order!  If you order in the month of November you will get a second freebie of a Turkey Dotz!  So be sure to get your order in soon!
https://youtu.be/RvTFbKnZFKQ
Thanks for visiting!  Have a crafty day!
Daisie Scraps


Thursday, September 10, 2020

Monochromatic Mixed Media Layout with Daisie

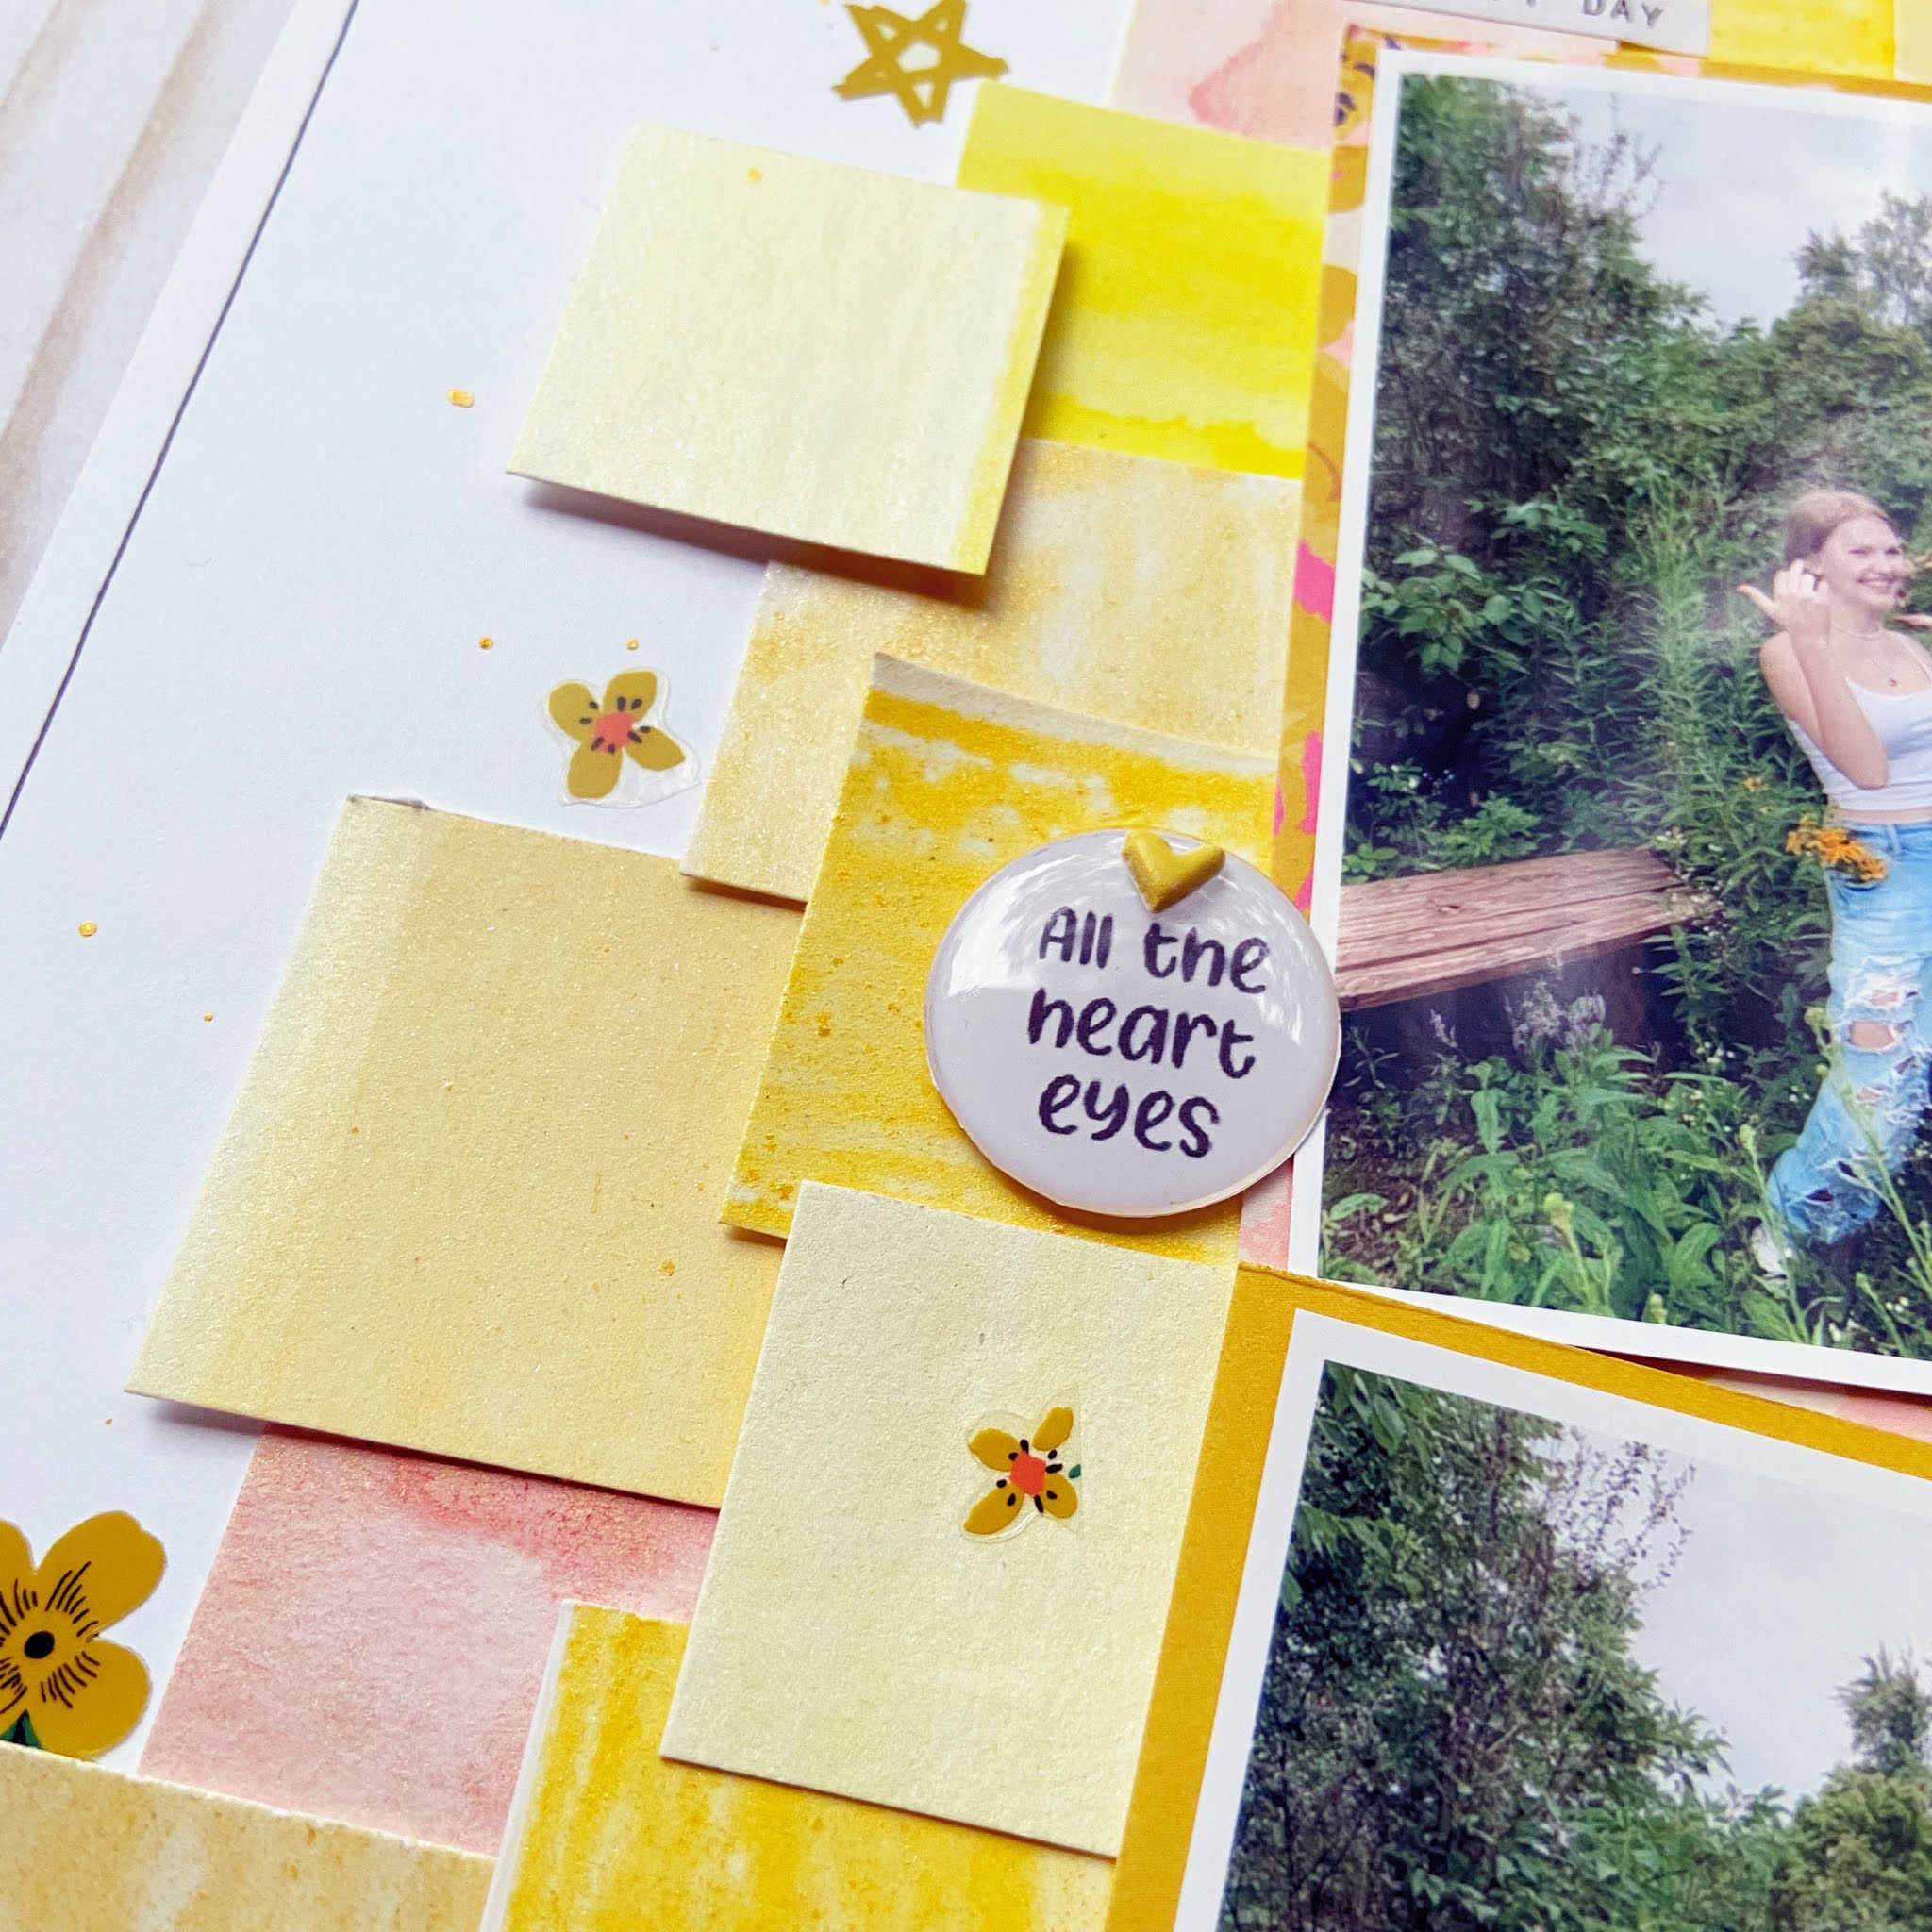
 Hi everyone!  Do you ever have a photo or set of photos that just inspire you?  I felt that way with these photos of my oldest daughter.  I went on the Shimmerz shop and purchased 5 different shades of yellow and one orange tone just to match!  When I recieved my package I painted big stripes on a piece of cardstock to see how they all looked together.  They were bright and shimmery, just what I needed!  

Here is a list of products I used:

I decided I didn't want to waste my swatch sheet so I cut the strips apart and cut them into squares of varying sizes. I thought they would make the perfect embellishment for my layout.  I grouped my set of 4 3x4 photos in the center of the layout.  Then I started adding all of my squares around, mixing up the colors and creating dimension by applying glue to one side of the square so the other side would pop up a little.  I also put a few of the squares on foam adhesive for an added boost.

To finish, I added a few clear stickers from Maggie Holmes Sweet Story collection.  I pulled out a few sets of Dotz and found the perfect ones to go with the photos.  This was a super simple layout and one that can easily be recreated using any color.  

Don't forget to add my name (Daisie) to the comments on your next purchase for a fun mini freebie.  Please check out my video to see the complete process!

I  hope you enjoy!  Go try this easy layout design!  I can't wait to see what you make!

Daisie


Thursday, August 20, 2020

Fall Leaves Mixed Media Layout - Daisie Scraps

 Hi everyone!  Daisie here sharing my first Shimmerz DT layout!  I'm so excited to be here!  I decided that with fall just around the corner it's time to start getting into the fall scrapping mood.  I pulled out 2 cute 4x6 photos of my youngest and a friend playing in the leaves and used that as my starting inspiration.  


Here is a list of the Shimmerz products I used for this layout:

I started with a piece of white cardstock.  I thought I was going to paint my leaves directly onto the background of my paper so I mapped out my original design idea and started creating my leaves.  To do this I used an embossing stylet to "draw" my leaves out.  The stylet creates a raised edge on the opposite side of the paper which is perfect for filling in with paints without worrying too much about going outside the lines.  I "drew"  all of the leaves I thought I was going to use and then started painting.  

I used quite a few different Shimmerz products to get the colors and effects that I was aiming for (see product list for all of the colors used!).  I wanted to have some of the leaves look like they were turning so I mixed some of the light green shades with browns and deeper teals.  I realized that I didn't have any orange colors and decided to use the purples and deeper pink colors.  It worked out perfectly!  

I quickly abandoned my original layout plan and decided to cut out the leaves I had created.  I then stitched down the center of each using gold thread.  I pulled out some kraft cardstock for my background because it went great with the color of my leaves.  Then I started playing!  I sprinkled Gold-N-Roses and Pink Moscato all over the background in a diagonal.  I pulled out some scrap pieces of paper and fussy cut out some butterflies and some phrases.  The butterflies I jazzed up using the Foilz in Mother of Pearl.  It adds all of the shimmer with no color.  It's perfect to add that special sparkle to any plain embellishment.  After that I just kept embellishing around my leaves.  They really put you in the fall state of mind! 


Don't forget to add my name (Daisie) to the comments on your next purchase for a fun mini freebie.  Please check out my video to see the complete process!


I had a lot of fun creating this layout!  I hope you enjoy it!  I can't wait to see everyone's favorite colors to use for fall!  Thanks for stopping by!

Daisie
@daisiescraps