
It may look like it takes a long time to recreate the look, but trust me, it doesn't. Shimmerz dries very quickly!
I started by scoring and folding a 4 1/2 x 12 cardstock to create the 4 1/2 x 6" card base.
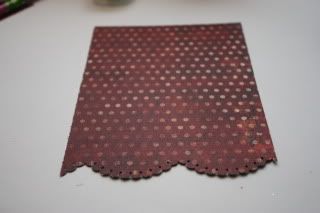
 Next I used the border punch to create a scalloped edge on the bottom of a 4 1/4 x 5 3/4 piece of patterned paper and set aside.
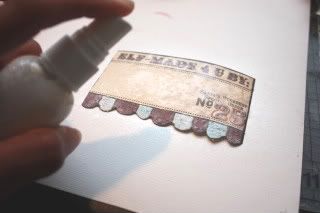
 I spritzed a die cut with Baby's Breath Shimmerz and dried with the heat gun and set aside.
 I then took my ribbon, originally cream, and placed it on my work surface.
 Next, I saturated it with Barn Door Shimmerz Spritz. Don't worry about getting messy, Shimmerz cleans up easily with soap and water!
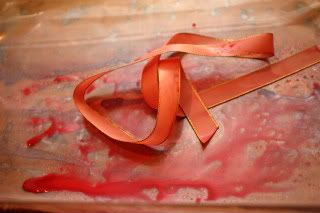 I took a Prima rose, originally white...
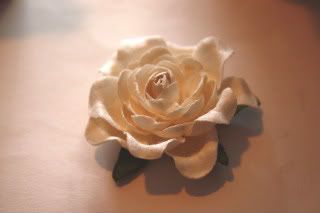 and rubbed it in the over spray on my work surface.
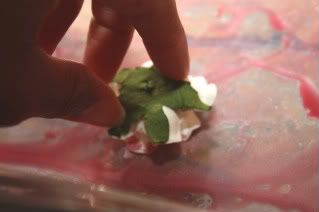
I could have easily sprayed the flower, but by rubbing it, I still maintain some of the original white in between the petals.
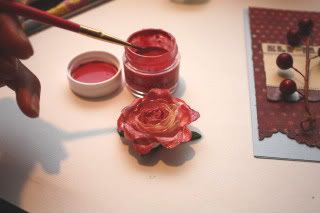
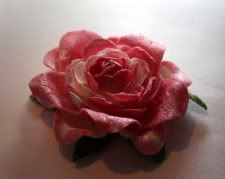 I took a thin paint brush and painted Ruby Red Shimmerz on some of the petals. I think the different tones of color really add dimension to the flower.
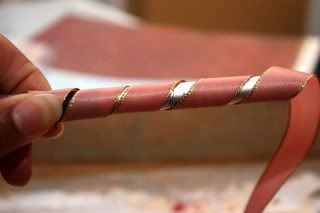
 I then took my ribbon, which is still wet and wrapped one end around the handle of my craft knife (a pencil or similar tool would work, too). To create the ribbon curls, I used the heat gun to dry it in this position. Watch out for your fingers because the heat gun gets hot!!! (make sure to move the heat gun back and forth frequently so it doesn't scorch the ribbon). Repeat on the other end.
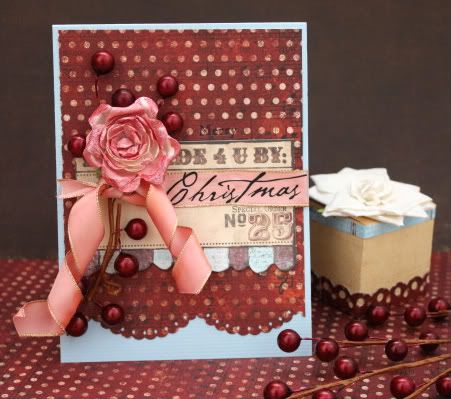
 Now that all of the elements are dry, everything comes together pretty fast. I adhered the pattern paper to the cardstock. I ended up cutting a little more off the top so a larger portion of blue could show at the bottom. I centered the die cut and adhered it 2 1/8" from the top of the card. I used glue dots to adhere the holly berries to the left side of the card and then added the curled ribbon. I removed the green leaves from the flower and then adhered it above the knot in the ribbon. I added the rub-on sentiment and here's the result...
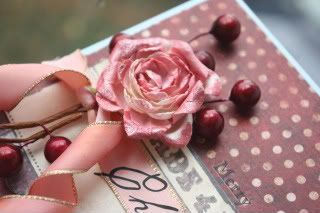
 Here's a close-up of the flower...you can really see the shimmerz!
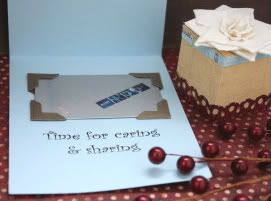
 Here's what the inside looks like. I used 4 photo corners to hold the gift card in place and then added another rub on sentiment.
I hope you enjoyed the tutorial!
I took a thin paint brush and painted Ruby Red Shimmerz on some of the petals. I think the different tones of color really add dimension to the flower. I then took my ribbon, which is still wet and wrapped one end around the handle of my craft knife (a pencil or similar tool would work, too). To create the ribbon curls, I used the heat gun to dry it in this position. Watch out for your fingers because the heat gun gets hot!!! (make sure to move the heat gun back and forth frequently so it doesn't scorch the ribbon). Repeat on the other end. Now that all of the elements are dry, everything comes together pretty fast. I adhered the pattern paper to the cardstock. I ended up cutting a little more off the top so a larger portion of blue could show at the bottom. I centered the die cut and adhered it 2 1/8" from the top of the card. I used glue dots to adhere the holly berries to the left side of the card and then added the curled ribbon. I removed the green leaves from the flower and then adhered it above the knot in the ribbon. I added the rub-on sentiment and here's the result... Here's a close-up of the flower...you can really see the shimmerz! Here's what the inside looks like. I used 4 photo corners to hold the gift card in place and then added another rub on sentiment.I hope you enjoyed the tutorial!
5 comments:
Love it!!!
Absolutely gorgeous Tanisha!!! What a great tutorial too. Beautiful colors together!
WOW! I love this!!! What a gorgeous way to give a gift card!!!
Great idea, Tanisha!!
A gift in a gift. Love it!
Post a Comment