Showing posts with label Teal the End of Times Shimmerz. Show all posts

Friday, August 23, 2019

Being Invested with Process Video | Niki Rowland


Hi everyone, Niki here today with a new layout to share. I've used wide paint strokes to create the background for this layout.
I've used a mixture of Inklingz and Creameez and added a small amount of water to each colour. Once the paint had activated a bit I used a wide paintbrush and painted directly onto my white background.

The colours I've used are:
Honeymoon Inklingz 
Teal the End of Time Shimmerz 
Boogie Boardin’ Blue Creameez 
Ride the Tide Creameez 
Green Grass Inklingz 
Freshly Minted Inklingz


Once the background stripes were dry, I then went back and added paint splatters over the top of each stripe. I did this colour-on-colour style.


I've used a mixture of different paper collections to create this layout, but mostly Crate Paper All Heart. Even though this collection was aimed towards girls, I found lots of things that were relevant to this story and worked really well.


I added machine stitching and also used tissue paper and tulle for extra texture. I fussy cut some stars and used an acrylic word for a title, as well as little alpha stickers too.

Thanks so much for joining me today, I hope you have enjoyed this layout. I have also put together a process video which you can view below.

Don't forget if you place an order via the Shimmerz Store, enter my name in the comments and you will get a little freebie in with your order.

Happy scrapping xx 


Thursday, February 21, 2019

Rumbly in my Tumbly | Niki Rowland


Hey there Shimmerz Fans! Niki here today and I have a bright colourful layout to share with you today.

I've used the new Dear Lizzy collection 'New Day' and it has lots of bright colours in it. I chose a striped paper with lots of colours and tore a strip of it to go across the top of my layout. I then matched my Shimmerz paints to the coloured stripes and extended the colours down the layout.


Once I had created my colourful background I then stuck on my striped paper. I created a photo cluster with three photos and lots of embellishments, all from the New Day collection too.

I used the multi print alpha from the same collection to make a fun title and I handwrote in my journaling at the bottom to finish off. 

Now you've got to the end, I'll let you into a secret. This layout was initially quite different. I had also got a striped paper strip at the bottom too with the colours painted up as well. I actually finished the layout but it was awful! It's extremely rare for me to make a layout that I hate and I really did hate this one, so much so that I didn't feel I could share it as a DT project for Shimmerz. So I left it a few days and then chopped it up, rescued the top painted part and added it to a new white background with a white strip right at the top and some white space at the bottom. This made it a whole lot better and I'm now happy with the end result (almost). See, even people on Design Teams get things wrong occasionally :)  

Happy scrapping lovelies and may Shimmerz paints colour your world beautiful xxx


Tuesday, August 21, 2018

"Get Your Paint On" with Sandi Clarkson

Hey hey, scrappy friends! 
It's Sandi here with you today sharing my latest Shimmerz Paints project. 
I wanted to have a little fun with some of the newest Shimmerz Paints colors, so I decided to create this little art palette piece and try for an ombre effect using the grays. 


The actual Art Palette is a chipboard piece from Creative Embellishments and it's about 7 inches high.  I prepped it with some crackle paste and let that air dry (waiting is the hardest part!) for about 24 hours. Next I adhered some old paintbrushes and decided on my other embellishments.

To achieve the ombre look, I've used Coloringz Night MovesVibez GreyFlannel and lastly Spritz Granny Gray. These were simply sprayed on one after the other.


Before the colors were completely dry, I splattered on Shimmerz Teal the End of Time and Vibez Snow Storm. And then because I couldn't stand NOT to, I splattered on some of the new Shimmerz Pip Pip Cherry O. I thought it would be a nice pop of color and it's perfect!


When that was done, I colorized my chipboard title (also Creative Embellishments) with the Coloringz Night Moves. After adhering that, I moved on to adding my other embellies.


I finished everything off with some white gesso splattering and highlighting.  Lastly, I added a few of the new sequins we are carrying by SpeigelMom ... Spigelmom Scraps Sequins Picking Wild Flowers


I'm loving all the dimension and mostly, these new gray colors!
I'm thinking lots of great modern farmhouse projects!

If you are ready to shop, don't forget to include my name SANDI in the comment section, to receive a little free gift.

That's it for today!
Thanks for coming by.

 Vibez GreyFlannel (new) 

Monday, April 16, 2018

Dreamer


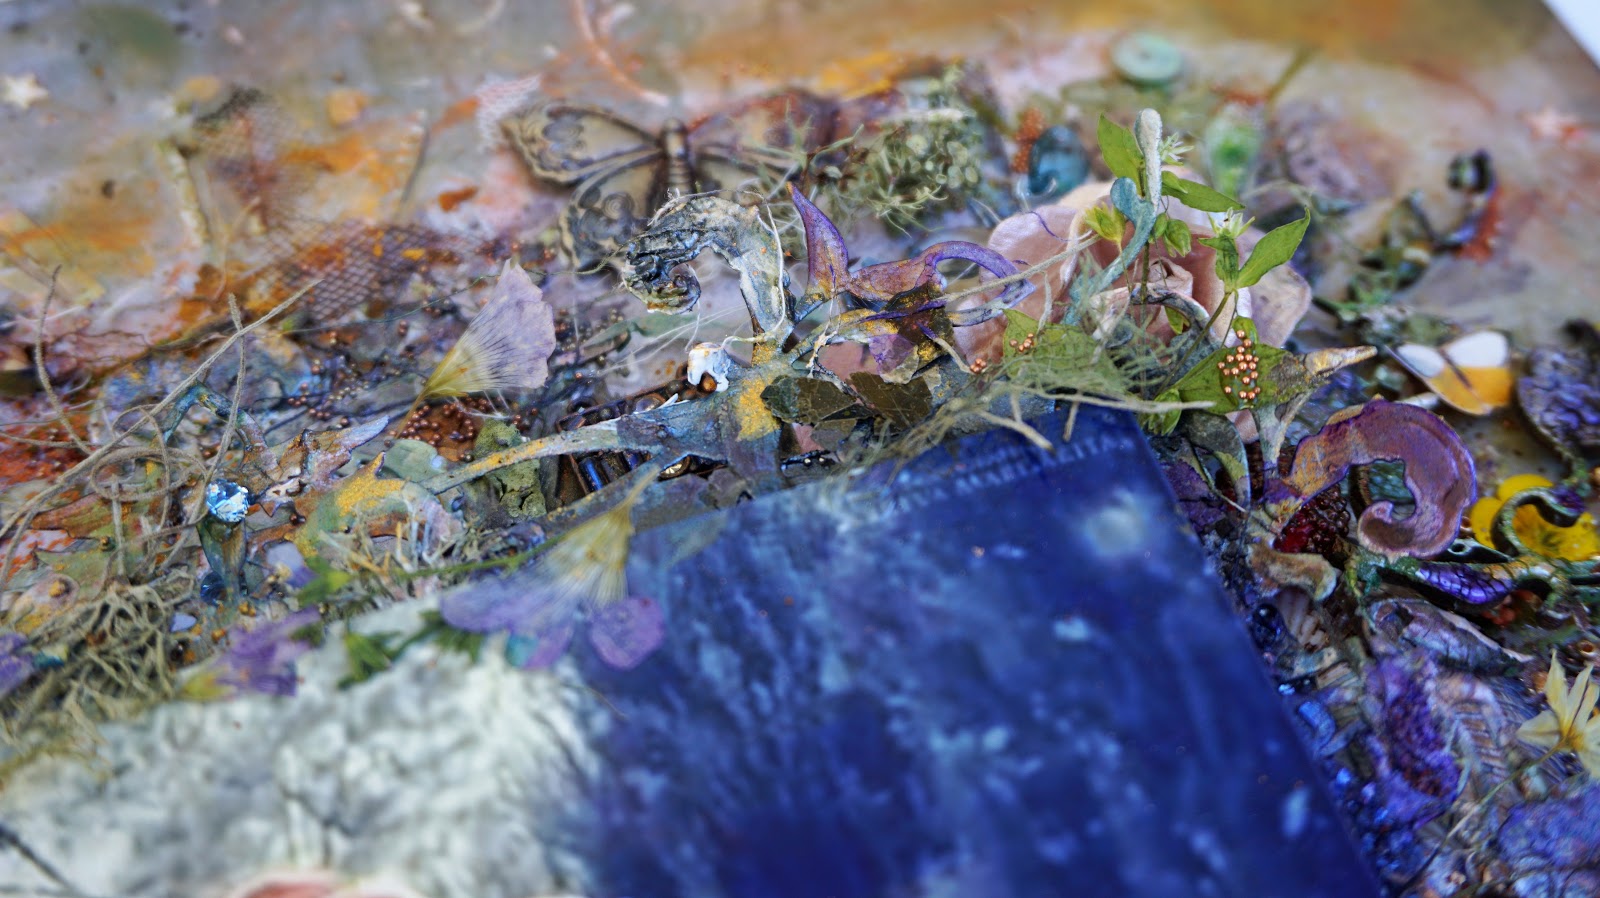
Hi everyone! Melissa here with my second design team page of April, for Shimmerz Paints! 
If you like paint, you will love these colors, and the type called Shimmerz is thick, ready made, and has an intense shimmer.The Inklingz are very shimmery too and are watercolors, you just spritz some water on top, and wait for a couple minutes for the paint to activate. Depending on how much water you use, the result can be thick, or thin. 


Here's how I made this page:
I mounted the photo on watercolor paper. I cut up die cuts,mostly Spellbinders, and put them around the pic. 


I stenciled on a clockface and bee using texture paste and a credit card.


I used double sided foam tape and put the pic with layers of foam core board on the sheet of Tattered Garden paper by 49 and Market. I like using tape because if I change my mind about design, it's easy to adjust, rather than tearing the paper by something that's glued on.


I added some big things like shells, glass pebbles, and flowers to support the die cut layers. There are metal pieces from Finnabair at the upper left and lower right corners. I painted the dusty attic chipboard and applied a thick layer of  Clear Rock Candy. For the paint I used Greener Pastures Inklingz first, then while it was wet, dropped in Penny 4 Your Thoughts Inklingz. You put a bunch on your brush and touch the green paint and the copper color flows right in. Be careful not to move the color around too much with your brush. I cut the Dusty Attic chipboard up and put it all over the page. I added Dear John Letter Inklingz to it, gold mica powder, and a mix of purple and blue mica powder. 


I painted the die cuts with Teal The End Of Time Shimmerz, and Greener Pastures. After I glued on micro beads and vintage glass glitter I painted on I Love You Onyxly Inklingz,I topped it with Imperial Amethyst Inklingz,a mix of watercolor crayons, and purple alcohol ink. 


I added gold mica powder to the die cuts, and also Dear John Letter. The copper and gold mica powder at the top was kind of covered up by stamped on Tsukineko chalk ink. I used a leaf stamp from Petite Poppies and sprinkled on mica powder over versamark.  Once I brushed off all the excess mica the images were too bright for the page. I smudged and inked over a lot of it.


I added a number of things for visual interest: the Tim Holtz metal butterfly, dried and pressed flowers,Spanish moss, and lichen I've collected, micro beads, vintage glass glitter, seed beeds, a few pearls, rhinestones, and Prima flowers.


A metal discovery tag by Tim Holtz, a couple fussy cuts fairies from G45, threads from plain and dyed gauze, fussy cut images of suns and moons from Stamperia paper, sequins, bling,new and old jewelry type items.


The bird at the bottom is a sticker with a clear background by 13 Arts. The title sticker is from 7 Dots.


Cut up lace, tulle, a little stencil work at the lower left and upper right corners using  Texturez Gold Mine,an art deco style costume jewelry earring art deco, from my sister in law. 


The little brass purse is from Vintaj. The green gem below it is Swarovski.  I used some green and white ball things from fall and holiday clearance flowers from Hobby Lobby.

Thank you so much for looking, and have a great week!


Monday, July 18, 2016

Joy, a dramatic layout with Karine

Hi there, Shimmerz fans,

Here is my second layout for this month.


I used the Dreamy paper from the Homegrown collection by 7 Dots Studio. I primed it with clear gesso.


I used some Tidy Widy Texturez through a rectangle stencil to build texture on my background.


To add even more texture and contrast, I selected another stencil and used Licorice Stick Dazzelerz. When everything was dry, I used my favorite color these days, Deep Blue Sea Vibez, to spray and make some drops.  


I didn't have enough flowers to match my layout, so I chose a white one with a script print, and I used Teal the End of Time Shimmerz with lots of water to color it. I'm pretty pleased with the result. I also used this Shimmerz to make a few drops on the background.


My title piece is covered with Tidy Widy Texturez that I painted with Deep Blue Sea Vibez and a little bit of water. Tags and die cuts are from the Homegrown collection, by 7 Dots Studio.

I hope you like it.