I love how it turned out! I will list all of the spray colors I used at the bottom of this post. I did coat my cardstock with clear gesso first. When I pulled the cardstock up, the lines from where I scraped on the gesso were visible through the colors. It looked really neat and added some pattern and texture. I embellished on each color with coordinating bits and pieces from my "stash bin" on my desk.
Since my photo was black & white, I added some stamping to the background here. I used the Bed of Roses and Fresh Start Stamp Sets with some black ink. I love the detail they give here.
These stamps are great because they look wonderful on top of the gesso and the sprays. Here I have an old Project Life card and an orange-dotted bag behind my photo. I added some Simple Stories washi tape strips, some MAMBI stickers, a few Amy Tangerine epoxy stickers, and some SpiegelMom Scraps sequins. Like I said, I just grabbed things that matched from my random bin of left overs on my desk.
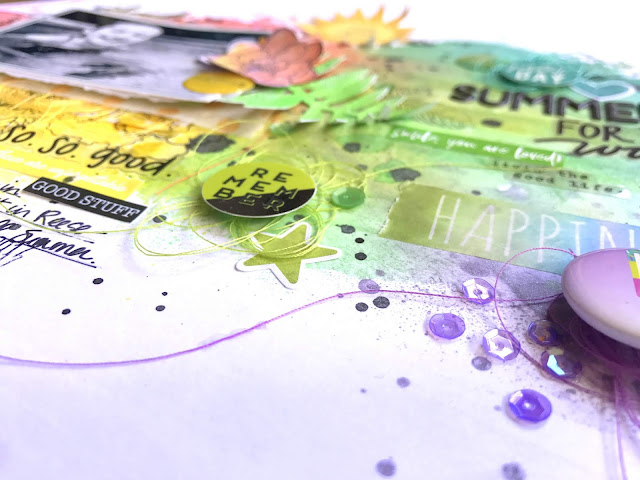
I love this small purple section. This is actually a pin from pack of flair that I got in the Michael's $1 section a few years ago. I added a foam dot under it along with some matching thread. That strip of washi tape is also from Michaels...I love the ombre effect on it, and it matched perfectly. I couldn't pass up the chance to use it here!
I used some newer Pinkfresh Studio black puffy alphas for my title and mixed them with a black clear MAMBI sticker. This cute cloud is from Amy Tangerine, and above the title are more random bits. I love how these blues blended together here.
I love looking at my finished layout from an angle and seeing all of the dimension! This is where bending up edges of things and adding foam adhesive come into play. The black splatters on the background are Coloringz Night Moves...the perfect black ink!
I added this cute yellow sun die cut from Simple Stories as well as more thread. I honestly could use a rainbow color scheme every day and probably not get sick of it ;)
Here's a look at one of the flowers I created using the Fresh Start Stamp Set. Now I used the sprays for the first two layers of the flower, so the liquid doesn't stamp very crisp. If you use actual ink pads, you'll get a totally different look. I wanted mine to look splotchy and watercolor-esque, so I used the sprays. The top layer is black ink. I fussy cut it out and added to the orange section. This leaf sprig was in my stash bin...I don't remember what I colored it with because it was from a long time ago. It looks like gelatos.
I hope this inspires you to pull out your rainbow Shimmerz shades and get colorful and bright! This was a lot of fun to make, and making the background was awesome. Give the "reverse packaging" technique a try! Here's my process video so you can see exactly how I did it.
Thanks for stopping by!
Supplies Used:
Coloringz:
My Bleeding Heart (red)
Freshly Squeezed (orange)
Lil' Yellow School Bus (bold yellow)
No Yoking (bright yellow)
Night Moves (black)
Pretty in Pink (pink)
Spritz:
4 Leaf Clover (green)
Vibez:
Jeni B Bleu (turquoise blue)
Frostbite (blue)
Princess (purple)
Stamps:


1 comment:
Gorgeous page!
Post a Comment