

Hello everyone!! I am so excited to share with you this technique. It was supposed to be a video, but my little guy got hold of my video camera one day. I took it and hid it from him and forgot where I put it! I found it after the fact, thank goodness...hiding in plain site--LOL!
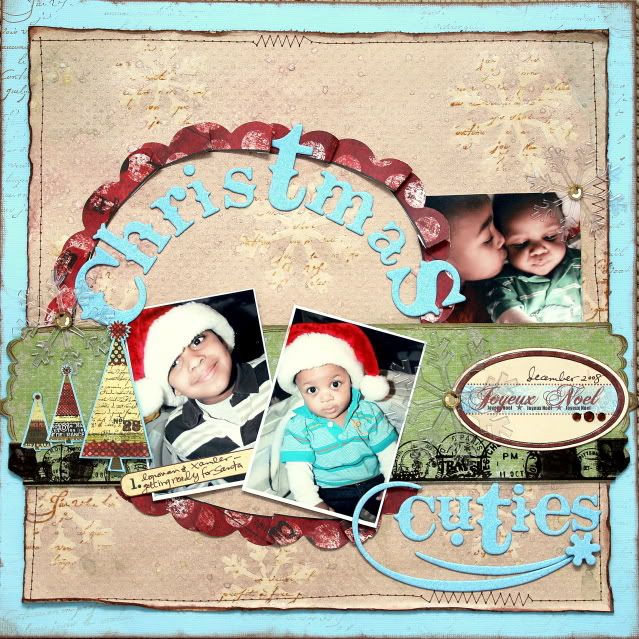
I did, however manage to take step-by-step pictures of my technique. I hope you'll enjoy it and try it out for yourself! I created this layout of my little cuties using the gorgeous December Kit from Timeless Daydreams. I really wish you could see this in person! The sparkles are so beautiful, it would make your eyes water! I even spritzed the Prima package insert with baby's breath shimmerz!
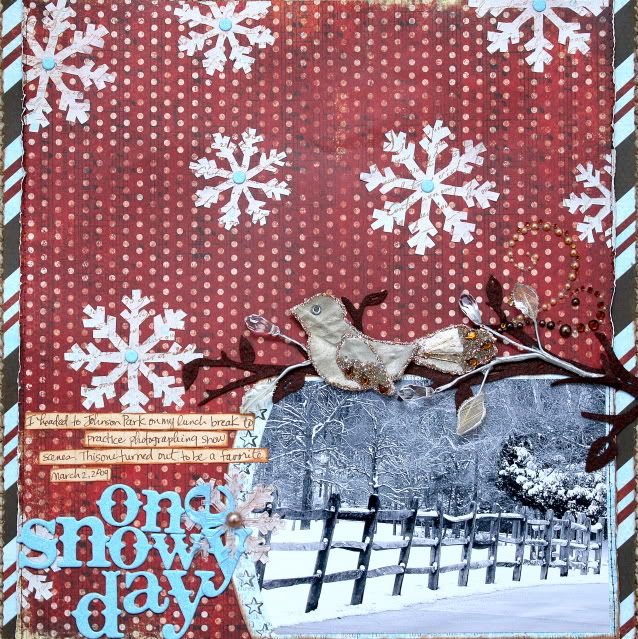
This layout was created using a Sketchy Thursdays sketch.
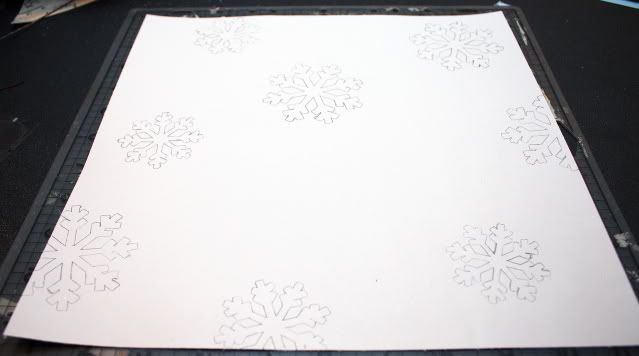
To create the first part of the mask, I started out with a plain piece of white paper trimmed to the same size as my background; in this case 11x11. (NOTE: use a cheap piece of paper for this, instead of cardstock. I used one of the inserts from an album protector sheet.)
I sporadically placed Heidi Swapp acetate snowflakes on the paper and traced them.
 Using a craft knife and a pair of microtip scissors, I very carefully cut the snowflakes from the paper. This is going to serve as a mask for the stamping portion of the technique.
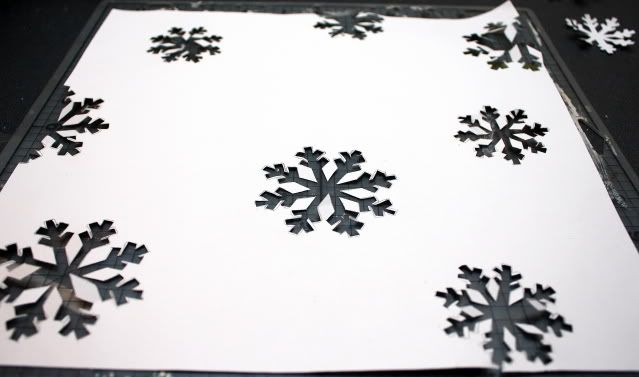 I then placed my mask over my 11x11 piece of background paper. I used Bazzill Swiss dot because it adds a little extra texture.
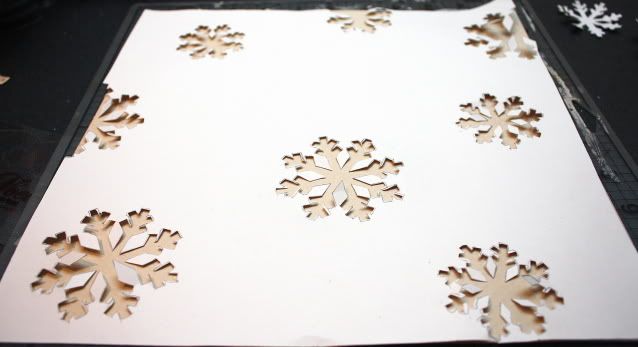 Next, I stamped the french script image across the negative snowflakes. You could use any small image for this part.
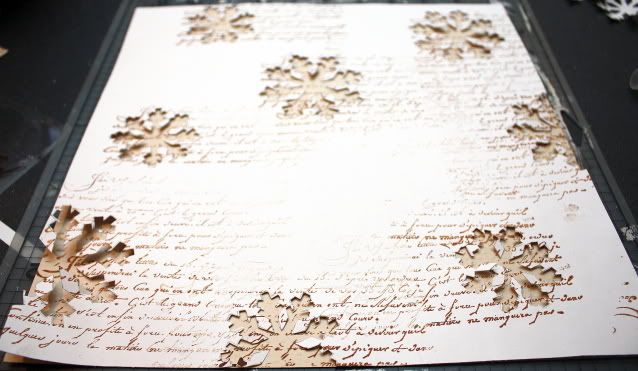 I then removed the white paper and placed the acetate snowflakes over the stamped images. This is for the second part of the masking technique.
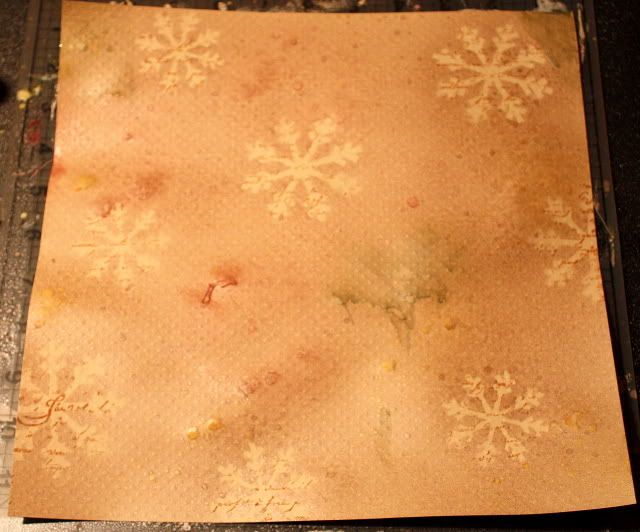
 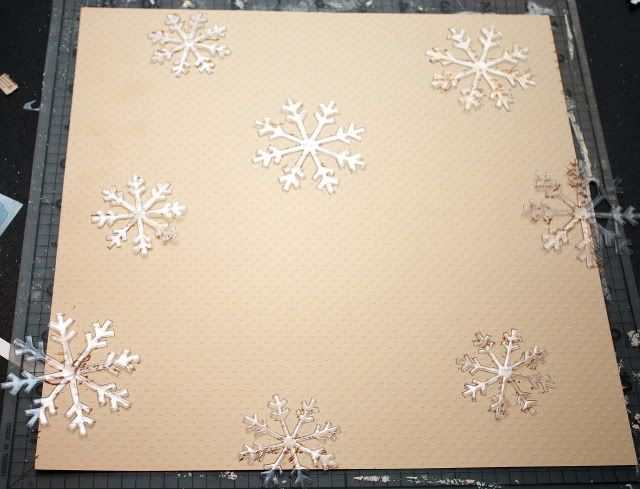 Next, I spritzed mudpie, olive branch, and barn door Shimmerz Spritz across the entire background. (NOTE: the reason that I used acetate snowflakes is because Shimmerz cleans up really easily. I just wiped them off with a piece of paper towel. )
When I removed the snowflakes, this is the result. I used my heat gun to dry the background. Shimmerz normally dries really evenly, but I found that by concentrating a heat gun over the larger drops, gives you the splattered look.
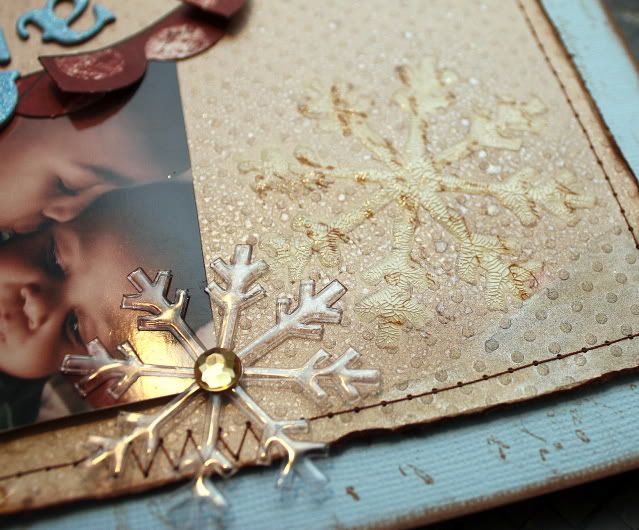
 Here's a close-up of the snowflake. At this point, you can highlight your snowflakes, if you chose, with a pen, hand stitching, stickles, etc... I chose to to use Ranger's crackle accents and I just love the added texture it creates. The crackling also adds to the vintage feel of the layout as well!
 Here's a close-up of the snowflake. At this point, you can highlight your snowflakes, if you chose, with a pen, hand stitching, stickles, etc... I chose to to use Ranger's crackle accents and I just love the added texture it creates. The crackling also adds to the vintage feel of the layout as well!
The acetate snowflake seen here is one of the same ones I spritzed over. Just a little wipe and the spritz is gone...easy peasey!
 I loved creating this technique; but to tell the truth, when I do it again, I'm going to use a shape with a little less detail, like a circle or something. The snowflakes were a little tedious, however, I did get a second use out of them.
 I loved creating this technique; but to tell the truth, when I do it again, I'm going to use a shape with a little less detail, like a circle or something. The snowflakes were a little tedious, however, I did get a second use out of them.
All of the snowflakes that I carefully cut from the paper (in step 1 of the technique) were used on this next layout. I lightly spritzed them with seafoam, treasured hymn, and mudpie Shimmerz spritz and then stamped with the same french script stamp (one of my faves).
 here's a close-up of a snowflake


 here's a close-up of a snowflake
I hope this post has inspired you to head out and grab some Shimmerz! There's no right or wrong way to use them!!!
3 comments:
WOWZERZ!! Tanisha you rock! This is REALLY amazing!
Gorgeous Tanisha. Love the idea, and I will have to try this out!
Such a great tutorial. Love your ideas!
Post a Comment