Showing posts with label Oakie Dokie Creameez. Show all posts

Monday, September 28, 2020

That's My Boy | Color-melting with Shimmerz Paints | Echo Park Paper | Lorimar Ortega

Hello everyone!

It's Lorimar, sharing this lovely "color-melting" layout with you today. I used a patterned paper from Echo Park's That's My Boy collection as an inspiration for layout as I wanted to make a colorful layout without going down rainbow road (LOL). I'll list all the colors I used in here (so it's easier to walk you through it): Oakie Dokie, Butter Cream, Bamboo Leaf, Keep Palm, Mustard Seed, Pumpkin, Anchors Away, Peacock's Plume, Ultra Marine, Gold Glimmer, and Pool Me Closer.


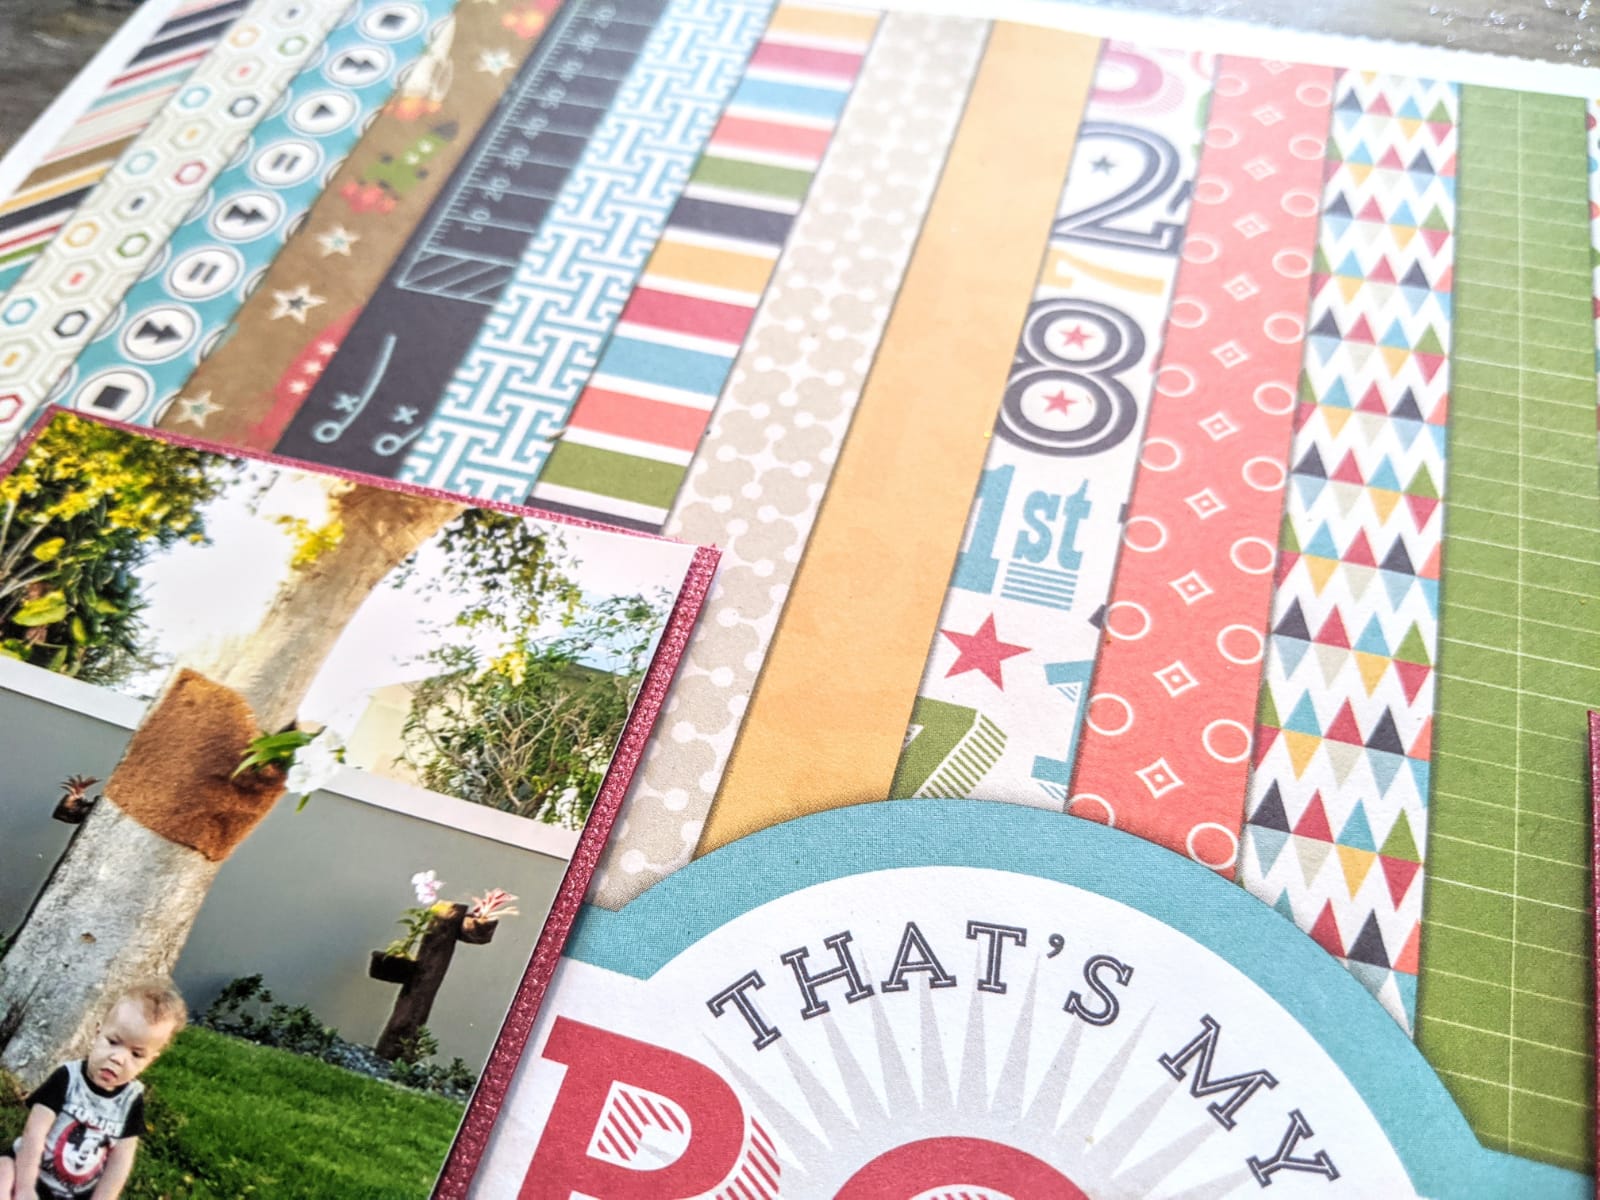
Here's what I did: as I rummaged through my stash, I found a patterned paper from Echo Park that featured a lot of color and patterns. It's actually the "cover page" from the collection; they are typically printed on shiny glossy paper, but this one was actually the A Side to the 3x4 Journaling cards. I fussy-cut around the hexagons and left the logo in to serve as my title. My idea was to use the colors from the paper and create a layout that looked like the color had melted down; and that's exactly what I did!

Using a Vicki Boutin foundations paper, I added water to the bottom of the paper (so my colors to blend and spread better) and began adding in each of the colors. I specifically used Butter Cream in between the bolder colors so the blending came out more fluid. Towards the bottoms of each of the color strips, I splashed a bit of each of the colors.

Once it was dried, it was all a matter of adding in my pictures (matted on red metallic cardstock, popped up on craft foam and placed on either side of the title) and sprinkle in a few embellishments (so as not to cover up to much of the mixed media.

And that's it! Thank you so much for joining me today, and I hope I've inspired you to make a colorful layout such as this. Remember, if you type my name, LORIMAR, in the comments sections of your next Shimmerz order, you'll be able to receive some free paint!

Take care and stay safe,

- Lorimar
PS. - If you're interested in watching the whole process, click here.


Tuesday, October 29, 2019

Love My Life With You

Hello everyone!

   Have you tried out a new color for the Shimmerz Color Challenge this month? I previously chose Shimmerz Coffee since brown is one I rarely use as a focal color. My first layout was a masculine, "nature-y" layout, so for this layout I shifted my focus to a more feminine, floral theme.


   I started off by selecting a wood grain patterned paper (Simple Stories Fall Farmhouse) as my base. With a wet brush, make some brushstrokes with white acrylic paint along the center of the layout and then ran over them with my brayer. This techniques gives the mixed media more of a washed out look. I added some extra splatters of white acrylic paint and Coffee (Shimmerz) and Oakie Doakie (Creameez).


     The floral clusters were fussy cut out of a patterned paper from Vicki Boutin's Wild Flower and Honey collection. For extra layers and dimension, I made a swatch of Coffee (in brushstrokes) and Brass Knuckles (in splatters) on a scrap piece of kraft cardstock, and punched out some branches. My leaflets were punched out of plain kraft cardstock.


   Once I had everything, I placed my base (backed with navy cardstock) on my base and layered in the flowers, leaflets, and branches. Used a mix and match of thickers to make title and popped on some stickable pearls in beige. For a finishing touch, and to marry everything together, I splattered Coffee on the whole layout.

And that's it! Hope you are inspired to make a layout like this and to use those "scary and difficult" colors. Remember, if you write my name in the comments section of your next Shimmerz order, you'll receive some free paint!

- Lorimar

www.shimmerzpaints.com


Thursday, October 17, 2019

You Are One Of A Kind

Hello! Super excited to be playing along for the Shimmerz Color Challenge, and here's my first layout.

I chose Coffee (love the name, color, and drink; Lol!) because I find it really hard to use browns as focal colors in my projects. This being said, I love this color now!

For this layout, not only did I step outside my comfort zone in terms of the focal color, I also pushed myself into making a masculine, nature-themed layout to document this picture from a few years ago of my husband (then my boyfriend) enjoying one of his hobbies.


Bearing in mind how brown is a color I struggle with, I also don't have a lot of patterned paper in this tine. Plus, I love color, I added blues and greens into mix by using the same colors/tonez from within the picture. I first began to work on my background. I dipped my brush into the Coffee pot (no pun intended) and started to draw vertical lines. Without waiting for it to dry, I ran a brayer over it and did the same thing only with horizontal lines. Splattered a few drops unto the background with the same color. Waited for it to dry and, using a "reptile skin" stencil and Jeni B Blue (Vibez), added a layer of teal to the background. Set the base aside again to dry and began to work on creating all the layer for the picture cluster.


I used a lot of different patterns in different tones of blue or green to layer in beneath my picture. Mixed in a bit of teal, but tried to stay between the blue and greens. Added a pop I did at a pop of brown right next to my picture tie in with the background. My picture/patterned paper cluster is set on 3D craft foam and the picture itself is also set on some craft foam. In the end, there are 2 layers beneath my picture.


Then I trimmed about maybe an inch on each side of the base a wonky matter and then distress the edges. In a way I wanted to recreate the idea of an old map. Beneath the first base, I placed a light blue pattern paper with rope design; I did this to continue with the masculine, nature-like vibe. With a brayer, I added a bit of In Deep (Coloringz) around the border and used a brayer to thin it out. Then added some splatters. Since the first base is light and the second base is white, I ran my brush with Coffee around the entire border of the second base. Did this also to further add on to the element of the distressed look.


Once everything was dry, I placed my patterned paper cluster onto my base with glue (I find it works better when adhering things on mixed media), and began finalizing the layout using embellishments in different tones of blues, greens and browns. Layered some green leaflets (leftover from another project) to give another "nature-y" element, added my journaling in blue marker and finished it all off with splatters in Coffee (Shimmerz) and  Oakie Dokie (Creameez)


3 words: I LOVE IT!! Hope you are inspired to make something like this, and thank you for looking! Remember, type my name in the comments section of your next Shimmerz order to receive some free paint.

Thank you once more for looking and happy craftin'!

- Lorimar

Saturday, October 27, 2018

Simply Enjoy Card | Melinda Beltran

Hello Shimmerz friends,
Melinda here with you today and I am super excited to share another fun card.
Simply enjoy card1b
Here’s a look at my finished card. It is a top folding A2 size card. I started with a white cardstock base. ALL of the elements actually started as white cardstock. I set about creating my various elements and then cut them all out.

flowers cu
Here is a closer view of the pretty flowers. I used some Marigold Shimmerz paint for the flower petals. For the centers, I used some Oakie Dokie Creameez paint. Once it was dry,I ran it through my die cut machine with my Alligator embossing folder to give it some of those fun “bumps” for dimension. For the leaves I used some Green Olive Shimmerz paint and for the flourishes, I used some Coffee Shimmerz paint.

shimmer shot
Here you can kind of see all of the beautiful shimmer through out the card. For the two mats, I spritzed some Jenni B Bleu and Glorious Day Vibez to get that beautiful shimmered background.

stamp cu
Once I adhered the white decorative frame to the mat, I applied some of the Puttin’ on the Glitz Pasteez to add some overall sparkle to it. I then stamped the sentiment from the Simply Enjoy stamp set with some brown ink. I cut it out of an oval scallop stitched die and then mounted on top of my white decorative frame. I added some little Nuvo drops to frame it.

bow edge
Here’s a closer look at the pretty bow and the decorative frame. You can also see some o the background paper and how pretty that Jenni B Bleu and Glorious Day Vibez Sprays "shimmerz" through.

simply enjoy it all melinda
Here is one last look at my completed card. I was super pleased with the way it turned out.


Be sure to head over to the Shop and pick up some of these beautiful products. They really add such a beautiful finish to your projects. Don't forget to add my name: Melinda Beltran to the comments when you place your order and you will get a freebie! How's that for awesome!!!


FREE SVG FILE SET

I am sharing this free SVG file set only here on the Shimmerz Blog
CLICK HERE TO DOWNLOAD
Free for a limited time, so be sure to scoop it up!

Now all that's left is for your to go pick up a little Shimmerz Paint and you can make your own!
Don't forget to mention my name in the comments when you place your order there! You will get a little freebie to try!


Thank you so much for allowing me to share with you. Please leave me a comment and let us know you were here. Don't forget to check back to see what the rest of these amazing designers are working on! Until the next time, you have a wonderfully crafty day!